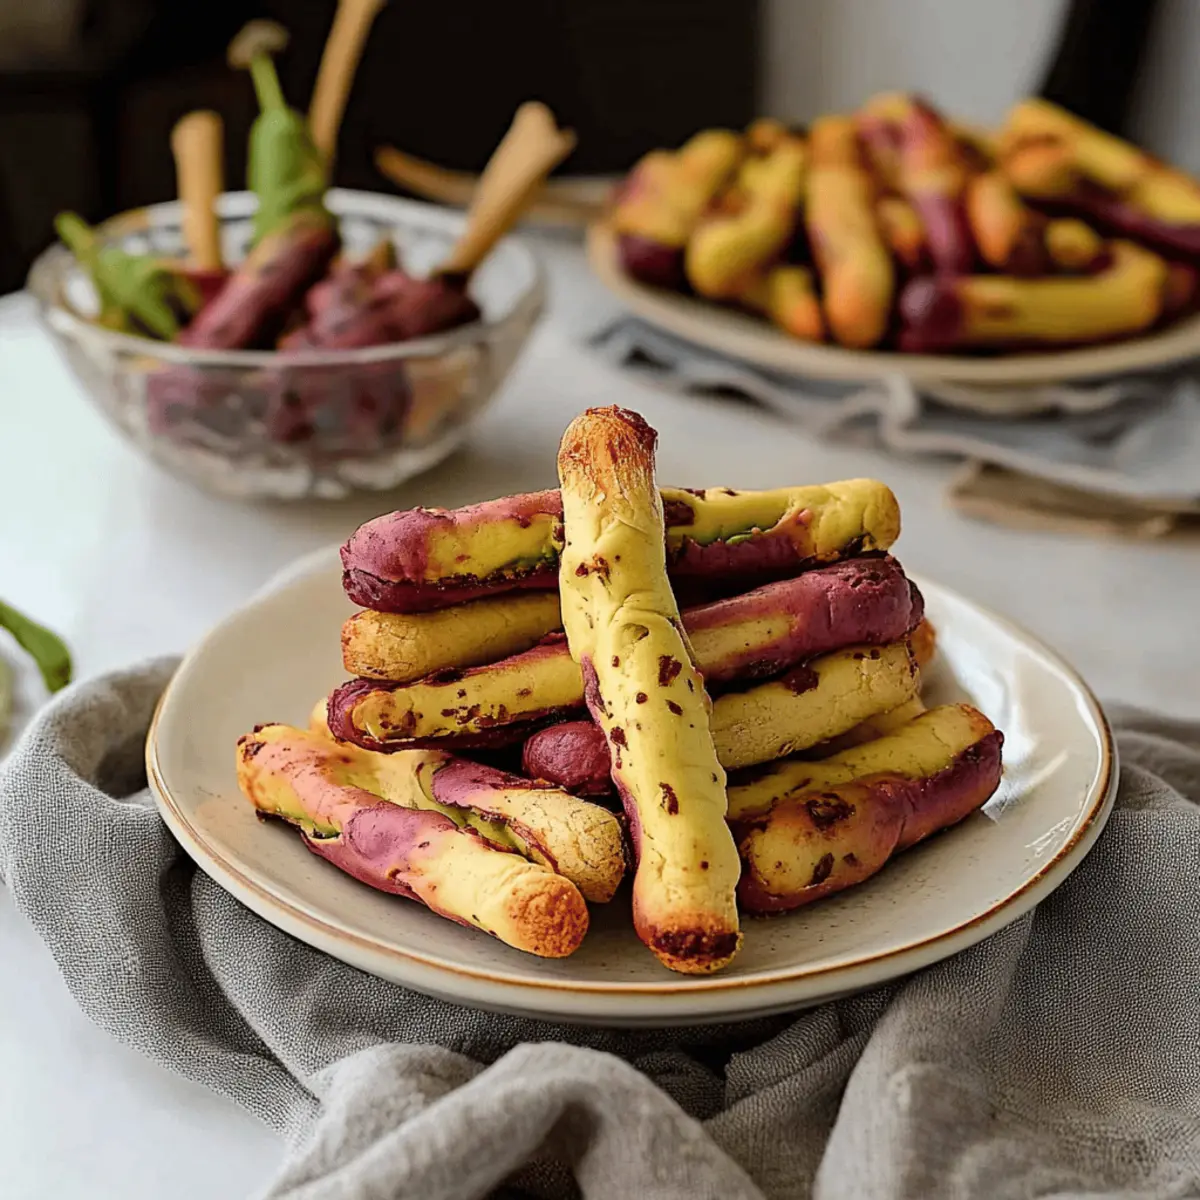
As I was stirring the batter, the playful whispers of my kitchen turned into a delightful little haunting, thanks to the “Creepy Witch Finger Cookies” taking shape before my eyes! These eerie yet adorable treats are perfect for not only celebrating Halloween but also for bringing some whimsy to any gathering. With minimal prep time and a recipe that serves up to 48 cookies, they're not just a fun project; they make for fantastic crowd-pleasers that will leave your guests talking long after the last crumb is gone. Plus, the added bonus of customizing colors and flavors means your cookie-making adventure can be as creative as your imagination allows! Curious about how to transform simple ingredients into these spooktacular delights? Let's explore!
Why are these cookies a Halloween must?
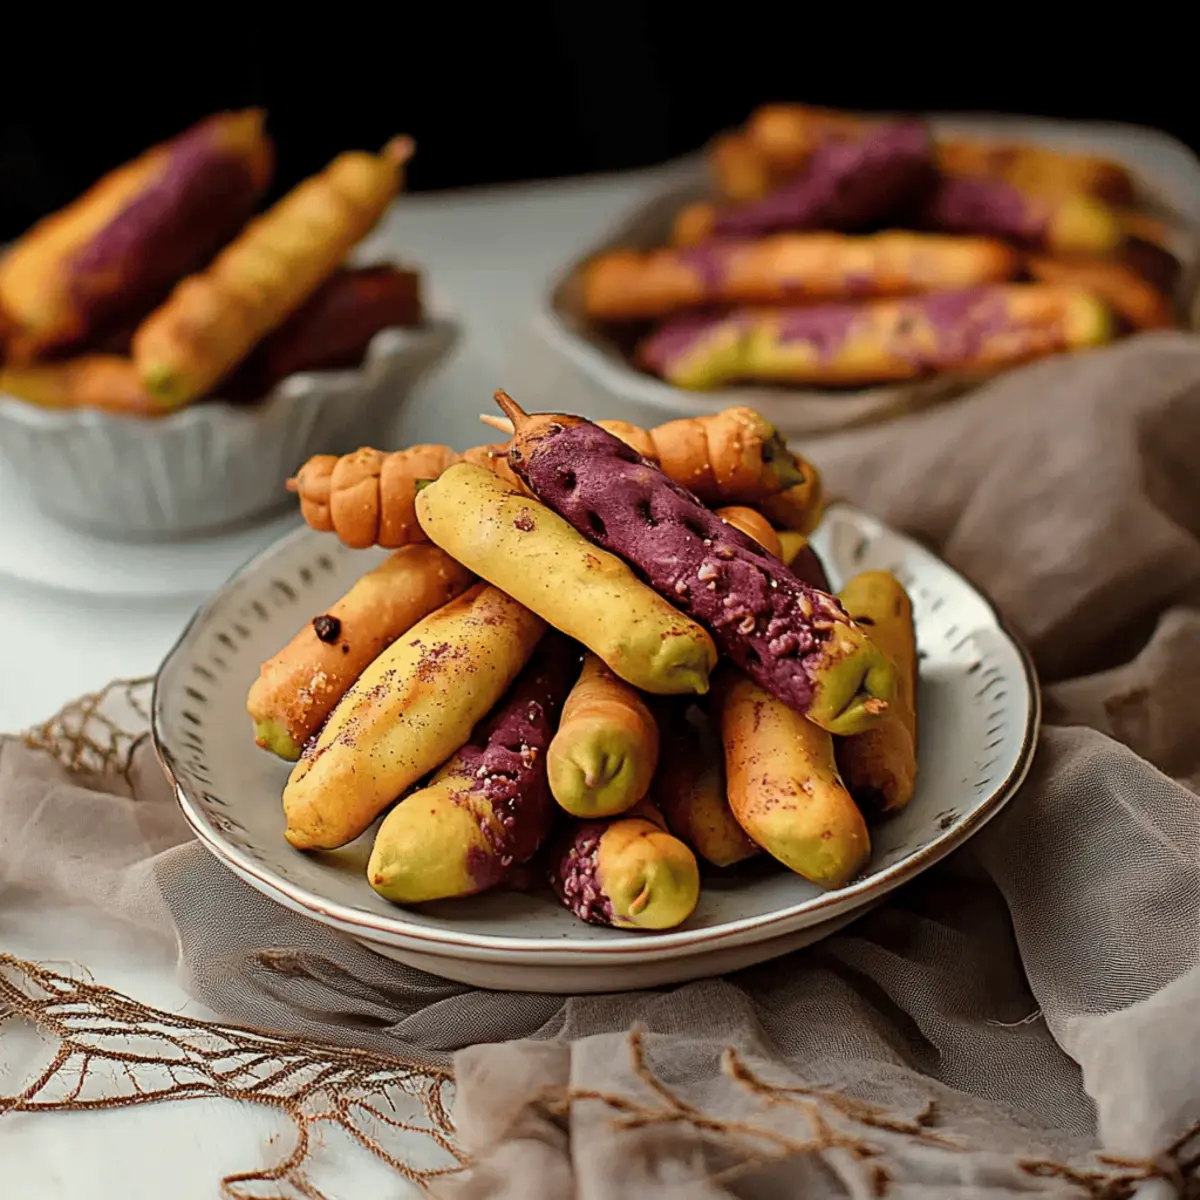
Whimsical Creation: These Creepy Witch Finger Cookies are not only delicious but also delightfully spooky, making them perfect for Halloween parties and gatherings.
Customization: With options to add colors using matcha, purple sweet potato, or cocoa, you can tailor each batch to match your festive theme.
Creative Fun: Enjoy a hands-on experience by shaping the dough and decorating with nails and “bloody” accents – it’s a treat that brings out creativity in everyone!
Crowd-Pleaser: They're fun to look at and even better to eat, ensuring they’ll be a hit among guests of all ages, turning any gathering into a memorable one!
Bakes up Quickly: With a total time of just over 3 hours, you can easily whip up a large batch ready to impress in no time. Don’t miss the chance to make these fun cookies that capture the spirit of Halloween!
Creepy Witch Finger Cookies Ingredients
Get ready to brew up a batch of treats that will enchant and amaze!
For the Dough
- 226 g unsalted butter – Softened to create a creamy, dreamy base for your cookies.
- 140 g confectioner's sugar – Adds just the right amount of sweetness to balance the cookie's flavors.
- 1 teaspoon sea salt – A hint of salt enhances the sweetness and depth of the dough.
- 4 egg yolks – At room temperature for a richer, smoother cookie texture.
- 5 mL vanilla extract – Infuses the cookies with a warm, inviting flavor.
- 454 g all-purpose flour – The essential building block for these spooky delights.
- ¼ teaspoon baking powder – Ensures your cookies rise to cookie perfection.
For the Spooky Decorations
- 50 whole blanched almonds – Serve as the creepy nails that complete the witchy look.
- 4 - 6 g matcha powder – Use to add a vibrant green coloring for a ghoulish touch.
- 20 - 30 g purple sweet potato powder – Mix in for a fun pop of spooky purple!
- 5 - 15 g cocoa powder – Creates a sinister brown hue, perfect for a Halloween vibe.
Toppings & Edible Effects
- Cocoa powder – Use for dusting to give your cookies an eerie, dusty appearance.
- Strawberry or raspberry jam – Adds a “bloody” detail that takes the spooky factor up a notch!
- Red cake writing gel – Perfect for creative little accents or scrawling spooky messages.
- Melted white chocolate or candy wafers – Drizzle over for a ghoulishly delicious finish.
These Creepy Witch Finger Cookies are sure to create delightful chills and thrills this Halloween!
Step‑by‑Step Instructions for Creepy Witch Finger Cookies
Step 1: Cream the Butter and Sugar
Begin by creaming together 226 g of softened unsalted butter, 140 g of confectioner’s sugar, and 1 teaspoon of sea salt in a mixing bowl. Use an electric mixer on medium speed for about 2-3 minutes until the mixture is light and fluffy, resembling a pale cloud. Make sure there are no granules left for a smooth texture.
Step 2: Add Egg Yolks and Vanilla
In a separate bowl, separate 4 large egg yolks and add them along with 5 mL of vanilla extract to the creamed mixture. Mix on low speed until fully combined, ensuring the yolks are well incorporated, which typically takes about 1-2 minutes. The mixture should appear smooth and glossy, signaling it's ready for the next step.
Step 3: Color and Flavor Optionality
If you're feeling creative, this is the time to divide the butter mixture into portions for coloring. Incorporate 4-6 g of matcha powder for a wicked green hue, 20-30 g of purple sweet potato powder for a spooky purple, or 5-15 g of cocoa powder for a dark twist. Mix each portion separately until the colors are vibrant and evenly blended, allowing for a fun variety of Creepy Witch Finger Cookies.
Step 4: Combine Dry Ingredients
In a large bowl, whisk together 454 g of all-purpose flour and ¼ teaspoon of baking powder until well combined. Gradually fold this dry mixture into the colorful butter mixture, using a spatula to combine until a soft dough forms. This process should take about 3-5 minutes, and the dough should be slightly sticky but manageable.
Step 5: Chill the Dough
Wrap the dough tightly in plastic wrap and refrigerate for 20-30 minutes. Chilling allows the fats to solidify, making it easier to shape the cookies later. When you’re ready, the dough should feel firmer to the touch, enhancing the cookie structure during baking.
Step 6: Shape the Cookies
After chilling, scoop out about a tablespoon of dough and roll it into a smooth ball. Then, gently shape it into a finger-like form, creating two thick points for knuckles. This should take about 1-2 minutes per cookie. Take your time to make each finger uniquely spooky, as these Creepy Witch Finger Cookies will be visually striking!
Step 7: Create Knuckle Details
Using a knife, carefully create lines along the knuckles to add realistic details. Press a whole blanched almond into the tip of each finger to simulate a witch's nail. This detail not only enhances appearance but adds a delicious crunch! Aim for an even look across all cookies for a uniform batch.
Step 8: Freeze for Firmness
Place your shaped cookies on a parchment-lined baking tray, making sure to leave space between them. Freeze for 40-60 minutes. This step is crucial as it prevents the cookies from spreading while baking, keeping the shape of your Creepy Witch Finger Cookies intact.
Step 9: Preheat Your Oven
While your cookies are freezing, preheat your oven to 325°F (163°C). This allows for an even bake and helps the cookies develop that delightful golden bottom. Prepare other materials like cooking spray or parchment paper while the oven heats.
Step 10: Bake the Cookies
Once frozen, take the cookies out of the freezer and place them directly in the preheated oven. Bake for 20-25 minutes, or until the bottoms are lightly browned but the tops remain pale. Keep an eye on them, as visual cues are key to achieving the perfect texture!
Step 11: Cool and Decorate
After baking, let the cookies cool on the tray for a few minutes before transferring them to a wire rack. Once cooled, carefully remove the almonds and replace them with a small dollop of strawberry jam to simulate a “bloody” nail effect. Secure the almond back on top for a spooky finish.
Step 12: Final Touches
For an eerie finish, brush the cookies lightly with cocoa powder for a dusty, ghoulish look or drizzle melted white chocolate for an extra treat. Packaging your Creepy Witch Finger Cookies with love will surely make your Halloween gathering a memorable delight!

What to Serve with Creepy Witch Finger Cookies
Embrace the spooky spirit of Halloween with sides and drinks that will enhance your cookie experience and thrill your guests!
- Witches' Brew Punch: This vibrant, fruity punch adds festive flair and a touch of mystery, making it the perfect complement to your eerie treats.
- Creepy Cheese Platter: Serve a platter of assorted cheeses with creepy accents like black olives for "witch's eyes" and ghost-shaped crackers for a fun twist.
- Gruesome Gummy Snacks: A bright assortment of gummy creatures adds playful sweetness that balances the cookies' rich flavors, ensuring no sweet tooth goes unsatisfied.
- Spooky Spiced Pumpkin Soup: This warm, comforting soup will engage the senses with its autumnal flavors, perfectly celebrating the season alongside your cookies.
- Chocolate Mousse Eyeballs: Rich and creamy mousse shaped like eyeballs will excite guests, providing a dramatic dessert that pairs wonderfully with the cookies.
- Ghostly Mini Quiches: Light and savory, these mini quiches featuring ingredients like spinach and feta can offer a delightful, non-sweet option to your Halloween menu.
- Hot Apple Cider: Warm apple cider with a touch of spice is a classic fall beverage that will keep guests toasty while they indulge in cookie delights.
- Chocolate Milkshakes: Rich, creamy shakes offer a delightful contrast in textures and flavors, appealing to both kids and adults alike during Halloween festivities.
How to Store and Freeze Creepy Witch Finger Cookies
Room Temperature: Store the cookies in an airtight container at room temperature for up to 3 days to keep them fresh and tasty.
Fridge: If you need a bit more time, these cookies can last in the fridge for about 5 days in a well-sealed container, enjoying a nice chill!
Freezer: For longer storage, freeze the formed cookies before baking for up to 3 months. Simply place them in a single layer on a parchment-lined baking tray, then transfer to a freezer-safe container or bag.
Reheating: To enjoy the cookies again, thaw them in the fridge overnight and reheat briefly in a preheated oven at 300°F (150°C) for about 5-7 minutes, just until warm.
Creepy Witch Finger Cookies Variations
Unleash your creativity and make these cookies truly your own with some fun twists and alternatives!
- Gluten-Free: Substitute all-purpose flour with a gluten-free flour blend for a cackle-worthy treat everyone can enjoy.
- Nut-Free: Replace blanched almonds with sunflower seeds or chocolate chips to accommodate nut allergies while keeping the “nail” effect.
- Vegan: Use coconut oil in place of butter, aquafaba (chickpea brine) instead of egg yolks, and a plant-based sweetener to create delicious vegan spookies.
- Spicy Treat: Add a pinch of cayenne or chili powder to the dough for a delightful surprise that contrasts with the sweetness. This will excite your taste buds!
- Cocoa Delight: Intensify the chocolate flavor by fully replacing some flour with cocoa powder, transforming them into wickedly rich cookies.
- Candy Coating: After baking, dip your cooled cookies in melted dark chocolate for a rich, indulgent treat that looks as good as it tastes!
- Fruit-Flavored: Replace the vanilla extract with almond or orange extract for a fun twist on the classic flavor, leaving your guests guessing what's in these haunting treats.
- Unique Decorations: Use white chocolate with food coloring for ‘flesh’ and edible glitter for a glam twist—perfect for a whimsical Halloween party vibe!
Let your imagination run wild with these Creepy Witch Finger Cookies, and explore even more spooky fun by checking out our fantastic Halloween-themed treats like Witch’s Brew Cupcakes or Pumpkin Spice Ghosts!
Make Ahead Options
These Creepy Witch Finger Cookies are a fantastic choice for making ahead of time, helping you breeze through the busy days leading up to Halloween! You can prepare the dough and shape the cookies up to 24 hours in advance. Simply follow the steps to shape them and then freeze the molded fingers on a parchment-lined tray. When you're ready to bake, there's no need to thaw; just pop them straight into the preheated oven (325°F/163°C) for 20-25 minutes. To maintain their spooky allure, store any unbaked shaped cookies in an airtight container to prevent freezer burn. With just a bit of prep, you'll have delightful treats ready to impress!
Expert Tips for Creepy Witch Finger Cookies
-
Chilling is Key: Always chill your dough for at least 20-30 minutes to ensure the cookies keep their spooky finger shape while baking.
-
Perfectly Shaped Fingers: When shaping, don’t rush! Take your time to create curves and knuckles, making each cookie uniquely eerie and eye-catching.
-
Monitor Baking Time: Keep an eye on your cookies as they bake. Remove them when the bottoms are lightly browned to avoid over-baking, which can make them dry.
-
Decorate with Care: Let the cookies cool completely before adding the jam and almond. This prevents the jam from melting or the cookie from breaking.
-
Get Creative with Colors: Feel free to mix and match your color powders! Craft a variety of Creepy Witch Finger Cookies to delight guests with a colorful assortment.

Creepy Witch Finger Cookies Recipe FAQs
What type of butter is best for making cookies?
Absolutely! For these Creepy Witch Finger Cookies, always use unsalted butter. This allows you to control the salt level in your recipe, which is essential for balancing the sweetness of the cookies.
How should I store my Creepy Witch Finger Cookies?
Store these cookies in an airtight container at room temperature for up to 3 days. If you want to keep them fresh longer, transfer them to the fridge where they can last about 5 days. Just make sure to seal them well to maintain their quality!
Can I freeze the dough for Creepy Witch Finger Cookies?
Very! You can freeze the formed cookies before baking for up to 3 months. Shape them as per the instructions, place them on a parchment-lined baking tray, and freeze until solid, then transfer to a freezer-safe container or bag. This way, you can quickly bake fresh cookies whenever the whim strikes!
What if my dough is too sticky after mixing?
No worries! If your dough feels too sticky, you can add a bit more flour, about 1 tablespoon at a time, until you reach a workable consistency. Be careful not to add too much, as this might change the texture. If you have time, chilling the dough longer also helps firm it up.
Are there any allergy considerations for these cookies?
Certainly! These cookies contain butter, eggs, and all-purpose flour, which may not be suitable for those with dairy, egg, or gluten allergies. If you're looking for alternatives, you can use dairy-free butter, egg substitutes (like flaxseed meal or applesauce), and gluten-free flour blends to create a similar cookie. Always double-check food labels and be mindful of cross-contamination for any specific dietary needs!
How can I achieve the best shape and detail for my cookies?
To get those perfectly creepy finger shapes, take your time shaping each cookie. After wrapping your dough for chilling, use a bit of flour to dust your hands and the countertop to prevent sticking. Gently roll the dough into a finger shape, ensuring you form knuckles and curves. For detailing, use a knife to carve lines that mimic knuckles, which will add a realistic touch before baking!
Creepy Witch Finger Cookies to Spook Your Halloween Treats
Equipment
- Mixing bowl
- Electric mixer
- spatula
- Parchment-lined baking tray
- Freezer-safe container
Ingredients
For the Dough
- 226 g unsalted butter Softened
- 140 g confectioner's sugar
- 1 teaspoon sea salt
- 4 egg yolks At room temperature
- 5 mL vanilla extract
- 454 g all-purpose flour
- 0.25 teaspoon baking powder
For the Spooky Decorations
- 50 whole blanched almonds Nails for decoration
- 4 - 6 g matcha powder For green coloring
- 20 - 30 g purple sweet potato powder For purple coloring
- 5 - 15 g cocoa powder For brown coloring
Toppings & Edible Effects
- cocoa powder For dusting
- strawberry or raspberry jam For a 'bloody' effect
- red cake writing gel For decorative accents
- melted white chocolate or candy wafers For drizzle effect
Instructions
Creepy Witch Finger Cookies Directions
- Cream together 226 g of softened unsalted butter, 140 g of confectioner’s sugar, and 1 teaspoon of sea salt on medium speed for 2-3 minutes until light and fluffy.
- Add 4 egg yolks and 5 mL of vanilla extract to the creamed mixture. Mix on low speed until fully combined, about 1-2 minutes.
- Divide the butter mixture into portions and mix in 4-6 g of matcha powder, 20-30 g of purple sweet potato powder, or 5-15 g of cocoa powder for coloring.
- Whisk together 454 g of all-purpose flour and ¼ teaspoon of baking powder, then gradually fold into the butter mixture until a soft dough forms.
- Wrap the dough in plastic wrap and refrigerate for 20-30 minutes.
- Scoop out a tablespoon of dough, roll into a ball, and shape into a finger-like form.
- Create knuckle details with a knife and press a whole almond into the tip of each finger.
- Freeze shaped cookies on a parchment-lined tray for 40-60 minutes.
- Preheat oven to 325°F (163°C) while cookies freeze.
- Bake cookies for 20-25 minutes, until lightly browned on bottom.
- Let cool before replacing almonds with strawberry jam for a 'bloody' look.
- Brush cookies lightly with cocoa powder or drizzle with melted white chocolate before serving.