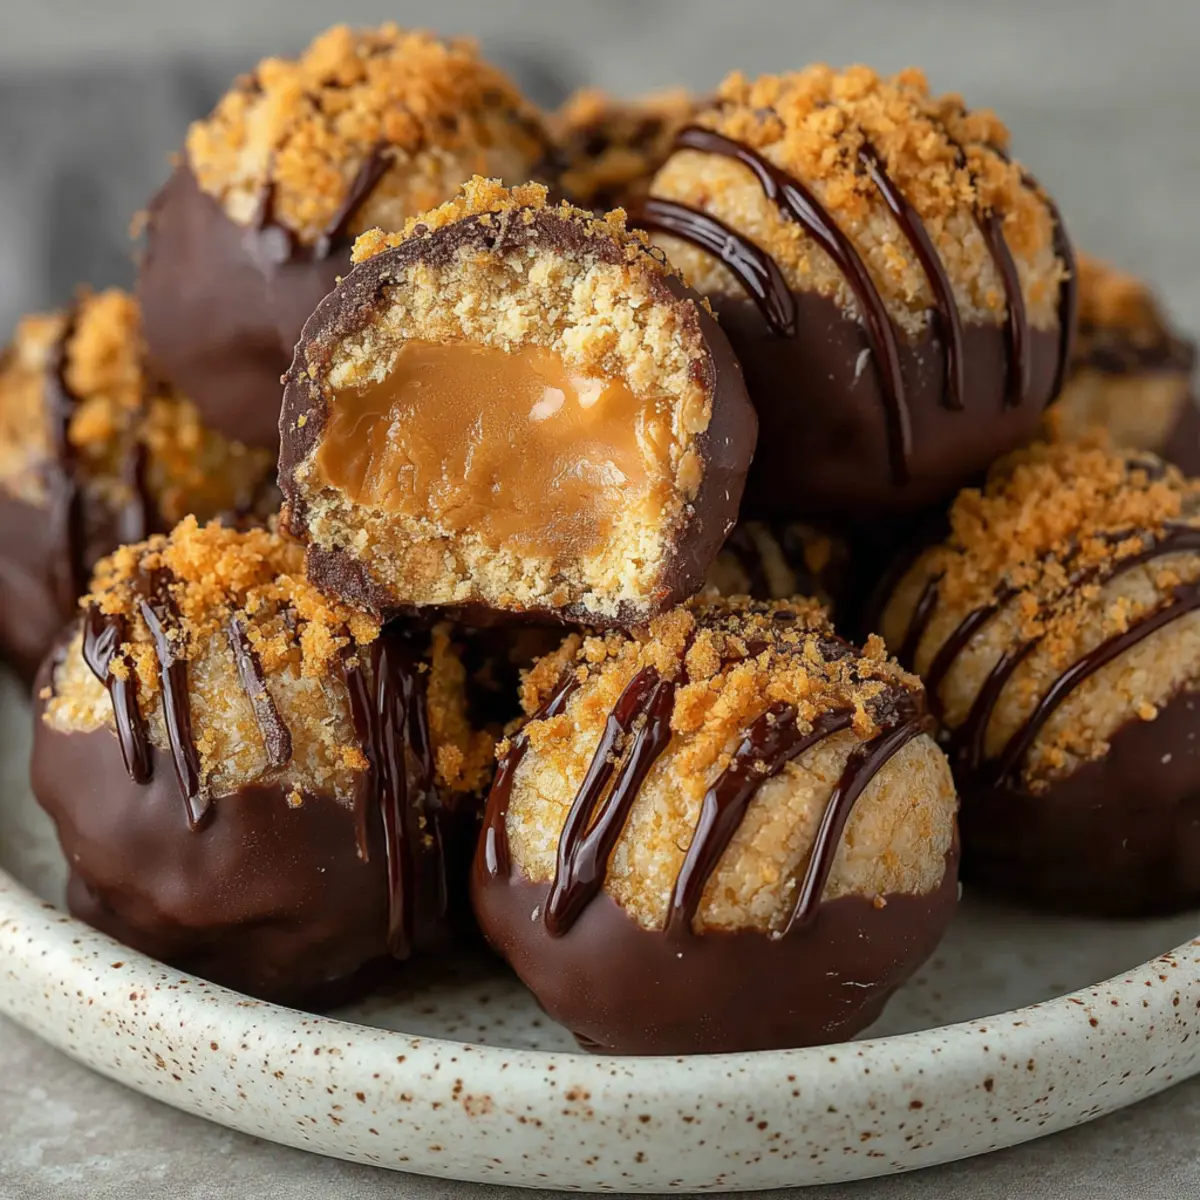
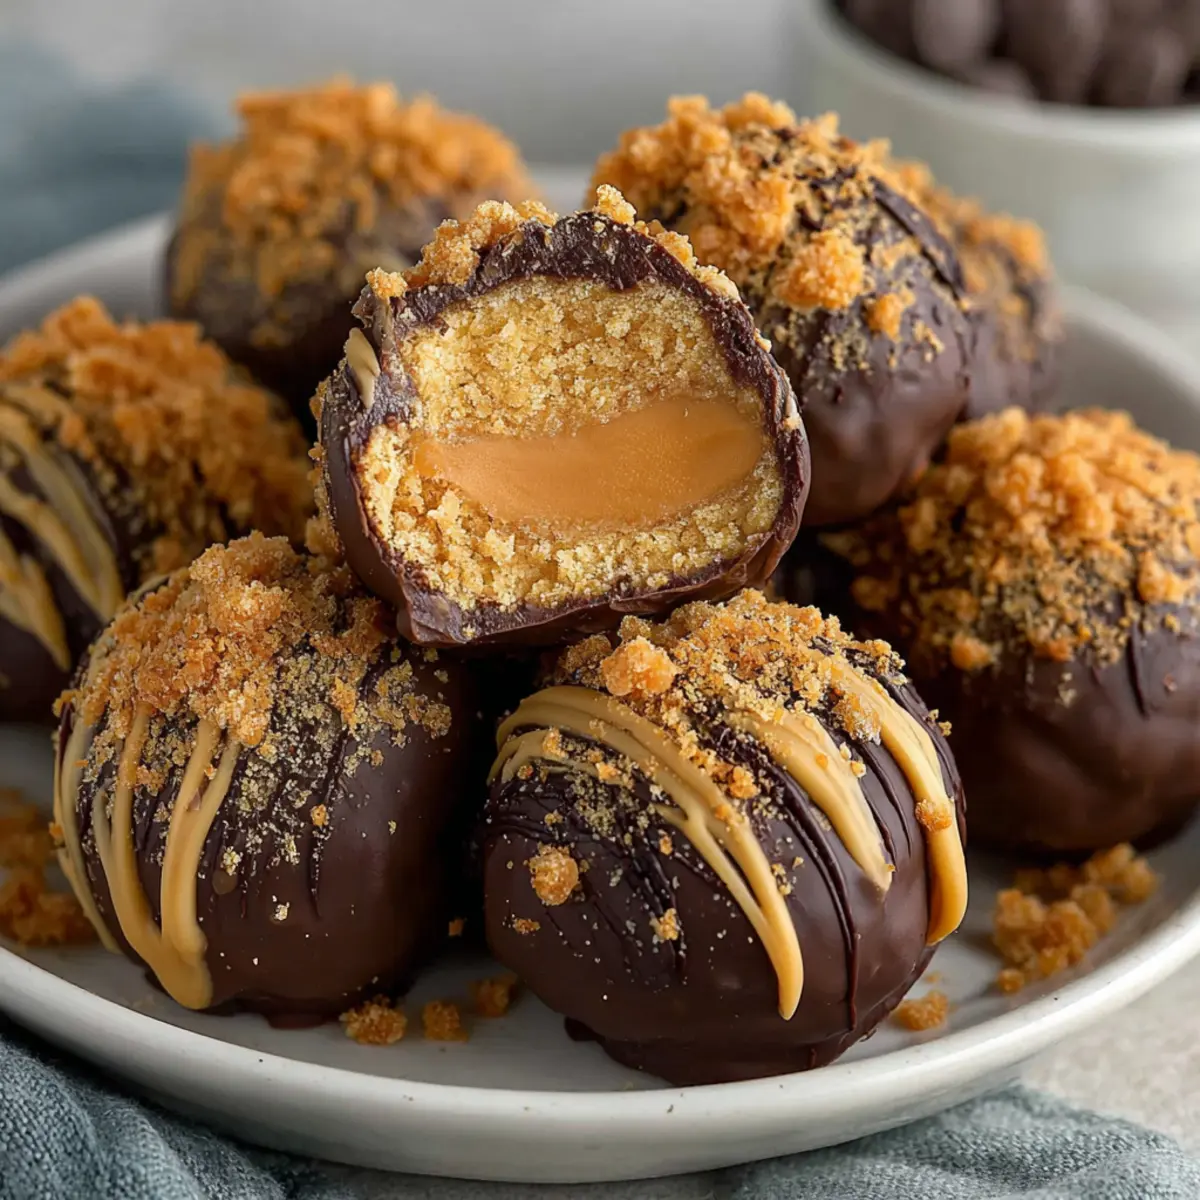
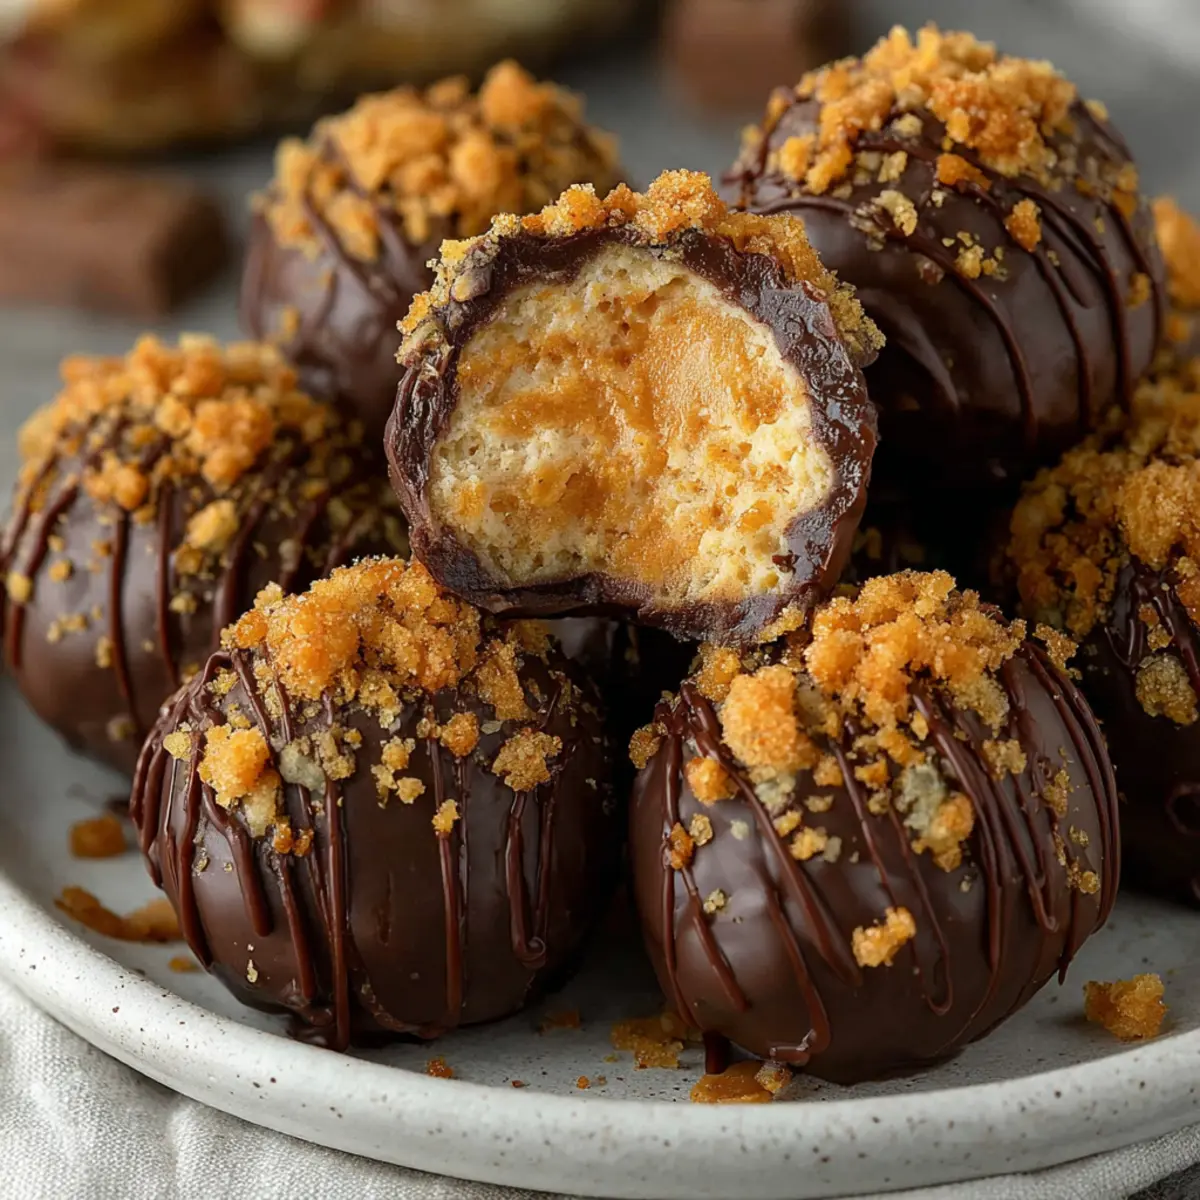
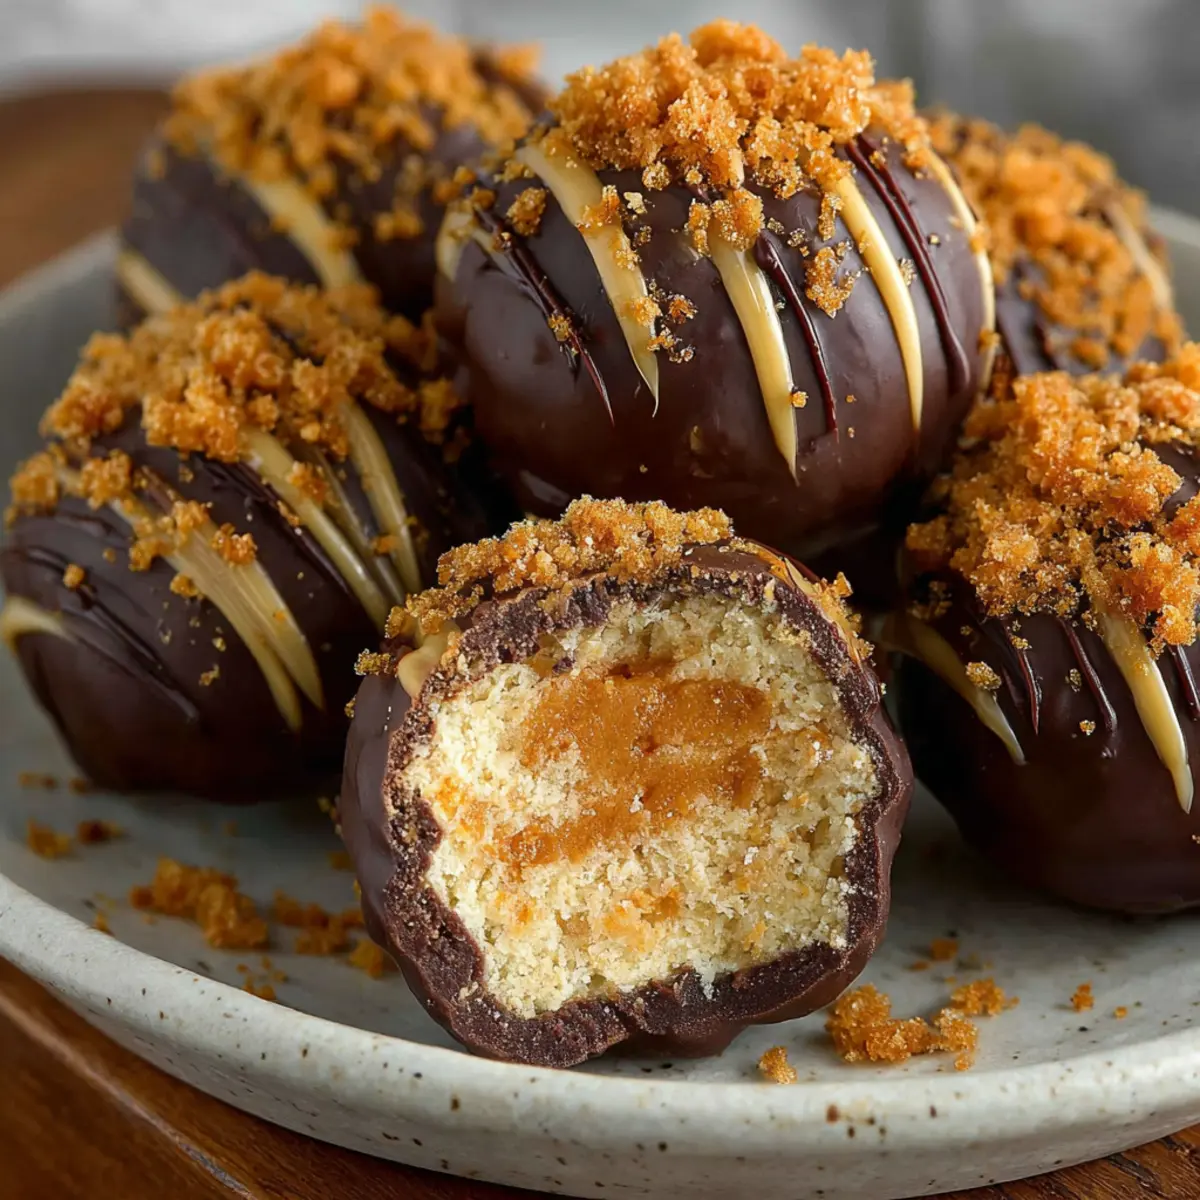
Did you know that a simple blend of peanut butter, graham crackers, and Butterfinger candy can transport you back to your childhood in just a few bites? That's the magic behind these delightful no-bake Butterfinger Balls. I can’t help but smile at how easy it is to whip up these tasty treats without ever turning on the oven. Perfect for parties or cozy gatherings, these little wonders take less than an hour to prepare—and the hardest part is waiting for them to chill.
The combination of creamy peanut butter and crunchy Butterfinger creates a texture that's as irresistible as it is comforting, all wrapped in a silky layer of melted chocolate. They’re a sure-fire crowd-pleaser and make for an excellent homemade gift option during the holidays!
Whether you’re a seasoned chef or just love homemade food, I guarantee this recipe will leave you buzzing with excitement. So, are you ready to indulge in a treat that’s both heartwarming and effortlessly delicious? Let’s get started on these Butterfinger Balls!
Why are Butterfinger Balls a Must-Try?
Simplicity at Its Best: With no baking involved, you can whip these treats up in under an hour.
Irresistible Flavor: The fusion of creamy peanut butter, crunchy Butterfinger, and smooth chocolate creates a delightful taste sensation.
Perfect for Sharing: Great for parties, holidays, or as homemade gifts, they appeal to sweet tooths of all ages.
Customize Them: Feel free to substitute your favorite candy bar for endless variations.
Lasting Freshness: They store beautifully in the fridge or freezer, ready to satisfy cravings whenever they hit.
Make these butterfinger balls your new favorite go-to snack, and don't forget to check out my delicious blueberry French toast casserole for another mouthwatering treat!
Butterfinger Balls Ingredients
For the Base
• Creamy Peanut Butter – Provides the base flavor and texture; use regular peanut butter like Jif or Skippy for best results.
• Unsalted Butter – Adds richness and helps bind the ingredients; be sure to soften before use.
• Vanilla Extract – Enhances the delicious flavor of the candy.
For the Crunch
• Graham Cracker Crumbs – Adds essential texture and structure to the balls.
• Crushed Butterfinger Bars – The star ingredient that provides the signature flavor and delightful crunch; feel free to crush your own.
For the Coating
• Chocolate Bark or Chocolate Chips – Ideal for melting and dipping; remember that tempering is key to avoid seizing during melting.
Optional Garnishes
• Additional Crushed Butterfinger – Adds an appealing finish and extra crunch.
• Sprinkles or Sea Salt – Adds both visual flair and extra flavor, making your Butterfinger balls pop!
Step-by-Step Instructions for Easy No-Bake Butterfinger Balls
Step 1
Begin by combining 1 cup of creamy peanut butter and ¼ cup of softened unsalted butter in a large mixing bowl. Using a hand mixer, blend these ingredients on medium speed until the mixture is creamy and well combined, which should take about 2-3 minutes. The goal is to create a smooth and fluffy mixture that will serve as the delightful base for your Butterfinger Balls.
Step 2
Next, pour in 1 teaspoon of vanilla extract and mix again for another minute, allowing the sweet aroma to envelop your kitchen. This extra touch of flavor enhances the overall taste of the Butterfinger Balls. Make sure to scrape down the sides of the bowl to ensure every bit is fully incorporated as you blend.
Step 3
Now it’s time to gradually add 2 cups of powdered sugar to your peanut butter mixture. This step is best done on low speed to prevent a sugar cloud from forming. Mix until it's just about combined, ensuring you stop to scrape the sides of the bowl to incorporate all the sugar. You’ll know it’s ready when the mixture looks thick and sticky, about 1-2 minutes of mixing.
Step 4
With your mixture ready, gently fold in 1 cup of graham cracker crumbs and 1 cup of crushed Butterfinger bars. Use a spatula to stir the ingredients together until everything is evenly distributed. The graham crackers provide crucial texture while the crushed Butterfinger adds that lovely crunch and signature flavor, making your Butterfinger Balls irresistible.
Step 5
Prepare a baking sheet by lining it with parchment paper. Using a tablespoon or a cookie scoop, portion out 1-1.5 tablespoon balls of the mixture and roll them into perfect little spheres with your hands. Place each ball on the prepared baking sheet, ensuring they’re spaced out so they don’t stick together as they chill in the freezer.
Step 6
Once all the balls are formed, transfer the baking sheet to the freezer and allow them to chill for about 30 minutes. This step is essential for firming up the Butterfinger Balls, making them easier to dip in chocolate later. You’ll know they’re ready when they feel firm to the touch.
Step 7
While the balls chill, it’s time to melt your chocolate. Take 12 ounces of chocolate bark or chocolate chips and place them in a microwave-safe bowl. Microwave in 30-second intervals, stirring well after each interval, until the chocolate is smooth and completely melted. This careful approach prevents the chocolate from seizing—important for achieving a beautiful coating on your Butterfinger Balls.
Step 8
Remove the chilled Butterfinger Balls from the freezer and dip each one into the melted chocolate. Use a fork to ensure they’re completely covered, then gently lift them out and let any excess chocolate drip off. Place the coated balls back onto the lined baking sheet, making sure they’re not touching each other.
Step 9
For an extra touch of flavor and visual appeal, immediately garnish the chocolate-coated Butterfinger Balls with additional crushed Butterfinger, colorful sprinkles, or a sprinkle of coarse salt. This step adds an exciting crunch and enhances the sweet and salty contrast, making each bite of your Butterfinger Balls even more delicious.
Step 10
Finally, let the chocolate set completely at room temperature or place the baking sheet back into the refrigerator for about 15 minutes. Once the coating is firm, your Easy No-Bake Butterfinger Balls are ready to be enjoyed! Store any leftovers in an airtight container in the fridge or freezer to keep them fresh and delicious for later.
Butterfinger Balls Variations & Substitutions
Feel free to adapt these yummy Butterfinger Balls to make them uniquely yours!
- Nut-Free: Swap creamy peanut butter for sunbutter or any seed butter for a nut-free delight.
- Crunchy Twist: Use crunchy peanut butter instead of creamy for an extra layer of texture in every bite.
- Chocolate Lovers: Add a drizzle of white or dark chocolate on top for a gourmet look and flavor boost.
- Candy Bar Change: Substitute Butterfinger with your favorite candy bar like Snickers, Reese's, or M&M's for a different taste twist.
- Add Some Spice: Mix in a pinch of cinnamon or cayenne pepper for a warm, spiced flavor that will surprise your guests.
- Holiday Cheer: Use vibrant holiday-themed sprinkles or swap out crushed Butterfinger for peppermint candies during the festive season.
- Healthy Boost: For a nutritious twist, fold in some chopped nuts or dried fruit after mixing in the graham crackers and Butterfinger.
- Vegan Option: Replace unsalted butter with coconut oil and use dairy-free chocolate to create a delicious vegan treat.
These variations allow you to unleash your creativity while enjoying the essence of these delightful Butterfinger Balls!
Make Ahead Options
These delightful Butterfinger Balls are perfect for meal prep, allowing you to indulge in a sweet treat without the last-minute hustle. You can prepare the base mixture (steps 1-4) up to 24 hours in advance, storing it in the refrigerator in an airtight container. When you’re ready to enjoy, simply roll the mixture into balls, freeze them for about 30 minutes (as per step 6), and dip in chocolate as outlined in the remaining steps. To maintain that irresistible texture and flavor, ensure the mixture is well-sealed and keep the finished chocolate-covered balls in the fridge for up to a week or freeze for up to 5 months. With these make-ahead tips, you’ll have these tasty treats ready at a moment’s notice!
What to Serve with Butterfinger Balls?
These delectable treats are perfect for transforming any gathering into a sweet celebration, enticing everyone to indulge.
- Coffee or Espresso: The rich, bold flavors of coffee harmonize beautifully with the sweetness of Butterfinger Balls, perfect for an afternoon treat.
- Milk: A classic pairing, cold milk balances the richness of chocolate and peanut butter, making every bite more delightful.
- Vanilla Ice Cream: Serving alongside a scoop of creamy vanilla ice cream creates a delicious contrast, ensuring a luxurious dessert experience.
- Fresh Berries: Juicy strawberries or raspberries add brightness and acidity, cutting through the sweetness for a refreshing touch.
- Chocolate Fondue: For the ultimate indulgence, serve Butterfinger Balls with a side of warm chocolate fondue for dipping; it’s a fun, interactive dessert!
- Fruit Salad: A light and refreshing fruit salad can offset the richness of the Butterfinger Balls, creating a perfect balance on the plate.
- Nutty Trail Mix: A crunchy trail mix on the side adds texture and a salty contrast that enhances the sweet flavor of the candies.
- Sparkling Water: For a lighter beverage option, sparkling water with a twist of lime refreshes the palate between bites of these sweet delights.
- Caramel Sauce: Drizzle warm caramel sauce on your Butterfinger Balls for an extra layer of flavor that elevates these treats to heavenly heights!
Expert Tips for Perfect Butterfinger Balls
• Choose the Right Peanut Butter: Regular creamy peanut butter like Jif or Skippy is recommended over natural brands, which can lead to an oily texture in your Butterfinger Balls.
• Avoid Hard Work: Remember to freeze the balls for at least 30 minutes before dipping them in chocolate. This ensures a perfect coating without breaking apart.
• Perfect Chocolate Melting: Microwave chocolate in 30-second intervals, stirring after each, to avoid seizing. If using chips, consider tempering for a smoother finish.
• Add Texture: Enhance the visual appeal by garnishing your Butterfinger Balls with crushed Butterfinger, sprinkles, or coarse salt right after dipping.
• Storage Tips: Store your Butterfinger Balls in an airtight container, with wax paper between layers in the fridge for up to a week or freeze for 5-6 months.
How to Store and Freeze Butterfinger Balls
Fridge: Store your Butterfinger Balls in an airtight container for up to 1 week. For best results, layer them with parchment paper to avoid sticking.
Freezer: These delightful treats can be frozen for up to 5-6 months. Just ensure they're in an airtight container, preferably with wax or parchment paper between layers to keep them from sticking.
Reheating: While these are best enjoyed cold, if you prefer a softer texture, let them sit at room temperature for about 10 minutes before indulging.
Tips: If you're packing for gifts, consider wrapping them individually in wax paper for a charming presentation that keeps each Butterfinger Ball fresh!
Butterfinger Balls Recipe FAQs
What is the best way to select Butterfinger bars for this recipe?
Absolutely! When choosing Butterfinger bars, look for ones that are fresh and have no visible damage to the packaging. Dark spots on the bars or irregular textures might indicate they've been stored for too long. Using fresh chocolate bars will ensure the best flavor and texture in your Butterfinger Balls.
How should I store Butterfinger Balls to keep them fresh?
Store your Butterfinger Balls in an airtight container in the refrigerator for up to a week. For optimal freshness, place a layer of parchment paper between the layers of the balls to keep them from sticking together. If you need them to last longer, you can freeze them for up to 5-6 months in a well-sealed freezer bag or container.
Can I freeze Butterfinger Balls? If so, how?
Yes, you can freeze Butterfinger Balls! To do this, place them in an airtight container with parchment paper between each layer to prevent sticking. They can remain in the freezer for up to 5-6 months. When you're ready to enjoy them, simply take out the desired amount and let them sit at room temperature for about 10 minutes before indulging for a soft and creamy treat!
What should I do if my chocolate coating is seizing or clumping?
If you find that your chocolate is seizing, it usually means it has come into contact with moisture or was heated too quickly. The best fix is to add a small amount of vegetable oil or shortening (about 1 teaspoon at a time) to the melted chocolate and stir until smooth. This will help loosen the chocolate. Always melt chocolate in 30-second intervals to maintain control over the temperature.
Are Butterfinger Balls suitable for those with dietary restrictions?
While Butterfinger Balls contain common allergens such as peanut butter and chocolate, you can customize them to meet dietary needs. For nut allergies, try using sunbutter or pumpkin seed butter. For vegan options, look for dairy-free chocolate and ensure your graham crackers are vegan. Always check product labels to confirm ingredients align with dietary restrictions.
Indulgent No-Bake Butterfinger Balls That Everyone Will Love
Ingredients
- 1 cup creamy peanut butter
- ¼ cup unsalted butter
- 1 teaspoon vanilla extract
- 2 cups powdered sugar
- 1 cup graham cracker crumbs
- 1 cup crushed Butterfinger bars
- 12 ounces chocolate bark or chocolate chips
- Optional: additional crushed Butterfinger
- Optional: sprinkles or sea salt
Instructions
- Combine 1 cup of creamy peanut butter and ¼ cup of softened unsalted butter in a large mixing bowl. Blend until creamy and well combined, about 2-3 minutes.
- Add 1 teaspoon of vanilla extract and mix for another minute, scraping down the sides of the bowl.
- Gradually add 2 cups of powdered sugar on low speed, mixing until just combined and thick and sticky, about 1-2 minutes.
- Gently fold in 1 cup of graham cracker crumbs and 1 cup of crushed Butterfinger bars until evenly distributed.
- Line a baking sheet with parchment paper. Portion out 1-1.5 tablespoon balls of the mixture and roll into spheres, placing them on the prepared baking sheet.
- Chill the balls in the freezer for about 30 minutes until firm to the touch.
- Melt 12 ounces of chocolate bark or chocolate chips in a microwave-safe bowl in 30-second intervals until smooth.
- Dip each chilled Butterfinger Ball into the melted chocolate, ensuring they’re completely covered, and place them back on the lined baking sheet.
- Garnish with additional crushed Butterfinger, sprinkles, or coarse salt immediately after dipping.
- Let the chocolate set at room temperature or refrigerate for about 15 minutes before serving.
Notes
- Choose regular creamy peanut butter for better texture.
- Freeze the balls before dipping for a better coating.
- Microwave chocolate carefully in intervals to avoid seizing.
- Garnish immediately after dipping for best results.
- Store in an airtight container with parchment paper for freshness.