As I stood in my kitchen, the vibrant colors of fresh cucumbers caught my eye, instantly transporting me back to summer picnics filled with laughter and sunshine. The beauty of these Canned Dill Pickles lies not just in their crunch, but in their ability to preserve those cherished moments. With just a few simple ingredients and a bit of patience, you can create a delightful batch that brightens up any meal—an easy way to elevate your cooking arsenal while impressing family and friends without breaking a sweat. Plus, this recipe is a fantastic way to maximize seasonal produce and create snacks that pair wonderfully with everything from sandwiches to charcuterie boards. So, are you ready to dive into the world of canning and bring some vibrant flavor into your pantry? Let's get started!
Why Are Canned Dill Pickles So Amazing?
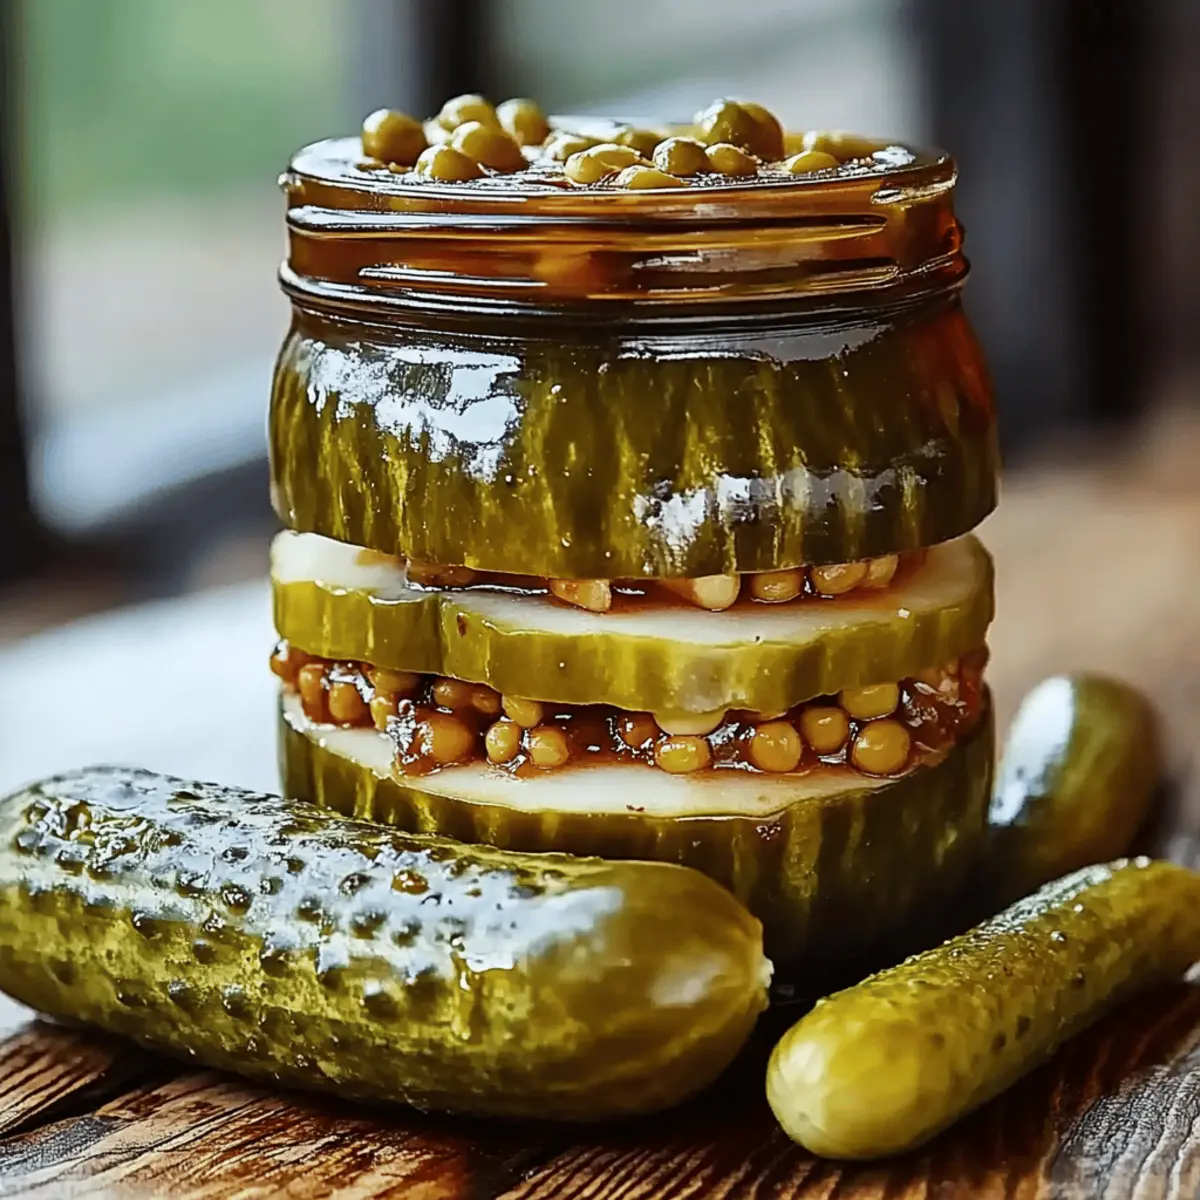
Crispy freshness: These homemade canned dill pickles boast a satisfying crunch that store-bought varieties simply can’t match.
Simple ingredients: With just cucumbers, vinegar, and spices, you’re in control of every flavor profile.
Flavor explosion: Each jar offers a tangy punch that complements countless meals, transforming your everyday dishes into something extraordinary.
Versatile snack: Enjoy them straight from the jar, or pair them with sandwiches or burgers for an unbeatable combo.
Time-saving: Preparing and canning these pickles takes just 30 minutes, allowing you to enjoy the delicious rewards in weeks to come!
Pro tip: For a rich twist, consider adding some spicy peppers or experimenting with unique herbs—your taste buds will thank you!
Canned Dill Pickle Ingredients
For the Brine
- Water – 4 cups, the base for your pickle magic.
- White vinegar – 1 cup, provides that essential tangy flavor.
- Salt – 2 tablespoons, crucial for enhancing the pickled taste and preserving the cucumbers.
- Sugar – 2 tablespoons, helps balance acidity with a hint of sweetness.
For the Pickles
- Pickling cucumbers – 4 fresh, ensure they are firm for the perfect crunch in every bite.
- Garlic cloves – to taste, adding depth and flavor to your pickles.
- Fresh dill sprigs – to taste, infusing a classic dill flavor that elevates the Canned Dill Pickles.
Step‑by‑Step Instructions for Canned Dill Pickle
Step 1: Sterilize Jars
Start by sterilizing your jars and lids to ensure a safe canning process. Place them in a large pot of boiling water for about ten minutes. This step is crucial for preventing bacteria growth, so keep an eye on the timer while the jars simmer in the bubbling water, making sure they are thoroughly cleaned and heated.
Step 2: Prepare Cucumbers
While the jars are sterilizing, wash the fresh pickling cucumbers under cold running water. Cut them into your desired shapes, either spears or slices, depending on how you enjoy your Canned Dill Pickles. The cucumbers should be firm and free of blemishes for optimal crunch, making the next steps even more enjoyable.
Step 3: Make the Brine
In a medium-sized pot, combine 4 cups of water, 1 cup of white vinegar, 2 tablespoons of salt, and 2 tablespoons of sugar. Heat the mixture over medium-high heat until it boils, stirring occasionally to dissolve the salt and sugar completely. You’ll know it’s ready when it reaches a rolling boil and the ingredients meld into a fragrant brine.
Step 4: Layer Ingredients in Jars
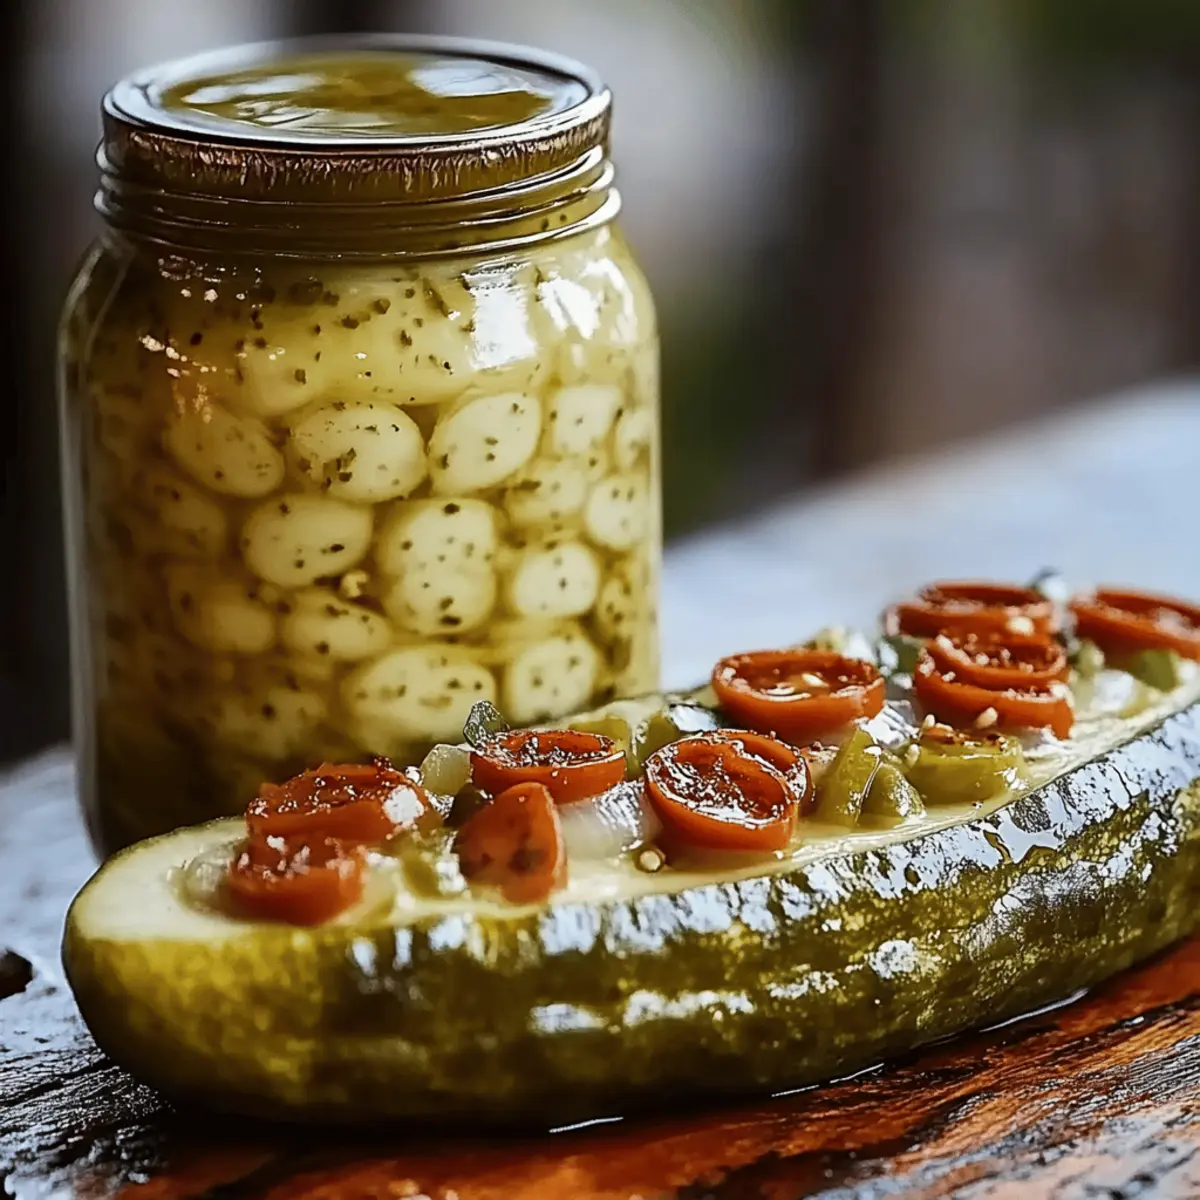
Once your brine is ready, carefully remove the sterilized jars from the boiling water using tongs. Start layering cucumber slices in each jar, adding garlic cloves and fresh dill sprigs to taste as you go. Fill each jar, packing the cucumbers snugly while leaving some space at the top, enhancing the flavors in your Canned Dill Pickle experience.
Step 5: Fill Jars with Brine
Next, pour the hot brine over the cucumbers until they are fully submerged, leaving about half an inch of headspace at the top. This prevents overflow during the next steps. As you pour, listen for the satisfying glug as the jar fills with tangy goodness, ensuring every cucumber is coated in that deliciously aromatic brine.
Step 6: Seal the Jars
After filling the jars, using a clean cloth, wipe the rims to ensure there are no spills. Seal the jars tightly with their sterilized lids. Make sure they are fitted properly to prevent air from entering and to create a vacuum seal, which is essential for preserving your Canned Dill Pickles for the long haul.
Step 7: Process Jars
Carefully place the filled jars back into a pot of boiling water, ensuring they are fully submerged. Process the jars in boiling water for about ten minutes. This final step helps in sealing the jars and making your Canned Dill Pickles shelf-stable, so keep an eye on the clock to ensure they receive even heating.
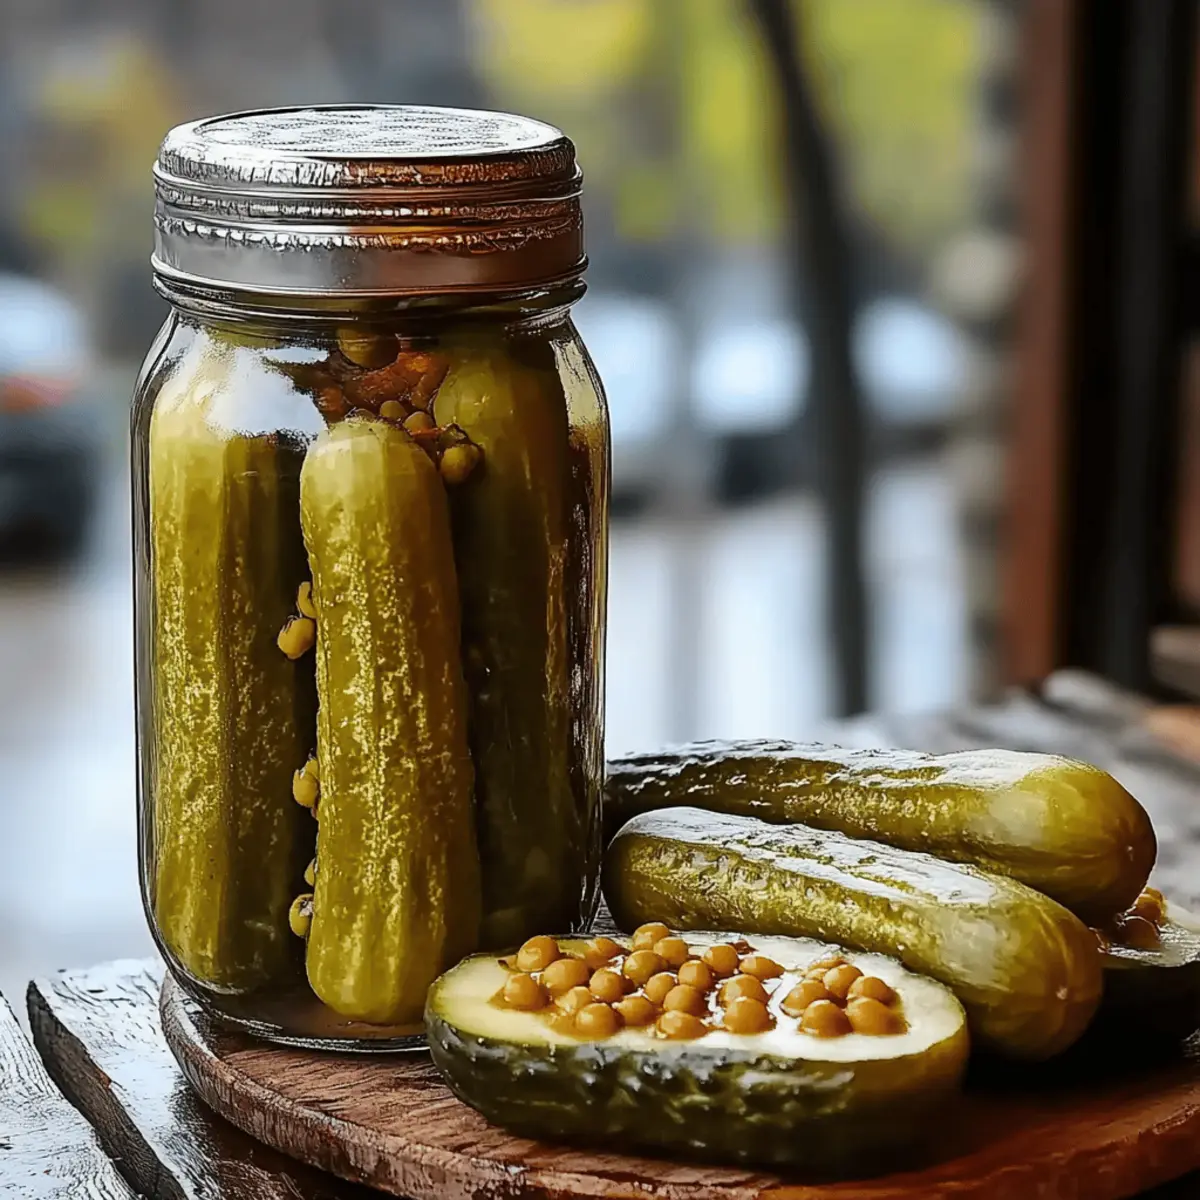
Step 8: Cool and Store
Once processed, remove the jars from the boiling water and place them on a clean towel or cooling rack. Allow them to cool completely in a cool place. After several hours, check that the lids have sealed tightly by pressing in the center; it should not pop back. Store your Canned Dill Pickles in a cool, dark place for at least a week for the flavors to develop beautifully.

What to Serve with Canned Dill Pickles?
Elevate any meal with the delightful tang and crunch of pickles, bringing a burst of flavor to your dining table.
- Grilled Cheese Sandwich: This warm, gooey sandwich pairs perfectly with the vibrant crunch of pickles, balancing the richness with a tangy bite.
- Classic Burger: Top your juicy burger with sliced Canned Dill Pickles to add a refreshing layer of flavor that brightens each delicious bite.
- Potato Salad: The tanginess of pickles complements the creamy textures in potato salad, creating a harmony of flavors that pleases the palate.
- Charcuterie Board: Make a splash with an array of antipasto meats, cheeses, and Canned Dill Pickles, inviting guests to enjoy contrasting tastes and textures.
- Tuna Salad: Add diced pickles to your tuna salad for a zesty twist that enhances the overall flavor, creating a lunchtime classic.
- Sliced Tomatoes with Feta: Placed alongside fresh tomatoes and creamy feta on a salad, the pickles enhance every fresh bite with their sharpness.
For drinks, pair your Canned Dill Pickles with a chilled glass of sparkling lemonade or a crisp lager beer, refreshing your palate and enhancing mealtime joy.
How to Store and Freeze Canned Dill Pickle
Room Temperature: Store unopened jars of your Canned Dill Pickles in a cool, dark place, like a pantry or cellar, where they can last up to one year.
Fridge: Once opened, refrigerate your pickles to maintain freshness and crispness, consuming within two months for best flavor.
Airtight Guidance: Always ensure that lids are sealed tightly after each use to keep out air and contaminants, which can spoil your pickles.
Flavor Enhancement: For even tastier pickles, let them sit for at least two weeks after canning to develop their full flavor profile before enjoying!
Tips for the Best Canned Dill Pickle
Choose Cucumbers Wisely: Select firm, fresh pickling cucumbers to ensure that delightful crunch; avoid any cucumbers that are soft or blemished.
Brine Balance: Pay attention to the sugar and salt ratio in your brine; too much can lead to overly sweet pickles, while too little can affect preservation.
Headspace Matters: Always leave about half an inch of headspace when filling the jars—this prevents overflow during processing and allows for proper sealing.
Cooling Time: Make sure to cool your jars completely after processing; this step is crucial for allowing the vacuum seal to form properly, ensuring your Canned Dill Pickles stay fresh.
Flavor Development: For optimal taste, allow the pickles to cure for at least a week, but two weeks is even better for richer flavors. This waiting period transforms their taste into something magical!
Make Ahead Options
Preparing Canned Dill Pickles is a breeze for busy home cooks looking to save time while still enjoying homemade flavors! You can start by sterilizing your jars up to 24 hours in advance; simply keep them in a cool, dry place until you’re ready to fill them. Additionally, you can wash and slice the cucumbers and even prepare the brine ahead of time—just store the prepped cucumbers in the refrigerator and the brine in a sealed container. When you're ready to can, combine everything following the recipe instructions and process the jars as directed. This way, your Canned Dill Pickles will be just as delicious with minimal effort on the day you want to enjoy them!
Canned Dill Pickle Variations
Feel free to get creative and explore these delightful twists to elevate your Canned Dill Pickle experience!
-
Spicy Kick: Add sliced jalapeños to the jars for a fiery touch. Spicy pickles add excitement to sandwiches and burgers—perfect for those who love a little heat!
-
Herb Infusion: Experiment with different herbs like thyme or oregano along with dill. This aromatic complexity brings an unexpected depth to your pickles while keeping the essence of the classic flavor intact.
-
Sweet Dill Pickles: Increase sugar to 4 tablespoons and add some cinnamon sticks for a sweeter, spiced version. These sweet pickles are a delightful contrast and perfect for complementing savory dishes!
-
Garlic Lovers: Double the garlic cloves for an extra punch of flavor. A garlic-forward pickle can be a showstopper on a cheeseboard, adding zest and character to your appetizer spread.
-
Bittersweet Balance: Substitute apple cider vinegar for white vinegar and add a pinch of bay leaf. The fruity notes of apple cider create a unique balance of flavors, perfect for those looking to try something different.
-
Pickled Vegetables Medley: Toss in some sliced carrots or cauliflower for a colorful veggie mix. This adds both texture and vibrant visual appeal, making every jar an eye-catching centerpiece!
-
Curry Twist: Add a teaspoon of curry powder to the brine for an exotic twist. This will enhance the flavor with warm spices and can make for a unique garnish in your next salad or curry dish.
-
Zesty Citrus: Include strips of lemon or orange zest in the mix for a refreshing citrus note. This brightens the overall flavor profile, making each bite a burst of sunshine!
Canned Dill Pickle Recipe FAQs
What type of cucumbers should I use for Canned Dill Pickles?
Absolutely! It's best to use fresh pickling cucumbers specifically bred for canning. They’re smaller, firmer, and have fewer seeds than regular cucumbers, ensuring that satisfying crunch. Avoid cucumbers with soft spots or blemishes as they can lead to mushy pickles.
How should I store my Canned Dill Pickles?
Once you've sealed your jars, store them in a cool, dark place like a pantry or cellar where they can last for up to one year unopened. After you’ve opened a jar, refrigerate them to keep them fresh, and try to enjoy them within two months for the best flavor.
Can I freeze Canned Dill Pickles?
While freezing isn't the ideal option for pickles due to potential texture changes, if you absolutely want to, you can freeze unprocessed pickle slices. Place them in an airtight freezer bag, removing as much air as possible. They’re best used within 3 months. However, for canned pickles, it’s better to focus on preserving them in jars!
What if my pickles don’t seal properly?
Very! If the seals don’t create a vacuum (you’ll know if the lid pops back when pressed), don’t worry! Simply store them in the fridge and consume within a couple of weeks. Always double-check your jar rims for residue before sealing to prevent this issue. If necessary, reprocess them, ensuring lids are perfectly sealed.
Are there any dietary considerations for Canned Dill Pickles?
Definitely! If you or someone you’re serving has dietary restrictions or allergies, keep in mind that this recipe contains salt, vinegar, and sugar. For a low-sodium alternative, try reducing the salt in the brine, but note that this may affect the preservation. Additionally, always check the ingredients in any garlic or dill products used, as they could contain allergens.
Canned Dill Pickle Magic: Tangy Crunch in Every Bite
Equipment
- Large pot
- clean jars and lids
- tongs
Ingredients
For the Brine
- 4 cups water the base for your pickle magic
- 1 cup white vinegar provides essential tangy flavor
- 2 tablespoons salt crucial for enhancing the pickled taste
- 2 tablespoons sugar helps balance acidity with a hint of sweetness
For the Pickles
- 4 fresh pickling cucumbers ensure they are firm for the perfect crunch
- garlic cloves to taste, adding depth and flavor
- fresh dill sprigs to taste, for classic dill flavor
Instructions
Step-by-Step Instructions for Canned Dill Pickle
- Start by sterilizing your jars and lids in boiling water for about ten minutes.
- Wash the fresh pickling cucumbers under cold running water and cut them into desired shapes.
- In a medium pot, combine water, white vinegar, salt, and sugar. Heat until boiling.
- Remove jars from boiling water and layer cucumber slices, garlic cloves, and dill in each.
- Pour hot brine over cucumbers until fully submerged, leaving half an inch of headspace.
- Wipe the rims, seal the jars tightly with lids, and process in boiling water for ten minutes.
- Remove the jars and let them cool completely on a clean towel.
- Store in a cool, dark place for at least a week for flavors to develop.