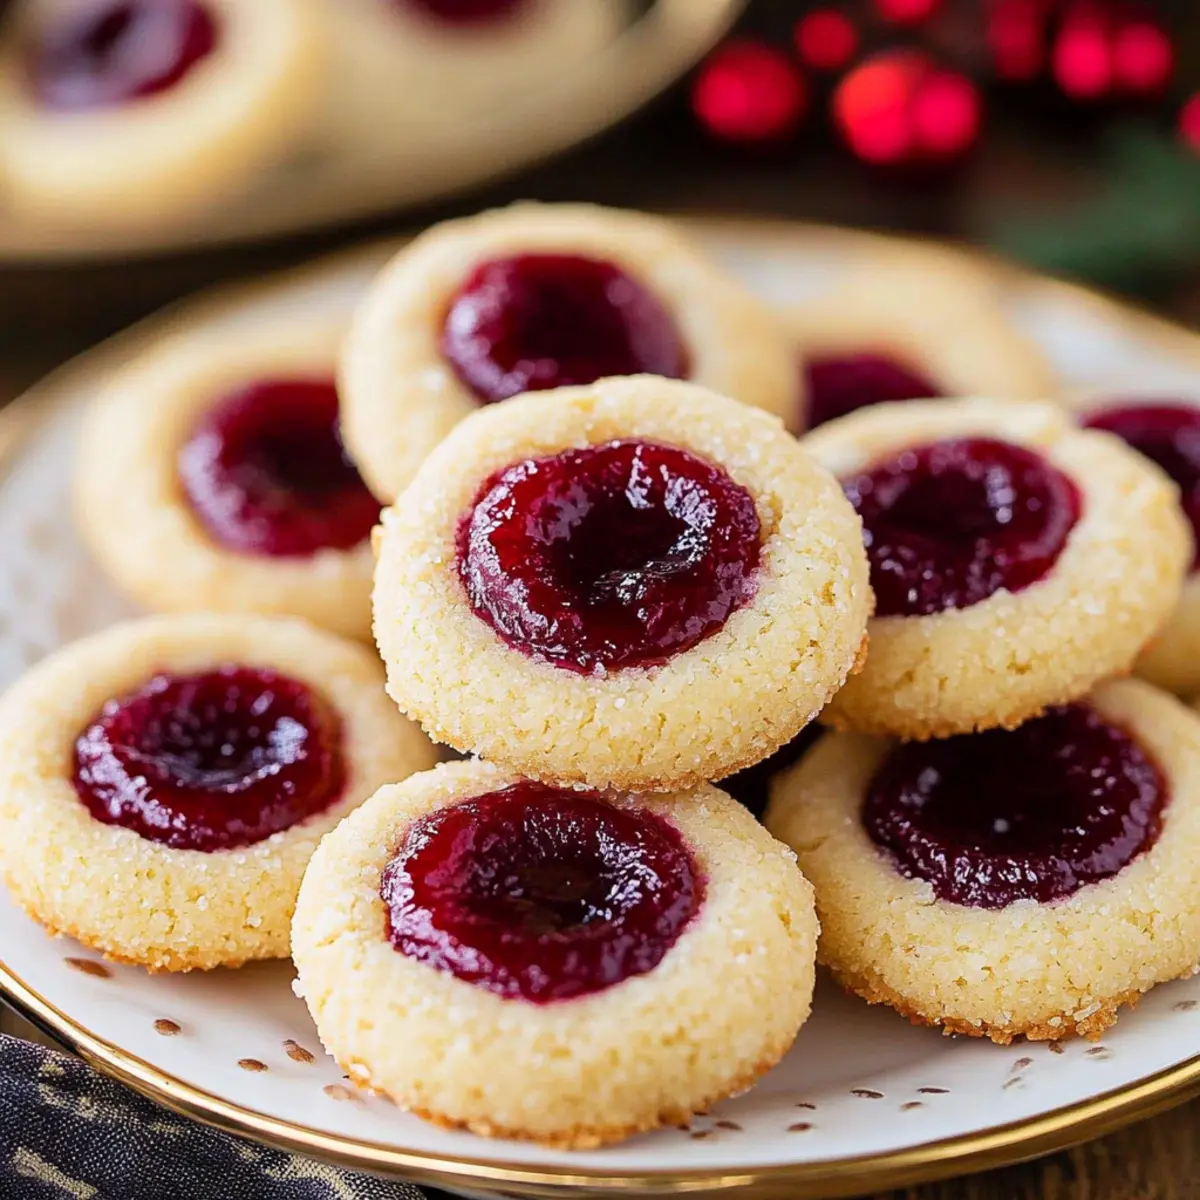
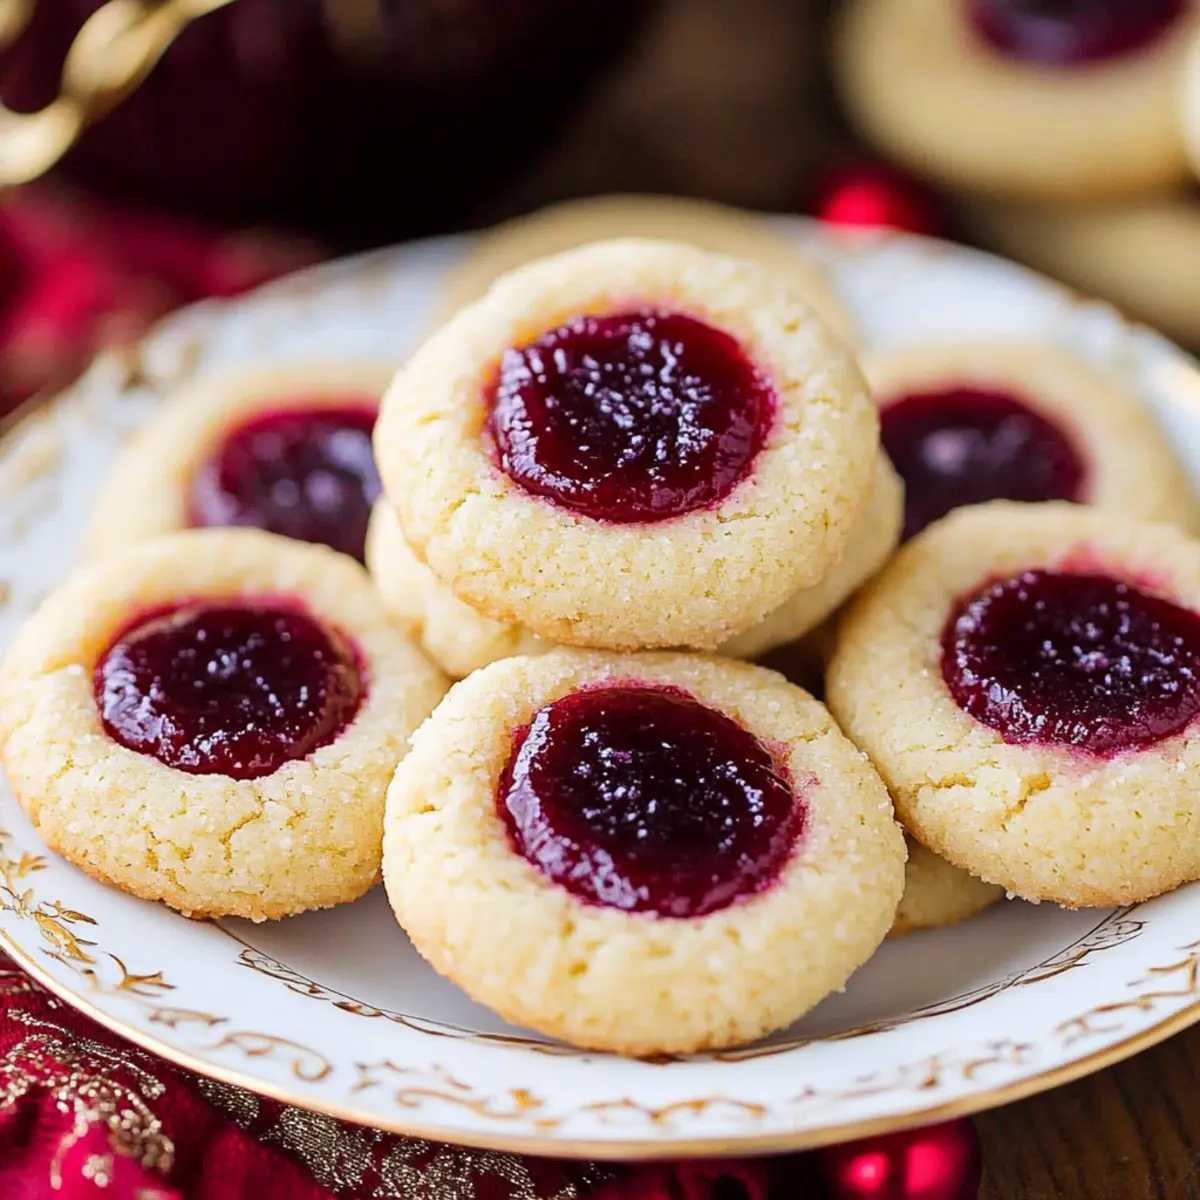
Did you know that thumbprint cookies have a history that dates back to ancient times? These delightful treats have been a staple during festive seasons in many cultures, particularly around Christmas. When baking, I can't help but feel a rush of nostalgia as the sweet aroma fills my kitchen, reminding me of cozy holiday gatherings and warm memories. Today, I’m excited to share my recipe for Christmas thumbprint cookies, a classic that beautifully marries buttery flavors with your favorite jam fillings. What makes this treat so irresistible is how easy it is to customize; you can fill them with raspberry, strawberry, or even a zesty citrus jam for a unique spin.
Not to mention, these cookies bake up in just about 15 minutes, making them a fantastic option for last-minute holiday baking or as a homemade gift! As they cool, the sugared exterior glistens, tempting anyone nearby to take a bite. Ready to bring a little sweetness to your holiday season? Let’s dive into this delightful recipe and fill those indents with jam!

Why are Christmas Thumbprint Cookies a Must-Bake?
Joyful Tradition: Thumbprint cookies bring a touch of nostalgia to your holiday baking making them a timeless favorite.
Quick Prep Time: These delightful treats only take 15 minutes to bake, perfect for last-minute gatherings.
Endless Filling Options: Personalize them with your choice of jam, from raspberry to zesty citrus, for a festive twist.
Glistening Appearance: Their sugared exteriors catch the eye, making them the star of your dessert table.
Easy to Share: Bake a batch and gift them to friends and family for a sweet homemade gesture!
With their unique flavors and cozy charm, your loved ones will relish these treats. For more festive inspiration, check out these delicious Pineapple Upside-Down Sugar Cookies to elevate your holiday baking!
Ingredients for Christmas Thumbprint Cookies
• Whip up these festive cookies with this delightful ingredient list!
For the Cookie Dough
- Unsalted Butter – Provides richness; ensure it's softened to room temperature for easy mixing.
- Sugar – Adds sweetness and promotes golden browning.
- Light Brown Sugar – Contributes to chewiness and adds a touch of molasses flavor.
- Egg Yolk – Enhances richness and binds the dough together.
- Vanilla Extract – Boosts flavor; choose pure for the best taste.
- All-Purpose Flour – Forms the structure of your cookies.
- Cornstarch – Helps create a tender mouthfeel.
- Salt – Balances sweetness and enhances overall flavors.
Optional Finishing Touch
- Sugar (for rolling) – Gives a sparkling exterior; roll your cookie balls before baking for added sweetness.
For the Filling
- Jam or Preserves – Raspberry is recommended; feel free to choose your favorite flavor for a unique twist, making them perfect Christmas thumbprint cookies!
With this simple recipe, you’ll be on your way to baking these charming treats that everyone will adore. Let’s get those cookies rolling!
Step-by-Step Instructions for Christmas Thumbprint Cookies
Step 1
Start by creaming the softened unsalted butter in a large mixing bowl using a stand mixer on medium speed for about 3 minutes, until the mixture is smooth and pale. This step is essential as it incorporates air into the butter, ensuring a light and fluffy texture in your Christmas thumbprint cookies. Scrape down the sides of the bowl to ensure all ingredients are well mixed.
Step 2
Gradually add in both granulated sugar and light brown sugar, beating until the mixture is fully combined and creamy, which should take about 2 minutes. The sugars will dissolve into the butter, creating a sweet base for your dough. Make sure to mix well so that no lumps remain and the mixture is light and airy.
Step 3
Add one egg yolk and pure vanilla extract to the sugary butter mixture, mixing thoroughly until everything is well incorporated, which should take around 1 minute. The egg yolk adds richness and helps bind the dough, while the vanilla enhances the flavor of your Christmas thumbprint cookies. Take a moment to enjoy that heavenly aroma wafting from the bowl!
Step 4
In a separate medium bowl, whisk together all-purpose flour, cornstarch, and salt until evenly combined. This step helps to distribute the dry ingredients, ensuring your Christmas thumbprint cookies have a tender look and feel. Gradually add the dry mixture to your wet ingredients in the stand mixer, mixing just until combined; avoid overmixing, as this can make the cookies tough.
Step 5
Once the dough is formed and looks dry and crumbly, scoop out about one tablespoon of the mixture and shape it into a ball using your hands. This step should yield uniform cookie dough balls to ensure even cooking. If desired, roll the dough balls in sugar for a sparkling exterior before placing them on a plate—this adds a festive touch!
Step 6
Gently press your thumb or the back of a spoon into the center of each cookie ball to create a nice indent, ensuring it's deep enough to hold the jam. This step is crucial for the aesthetic and functional aspect of your Christmas thumbprint cookies, as you want a satisfying amount of jam in each one. Arrange the cookies on a parchment-lined baking sheet.
Step 7
Chill the cookie dough in the refrigerator for about 30 minutes. This will firm up the dough and prevent the cookies from spreading too much while baking. While you're waiting, preheat your oven to 375°F (190°C) so it's hot and ready to go as soon as the dough is chilled.
Step 8
Once chilled, briefly microwave your chosen jam or preserves for about 10 seconds to soften it. This makes it easier to fill the indentations in your cookies. Afterward, carefully spoon a small amount of jam into each of the indents, ensuring you don’t overfill, as the jam may bubble over while baking.
Step 9
Bake your Christmas thumbprint cookies in the preheated oven for about 11 minutes. Keep an eye on them, as you want the edges to turn golden brown while the centers remain soft. This contrast in texture is what makes thumbprint cookies so delightful!
Step 10
Once done, carefully remove the baking sheet from the oven and let the cookies cool on the sheet for about 5 minutes. Afterward, transfer them to a wire rack to cool completely. Patience is key here; allow the cookies to cool fully before taking that satisfying first bite of your irresistible Christmas thumbprint cookies!
Make Ahead Options
These Christmas thumbprint cookies are perfect for meal prep enthusiasts looking to save time during the busy holiday season! You can prepare the cookie dough up to 3 days in advance. Simply follow steps 1-5, then wrap the shaped cookie balls tightly in plastic wrap and refrigerate them. For optimal flavor and texture, chill the dough instead of freezing. When you're ready to bake, take the dough out, create the indents, fill them with jam, and bake as usual. By preparing ahead, you can enjoy fresh, warm cookies straight from the oven with minimal effort, making your holiday gatherings even sweeter!
How to Store and Freeze Christmas Thumbprint Cookies
Room Temperature: Store in an airtight container at room temperature for up to 5 days for optimal freshness.
Fridge: For extended freshness, you can refrigerate the cookies for up to 10 days; however, they may lose some texture. Ensure they're in a sealed container.
Freezer: Freeze the cookies in a single layer on a baking sheet, then transfer to an airtight container or freezer bag for up to 3 months. To enjoy later, thaw at room temperature.
Reheating: To revive their softness, warm cookies in the microwave for a few seconds before serving; add a little jam in the indent if needed. Enjoy your Christmas thumbprint cookies!
Expert Tips for Christmas Thumbprint Cookies
Softened Butter: Ensure your butter is at room temperature for easy mixing. Cold butter will result in a dense texture.
Avoid Overmixing: Mix until just combined; overmixing can make your cookies tough. Gently incorporate dry ingredients for best results.
Indent Depth: Press the indent deep enough to hold a good amount of jam—too shallow, and the jam will overflow during baking.
Re-indent Trick: If you forget to add jam before baking, re-indent the cookies immediately after removing them from the oven and add the filling promptly.
Storing: Keep your Christmas thumbprint cookies in an airtight container to maintain their freshness for days. Enjoy them at room temperature!
Variations & Substitutions for Christmas Thumbprint Cookies
Feel free to let your creativity shine by customizing this classic cookie recipe with delightful twists!
- Nutty Delight: Stir in ½ cup of chopped nuts, like pecans or walnuts, for added crunch and flavor.
- Flavor Infusion: Replace vanilla extract with almond or citrus extract for a zesty new taste that brightens each bite.
- Gluten-Free: Swap all-purpose flour for a gluten-free blend to make these cookies suitable for everyone.
- Chocolate Lovers: Mix in ¼ cup of cocoa powder to the cookie dough, and fill with chocolate ganache for a decadent treat.
- Spiced Variation: Incorporate a teaspoon of cinnamon or pumpkin spice into the dough for a warm, festive flavor.
- Dairy-Free Option: Use coconut oil or a vegan butter substitute in place of unsalted butter for a creamy texture without dairy.
- Citrus Twist: Fill the indents with orange or lemon curd for a refreshing and tangy surprise that sings holiday cheer.
With these comforting variations, you’ll create a batch of Christmas thumbprint cookies that warms the heart and tantalizes the taste buds! Enjoy exploring these delicious options.
What to Serve with Christmas Thumbprint Cookies?
These delightful treats are the perfect sweet ending to any festive meal, enticing your senses with warm, buttery goodness.
- Hot Cocoa: This rich and creamy drink enhances the cookie's flavor, providing a cozy warmth that makes every bite even sweeter.
- Vanilla Ice Cream: The cool creaminess of ice cream complements the soft, sweet cookies beautifully, offering a delightful contrast in texture.
- Fruit Platter: Fresh fruits, like strawberries and oranges, add a refreshing burst of flavor that balances the sweetness of the cookies.
- Coffee or Tea: The bitterness of a freshly brewed cup of coffee or tea is an excellent accompaniment that elevates the thumbprint cookies’ sweetness.
A simple yet elegant tea service can create a lovely afternoon tradition. Imagine sharing stories while indulging in these treats.
- Christmas Cheer Mix: Pair your cookies with a festive snack mix of nuts, chocolate, and dried fruits for a delightful variety in textures and flavors.
- Milk: Classic cold milk never fails; it's comforting and enhances the sweet, buttery flavors of your delicious cookies.
Whether you are hosting a holiday gathering or enjoying a quiet night at home, these pairings will surely make your Christmas thumbprint cookies even more irresistible.

Christmas Thumbprint Cookies Recipe FAQs
How do I choose the best jam for my thumbprint cookies?
Absolutely! When selecting jam or preserves for your Christmas thumbprint cookies, look for seedless options to avoid any unwanted texture. Raspberry and strawberry are classic choices that provide a sweet contrast to the buttery cookies, but feel free to experiment with citrus or even chocolate spreads for a unique spin. Just ensure the jam complements the overall flavor of the cookie!
How should I store my thumbprint cookies after baking?
To keep your Christmas thumbprint cookies fresh, store them in an airtight container at room temperature for up to 5 days. If you're planning to enjoy them later, you can refrigerate them for up to 10 days, though be aware that they might lose some of their delightful texture. Just ensure they're sealed properly to maintain their delicious flavor!
Can I freeze my Christmas thumbprint cookies?
Yes, you can freeze your cookies! To do this, place the baked and cooled Christmas thumbprint cookies in a single layer on a baking sheet. Once frozen solid, transfer them to an airtight container or a freezer bag. They can stay fresh for up to 3 months! When you're ready to enjoy them, simply thaw at room temperature. If you like, you can add a bit of fresh jam to the indent after reheating for that fresh-out-of-the-oven experience!
What should I do if my cookies spread too much during baking?
If your cookies spread too much, it might be due to warm dough or insufficient chilling time. To prevent this, ensure you chill the dough for at least 30 minutes, as this helps it firm up before baking. If they still spread unexpectedly, you can try re-indenting them right after baking while they’re still warm to add more jam. Remember, a good indent is crucial to keep the jam from overflowing!
Are these cookies pet-friendly?
No, Christmas thumbprint cookies are not suitable for pets, particularly due to the sugar and other ingredients like butter. It's best to keep these festive treats away from your furry friends to ensure their safety and health.
What’s the best way to ensure my cookies are evenly baked?
To achieve uniformly baked Christmas thumbprint cookies, place the baking sheet in the center of your oven—this allows for even heat distribution. Keep an eye on them while baking; typically, they need about 11 minutes. If your oven has hot spots, consider rotating the baking sheet halfway through baking to ensure that all cookies bake evenly. Enjoy the delightful process and the delicious results!
Irresistibly Festive Christmas Thumbprint Cookies Recipe
Ingredients
- 1 cup unsalted butter
- ¾ cup sugar
- ¼ cup light brown sugar
- 1 egg yolk
- 1 teaspoon vanilla extract
- 2 cups all-purpose flour
- 2 tablespoons cornstarch
- ¼ teaspoon salt
- ¼ cup sugar for rolling
- 1 cup jam or preserves
Instructions
- Cream the softened unsalted butter in a mixing bowl until smooth and pale.
- Gradually add in granulated sugar and light brown sugar, beating until creamy.
- Add egg yolk and vanilla extract, mixing thoroughly.
- In another bowl, whisk together flour, cornstarch, and salt. Gradually add to wet ingredients.
- Scoop about one tablespoon of the mixture and shape into a ball. Optionally roll in sugar.
- Press your thumb into the center of each cookie ball to create an indent.
- Chill the dough for about 30 minutes then preheat the oven to 375°F (190°C).
- Microwave jam for about 10 seconds to soften, then fill each indent.
- Bake for about 11 minutes until edges are golden.
- Cool on the baking sheet for 5 minutes, then transfer to a wire rack.
Notes
- Ensure butter is softened for easy mixing.
- Avoid overmixing to prevent tough cookies.
- Press the indent deep enough to hold jam.
- Add jam if forgotten right after removing from the oven.
- Store in an airtight container for freshness.