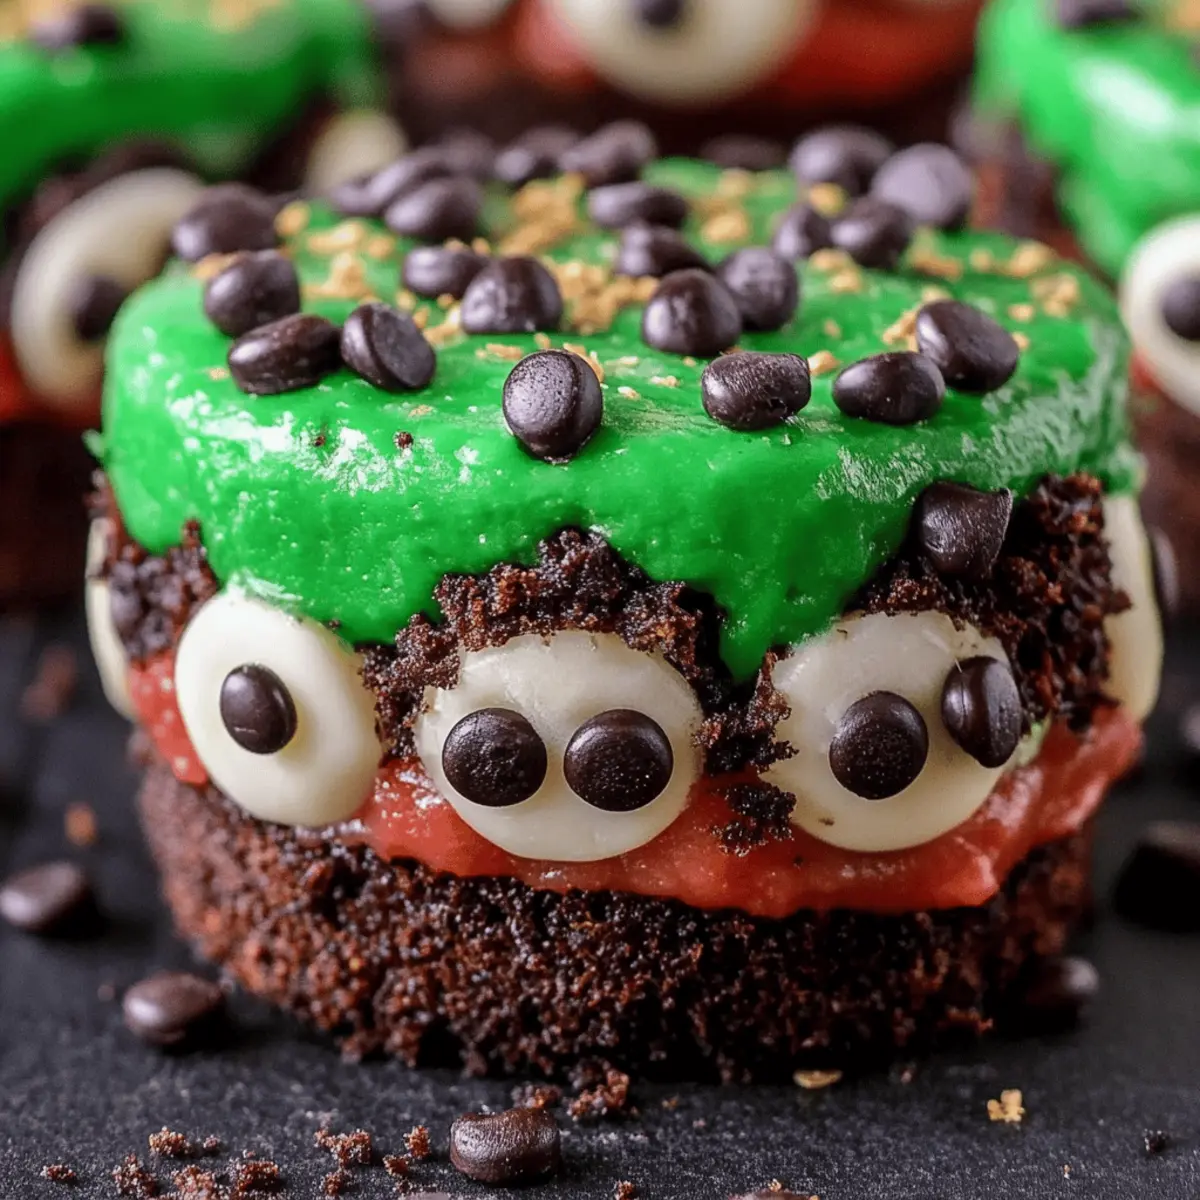
As I was rummaging through my pantry, I stumbled upon a forgotten package of OREO cookies and a burst of inspiration struck me. What better way to celebrate the Halloween season than with delightful Frankenstein Mini Cheesecakes? This playful recipe transforms classic cheesecake into a spooky treat that’s not only a showstopper but also a breeze to prepare! With just 15 minutes of prep time, you’ll create these adorable little monsters that are perfect for parties or family fun nights. Plus, they’re a fantastic way to lure those tired of fast food back into the kitchen. Are you ready to bring some delicious fright to your dessert table? Let’s dive into this sweet and spooky adventure!
Why Are These Mini Cheesecakes Irresistible?
Deliciously unique: These Frankenstein Mini Cheesecakes are unlike any other dessert, combining creamy cheesecake with a fun Halloween twist.
Quick and easy: With just 15 minutes of prep time, you can whip up a batch that will impress your guests without spending hours in the kitchen.
Fun for all ages: Perfect for parties, these spooky treats bring excitement to any gathering, making them a hit with both kids and adults alike.
Customizable toppings: Get creative! Use your favorite candies or chocolates for decorating, and make each cheesecake a masterpiece.
Perfect portion size: These mini cheesecakes are just the right size to satisfy your sweet cravings without overindulging.
Let your creativity shine and discover new flavors with these delightful treats! If you love easy dessert recipes, this one is sure to become a favorite.
Frankenstein Mini Cheesecakes Ingredients
• Get ready to create a spooky sensation with these delicious treats!
For the Cheesecake Filling
- 16 ounces Cream cheese – soften this to achieve a smooth and creamy texture for your cheesecake.
- 1 cup Sugar – sweeten the mix to perfection; adjust according to your taste preference.
- 3 Eggs – these help bind the filling together while adding richness.
- 2 tablespoons Flour – gives the cheesecake structure and helps set its consistency.
- 1 ½ teaspoons Vanilla – enhances the flavor, making every bite delightful.
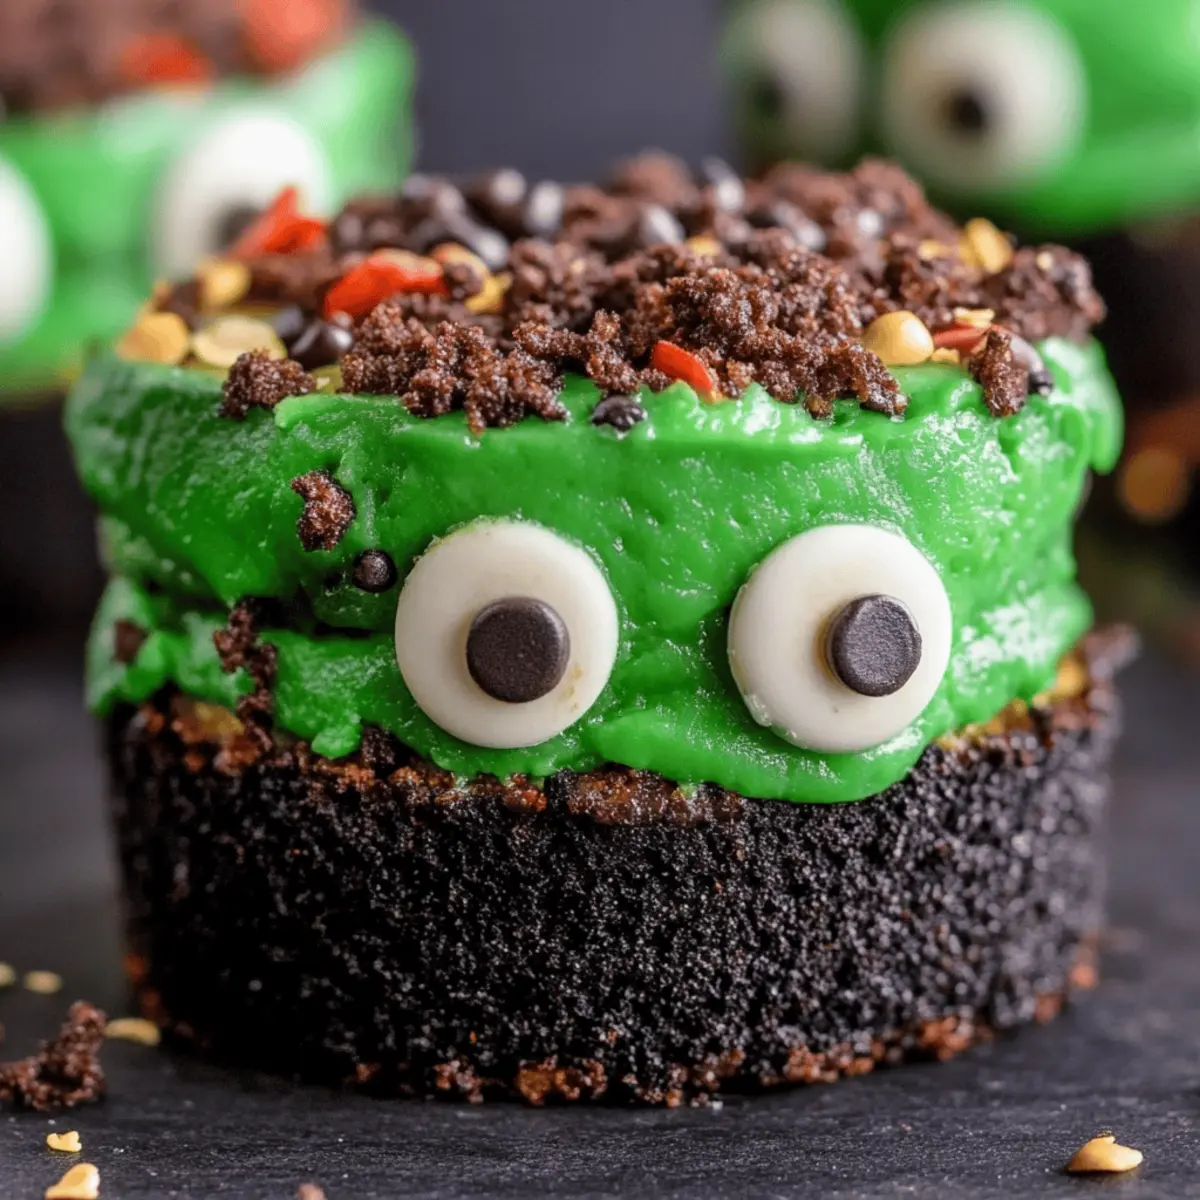
- 20 drops Green food coloring – this is what gives your Frankenstein cheesecakes their iconic hue!
For the Cookie Crust
- 24 OREO cookies, crushed – adds a deliciously chocolatey base that complements the sweet cheesecake beautifully.
- 2 tablespoons Butter, melted – binds the crushed cookies together for a sturdy crust.
For the Fun Toppings
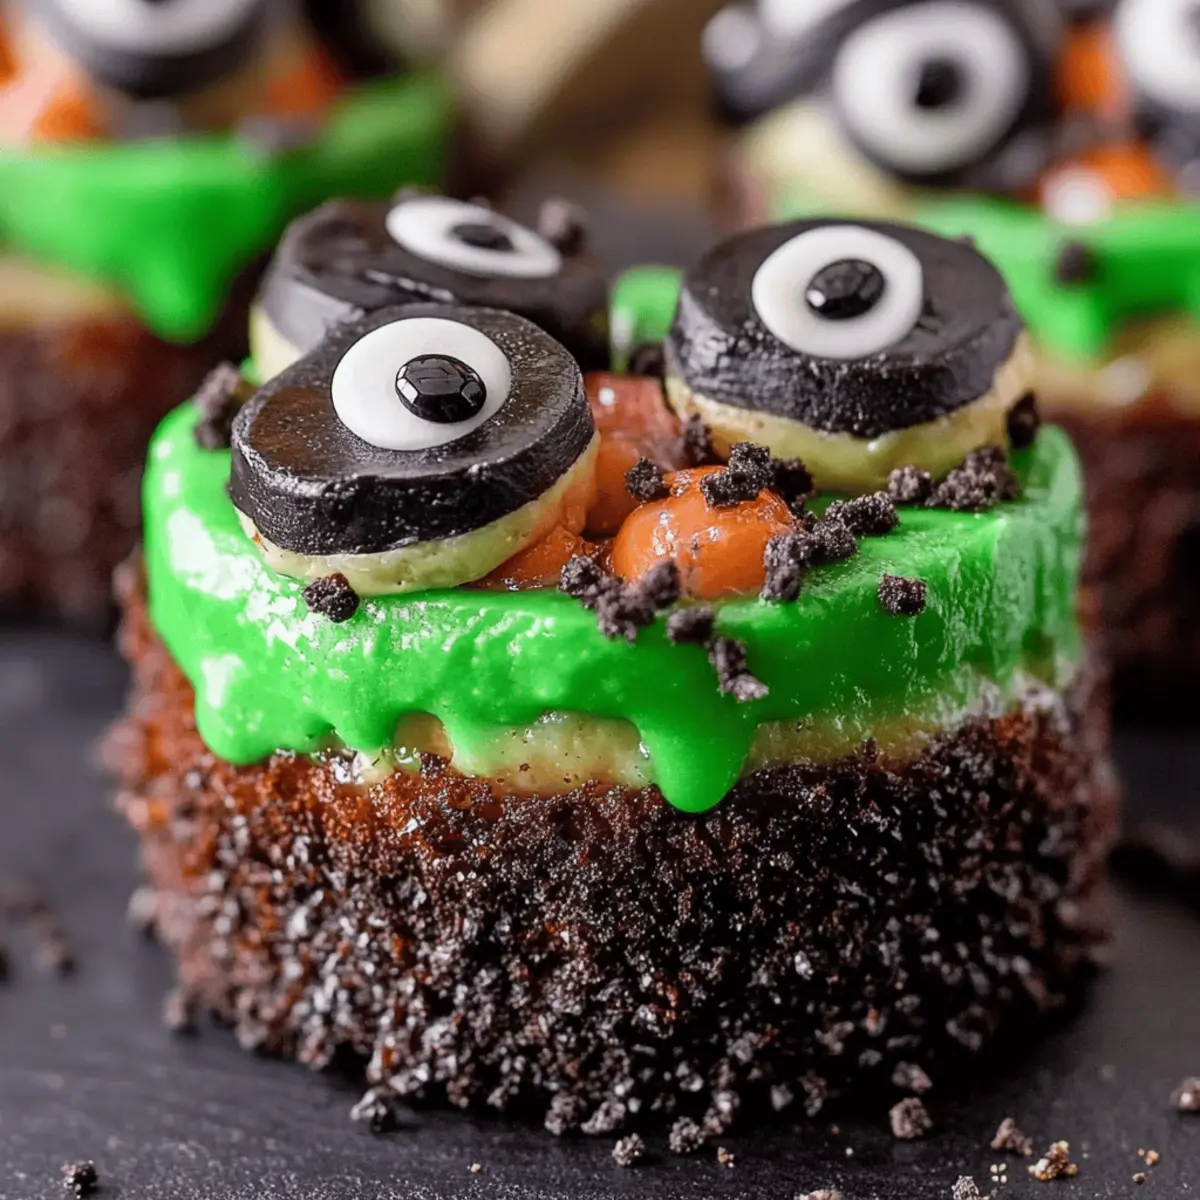
- 32 Edible Eyes – these little decorations are essential for bringing your spooky mini cheesecakes to life!
- 1 cup Chocolate chips, melted – a gooey layer that adds extra flavor and fun for decoration.
- 1 cup Chocolate Sprinkles – provides an exciting crunch and festive look to your cheesecakes.
- 32 Chocolate Chips – use these to create whimsical facial expressions on your Frankenstein treats!
Now that you're all set with the ingredients for these delightful Frankenstein Mini Cheesecakes, let the spooky fun begin!
Step‑by‑Step Instructions for Frankenstein Mini Cheesecakes
Step 1: Preheat the Oven
Begin by preheating your oven to 350°F (175°C). This will ensure the perfect baking temperature for your Frankenstein Mini Cheesecakes. While the oven heats up, prepare your mini cheesecake pan by lightly greasing it to prevent sticking later on.
Step 2: Make the Cookie Crust
In a mixing bowl, combine the crushed OREO cookies with melted butter. Stir until the cookies are evenly coated, creating a moist mixture. This will be your delicious crust. Once mixed, form the mixture into 1-inch balls and place them into the greased mini cheesecake pan, ensuring the crust is evenly distributed in each compartment.
Step 3: Press the Crust Firmly
With a tamper or the back of a spoon, press each cookie ball firmly into the bottom of the mini cheesecake pan. This creates a sturdy base for your cheesecakes. The crust should be fairly compact and level, ensuring it holds together beautifully once baked.
Step 4: Prepare the Cheesecake Filling
In a large mixing bowl, beat together the softened cream cheese, sugar, eggs, and vanilla extract using an electric mixer. Blend until the mixture is smooth and creamy, with no lumps remaining. This will be the rich filling for your Frankenstein Mini Cheesecakes, so take your time to achieve a nice consistency.
Step 5: Incorporate the Flour
Gradually add in the flour, continuing to mix until it's fully incorporated. This step is essential for giving your cheesecake its delightful structure. The mixture should now be thick and smooth, giving you a perfect canvas for the vibrant green color to come.
Step 6: Add the Green Food Coloring
Now, add the green food coloring to the cream cheese mixture. Stir until you achieve the desired shade of green, typically around 20 drops will do the trick. This will give your Frankenstein Mini Cheesecakes their signature look, making them fun and festive for any Halloween gathering.
Step 7: Fill the Cheesecake Pan
Carefully pour the cheesecake filling over the crusts in each mini cheesecake compartment, filling them nearly to the top. This will ensure fluffy cheesecakes. Gently tap the pan on the counter to remove any air bubbles and allow for an even bake.
Step 8: Bake the Cheesecakes
Place the filled mini cheesecake pan in the preheated oven and bake for 15 minutes. Keep an eye on them; you want the tops to look set but a little jiggle in the center is okay. This indicates a perfectly creamy texture once cooled.
Step 9: Cool Completely
Remove the pan from the oven and allow the cheesecakes to cool at room temperature for a few minutes. Then, transfer them to the refrigerator and let them chill completely for at least 1 hour. This cooling time is crucial for the cheesecakes to set properly.
Step 10: Remove and Decorate
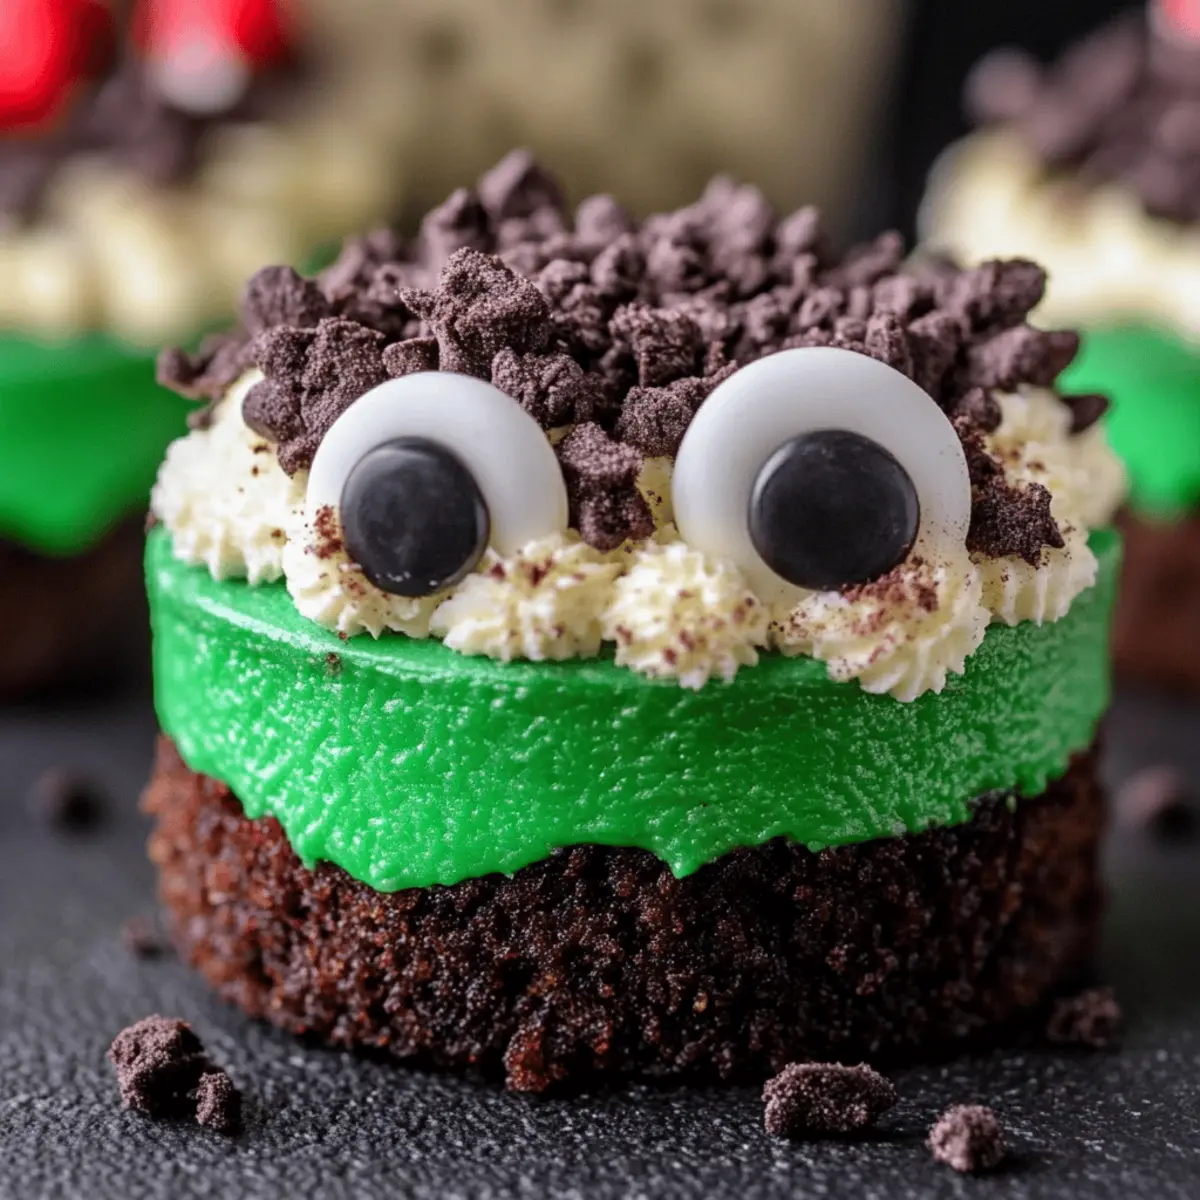
Once cooled, gently remove the cheesecakes from the pan. For decoration, dip each cheesecake into melted chocolate, allowing any excess to drip off. Immediately sprinkle them with chocolate sprinkles for a festive touch. This will be the fun part – transforming them into your spooky Frankenstein creations!
Step 11: Add Final Touches
Using a piping bag or a spoon, drizzle melted chocolate on top of each cheesecake to create fun faces. Attach the edible eyes and press in chocolate chips to make the features of Frankenstein. Let your creativity shine as you give each mini cheesecake its unique personality!
Tips for the Best Frankenstein Mini Cheesecakes
-
Room Temperature Cream Cheese: Allowing cream cheese to soften fully will result in a smoother, creamier filling. This step is key for achieving that lush texture in your Frankenstein Mini Cheesecakes.
-
Don’t Overmix: When adding the flour, mix just until combined. Overmixing can lead to a dense cheesecake rather than the light and fluffy delight we all love.
-
Check for Doneness: Keep an eye on your cheesecakes while baking. They should be set around the edges but slightly jiggly in the center; this ensures a creamy texture after cooling.
-
Cool Properly: Allow the cheesecakes to cool completely at room temperature before refrigerating. This prevents them from sinking or cracking during the chilling process.
-
Get Creative: The fun part of decorating your Frankenstein Mini Cheesecakes is making each one unique. Use different candies to create various expressions and let your imagination run wild.
-
Avoid Sticking: Lightly greasing your mini cheesecake pan is essential. This simple step helps ensure that your cheesecakes come out easily and retain their adorable shapes.
Storage Tips for Frankenstein Mini Cheesecakes
Fridge: Store uneaten Frankenstein Mini Cheesecakes in an airtight container in the fridge for up to 3 days. This keeps them fresh and creamy for your next snack.
Freezer: You can freeze these mini cheesecakes for up to 3 months. Wrap each cheesecake tightly in plastic wrap and then in foil to prevent freezer burn.
Reheating: Thaw frozen cheesecakes overnight in the refrigerator before serving. Enjoy them cold, or for a warm treat, microwave for 10-15 seconds just before enjoying!
Decorations: If decorated, keep in mind that toppings like chocolate sprinkles may lose their crunch after freezing, so add fresh sprinkles just before serving.
Frankenstein Mini Cheesecakes Variations & Substitutions
Feel free to let your imagination run wild and personalize these mini cheesecakes to suit your taste!
- Gluten-Free: Substitute regular flour with almond flour or gluten-free baking flour for a gluten-free delight.
- Flavor Infusion: Add a teaspoon of mint extract for a refreshing twist that complements the rich cheesecake.
- Dairy-Free: Use plant-based cream cheese and dairy-free chocolate for a delicious vegan version everyone can enjoy.
- Fruit Toppings: Top the cheesecakes with fresh raspberries or strawberries for a pop of color and natural sweetness.
- Nutty Addition: Incorporate crushed nuts like pecans or walnuts into the crust for added crunch and flavor. These add a delightful texture that pairs wonderfully with the smooth cheesecake.
- Heat It Up: If you love a spicy kick, mix a pinch of cayenne pepper into the cheesecake batter for a unique flavor profile. You may be surprised at how well spice complements the sweetness!
- Different Colors: Swap the green food coloring for orange or purple to create mini cheesecakes for different fun occasions throughout the year.
- Choco-Hazelnut Delight: Drizzle some Nutella instead of melted chocolate for a rich, chocolate-hazelnut flavor that takes these cheesecakes to another level.
Each variation is an opportunity to discover new flavor combinations. If you enjoy playful and customized sweets, don't forget to check out these other creative dessert recipes as well!
Make Ahead Options
These Frankenstein Mini Cheesecakes are perfect for meal prep, making your spooky dessert experience a breeze! You can prepare the cookie crust and fill the cheesecake mixture up to 24 hours in advance. First, mix the crushed OREO cookies with melted butter and store the crust in an airtight container. Then, prepare the cheesecake filling, pour it over the crusts in the mini cheesecake pan, and cover with plastic wrap before refrigerating. When you're ready to serve, simply bake the cheesecakes as directed, and decorate them with chocolate and sprinkles after they have cooled completely. This way, you’ll enjoy delicious, hassle-free treats that are just as delightful even when prepared ahead!
What to Serve with Frankenstein Mini Cheesecakes?
Take your dessert experience to the next level with these delightful pairings that perfectly complement your spooky treats.
-
Whipped Cream:
Light and airy, whipped cream adds a creamy contrast that enhances the sweetness of the cheesecakes. -
Berry Compote:
A tangy berry compote provides a fresh burst of flavor that cuts through the richness of the cheesecake. -
Chocolate-Covered Strawberries:
These chocolate-dipped berries offer a fun, fruity addition that pairs beautifully with the chocolate elements in your mini cheesecakes. -
Vanilla Ice Cream:
A scoop of creamy vanilla ice cream merges perfectly with your Frankenstein Mini Cheesecakes, creating a luscious dessert duo. -
Caramel Sauce:
Drizzle some warm caramel over your cheesecakes for a sweet, buttery flavor that contrasts beautifully with the chocolate and cream. -
Pumpkin Spice Latte:
Embrace the season with this cozy drink! The warm spices complement the sweet notes of the cheesecakes wonderfully, making each bite even more delightful. -
Hot Chocolate:
For a comforting treat, serve with rich hot chocolate; its chocolatey depth resonates well with the flavors of the cheesecakes. -
Halloween-Themed Punch:
A fun, fruity punch adds a festive touch to your dessert table, making the whole experience feel like a lively celebration.
Elevate your spooky gathering with these pairings and watch your guests delight in every delicious bite!
Frankenstein Mini Cheesecakes Recipe FAQs
What type of cream cheese is best for this recipe?
Absolutely! Use full-fat cream cheese for the creamiest texture. Make sure it’s softened to room temperature, as this helps achieve a smooth filling without lumps.
How should I store leftover mini cheesecakes?
For optimal freshness, store your Frankenstein Mini Cheesecakes in an airtight container in the fridge for up to 3 days. This keeps them deliciously creamy and ready to enjoy later!
Can I freeze Frankenstein Mini Cheesecakes?
Yes, you can freeze these delightful treats! Wrap each cheesecake individually in plastic wrap, followed by aluminum foil to prevent freezer burn. They can be stored in the freezer for up to 3 months.
How do I properly thaw frozen cheesecakes?
To thaw, place the wrapped cheesecakes in the refrigerator overnight. This gentle method ensures they retain their texture. For a warm option, you can microwave for 10-15 seconds before serving!
What if my cheesecakes crack during baking?
Very! If cracks appear, don't worry! They’re often a result of overbaking or rapidly changing temperatures. Keep an eye on them in the oven, and let them cool gradually at room temperature before refrigerating to avoid sudden temperature shifts.
Are these cheesecakes suitable for those with dietary allergies?
Be cautious! This recipe contains dairy, eggs, and gluten. For a gluten-free version, you can substitute OREO cookies with gluten-free alternatives. Always check labels for possible allergens if serving to guests with dietary restrictions.
Deliciously Spooky Frankenstein Mini Cheesecakes to Delight
Equipment
- Mini cheesecake pan
- Mixing bowls
- Electric mixer
- Piping bag
Ingredients
For the Cheesecake Filling
- 16 ounces Cream cheese softened
- 1 cup Sugar adjust to taste
- 3 large Eggs
- 2 tablespoons Flour
- 1.5 teaspoons Vanilla
- 20 drops Green food coloring
For the Cookie Crust
- 24 cookies OREO cookies, crushed
- 2 tablespoons Butter, melted
For the Fun Toppings
- 32 Edible Eyes
- 1 cup Chocolate chips, melted
- 1 cup Chocolate Sprinkles
- 32 chips Chocolate Chips
Instructions
Step-by-Step Instructions
- Preheat your oven to 350°F (175°C). Lightly grease the mini cheesecake pan.
- Combine crushed OREO cookies with melted butter in a mixing bowl and stir until evenly coated.
- Press cookie mixture firmly into the bottom of the mini cheesecake pan.
- Beat together the softened cream cheese, sugar, eggs, and vanilla extract until smooth and creamy.
- Gradually add flour, mixing until fully incorporated.
- Add green food coloring to the cream cheese mixture and stir until the desired shade is achieved.
- Pour the cheesecake filling over the crusts, filling nearly to the top, and tap the pan to remove air bubbles.
- Bake for 15 minutes until tops are set but a little jiggle in the center is acceptable.
- Cool at room temperature for a few minutes then transfer to the refrigerator to chill for at least 1 hour.
- Once cooled, dip each cheesecake into melted chocolate and sprinkle with chocolate sprinkles.
- Drizzle melted chocolate on top and attach edible eyes and chocolate chips for decoration.