As the leaves turn and autumn settles in, I can't help but bring a little magic to the kitchen, especially when it comes to festive treats like Halloween Cake Pops. These delightful bites not only spark joy with their whimsical designs but also offer a fun and easy way to engage the whole family in a creative cooking adventure. Imagine rolling moist cake mixed with frosting into perfect little spheres, eagerly dipping them in vibrant candy melts, and adorning them with playful sprinkles and candy eyeballs. Not only are these cake pops a crowd-pleasing addition to any Halloween gathering, but they're also a perfect way to use up leftover cake mix. Plus, they double as charming decorations, making dessert time a thrilling surprise! Are you ready to conjure up these spooky-sweet delights that will be the highlight of your Halloween festivities?
Why Make Halloween Cake Pops?
Simplicity: These Halloween Cake Pops are incredibly easy to prepare, making them perfect for bakers of all skill levels – even beginners can get in on the fun!
Endless Creativity: With the option to use different cake flavors and vibrant candy melts, each batch can be as unique as your imagination allows.
Crowd-Pleaser: They’re a charming addition to any Halloween party, guaranteed to delight both kids and adults with their playful designs and delicious taste.
Versatile: Not just for Halloween, you can customize these pops for any occasion, making them a go-to dessert throughout the year.
Time-Saving: Perfect for using up leftover cake mix or frosting, these cake pops allow for a quick and satisfying treat with minimal waste.
Get ready to impress with these delightful bites and check out tips for more festive desserts that'll keep your Halloween spirit alive!
Halloween Cake Pops Ingredients
• • Prepare for delightful creations with these must-have ingredients!
For the Cake
- 1 box cake mix – Any flavor works, but chocolate and red velvet bring Halloween vibes!
- Eggs – Use as required by the cake mix box instructions for perfect texture.
- Oil – Follow the box instructions; it adds moisture to the cake.
- Water – Required amount is specified on the cake mix box to ensure proper consistency.
For the Cake Pop Base
- ½ to 1 cup frosting – Cream cheese or chocolate frosting elevates the flavor and binds the cake.
For the Coating
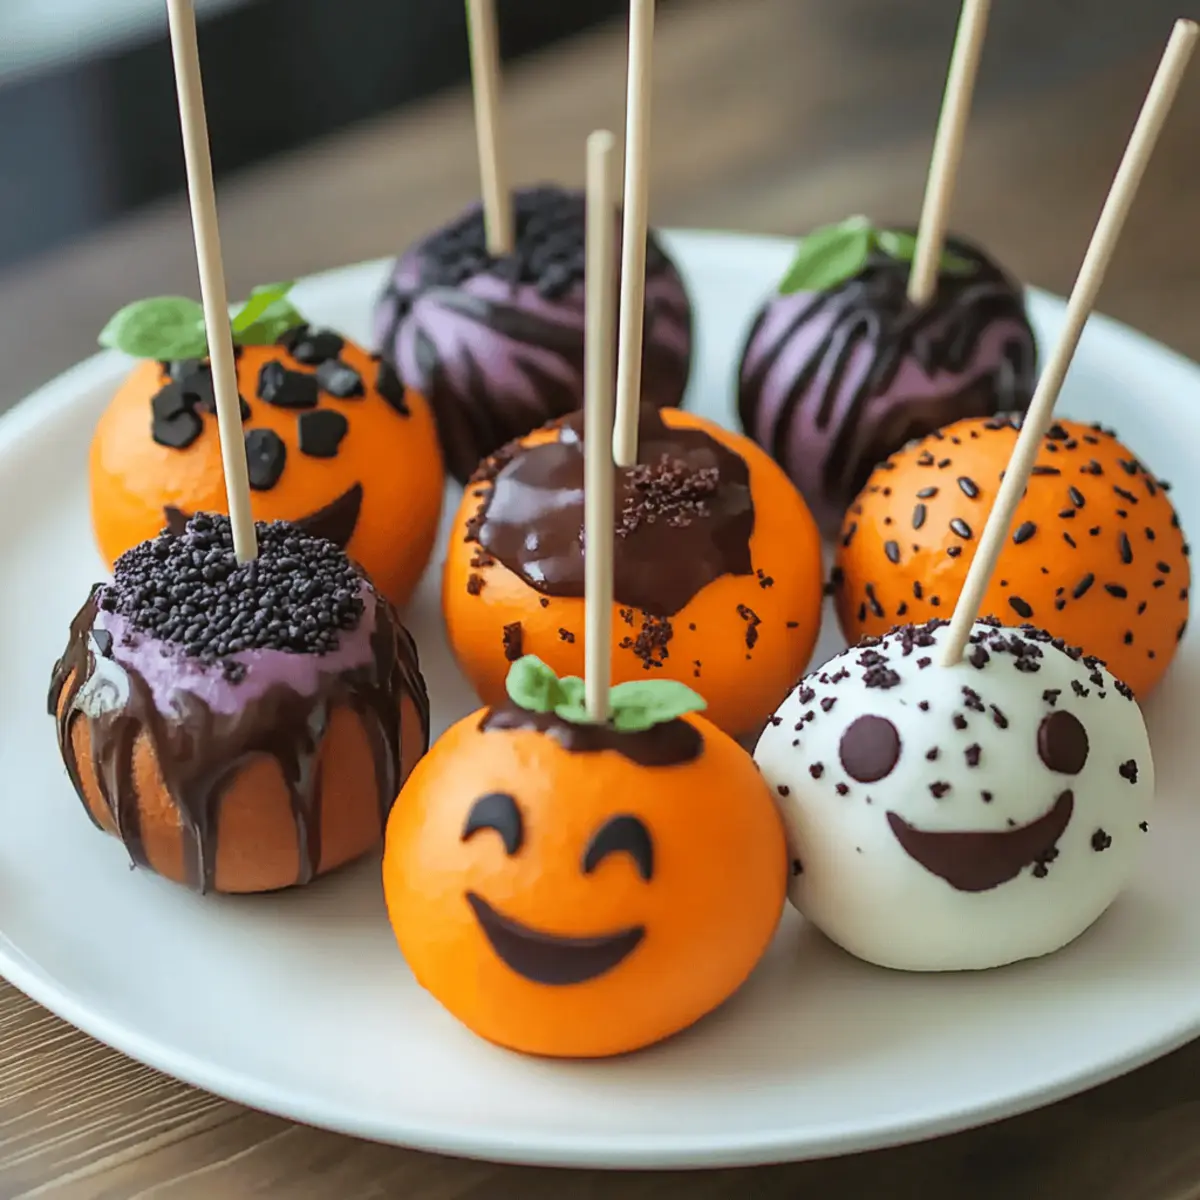
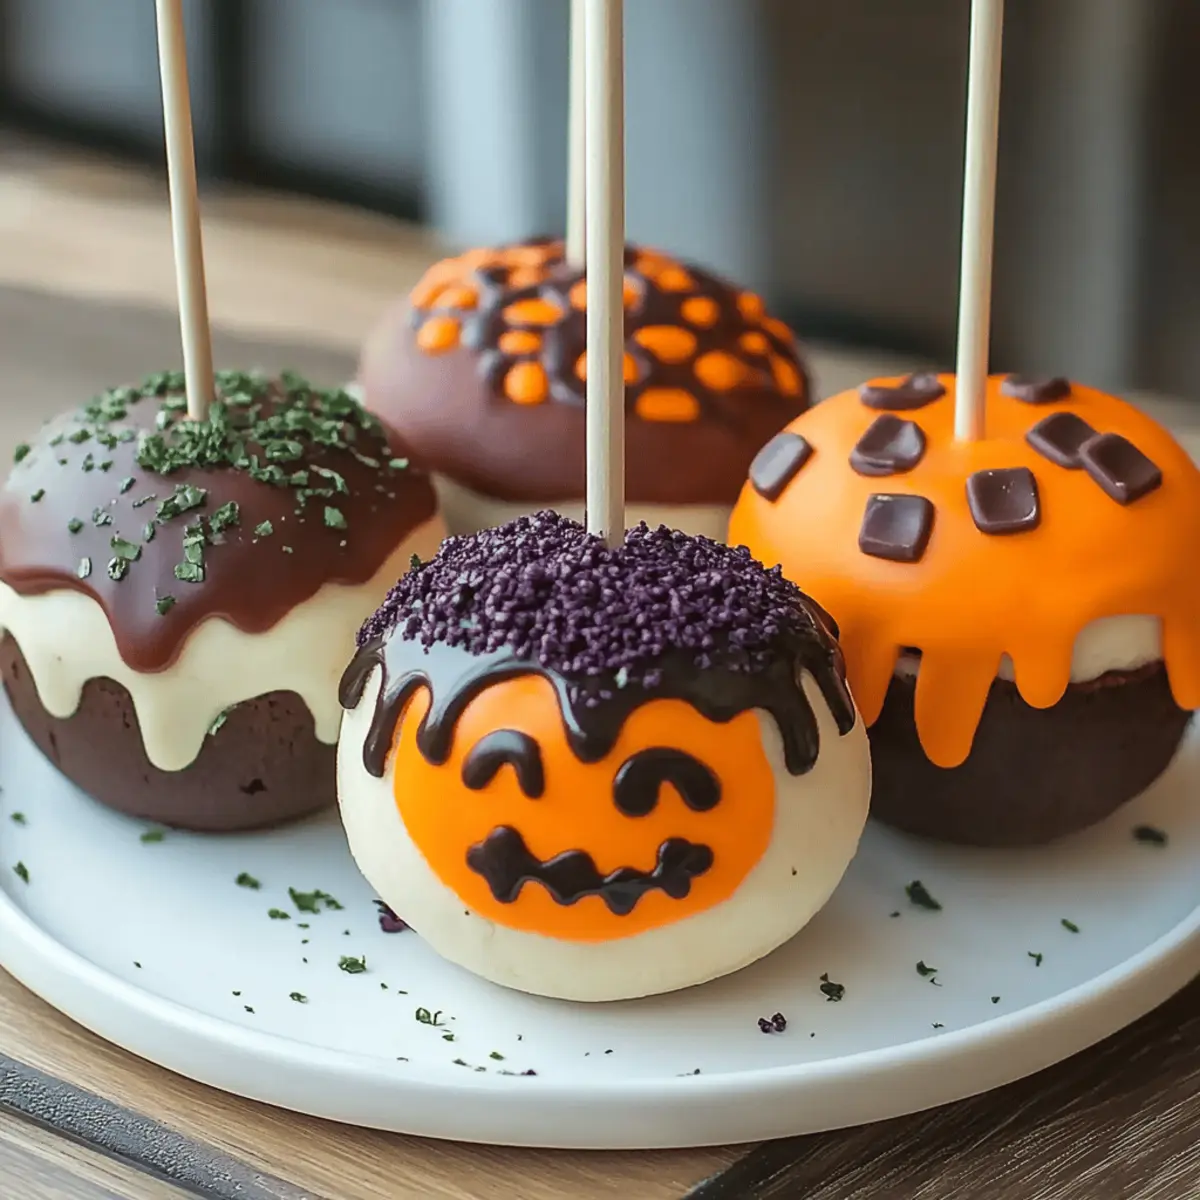
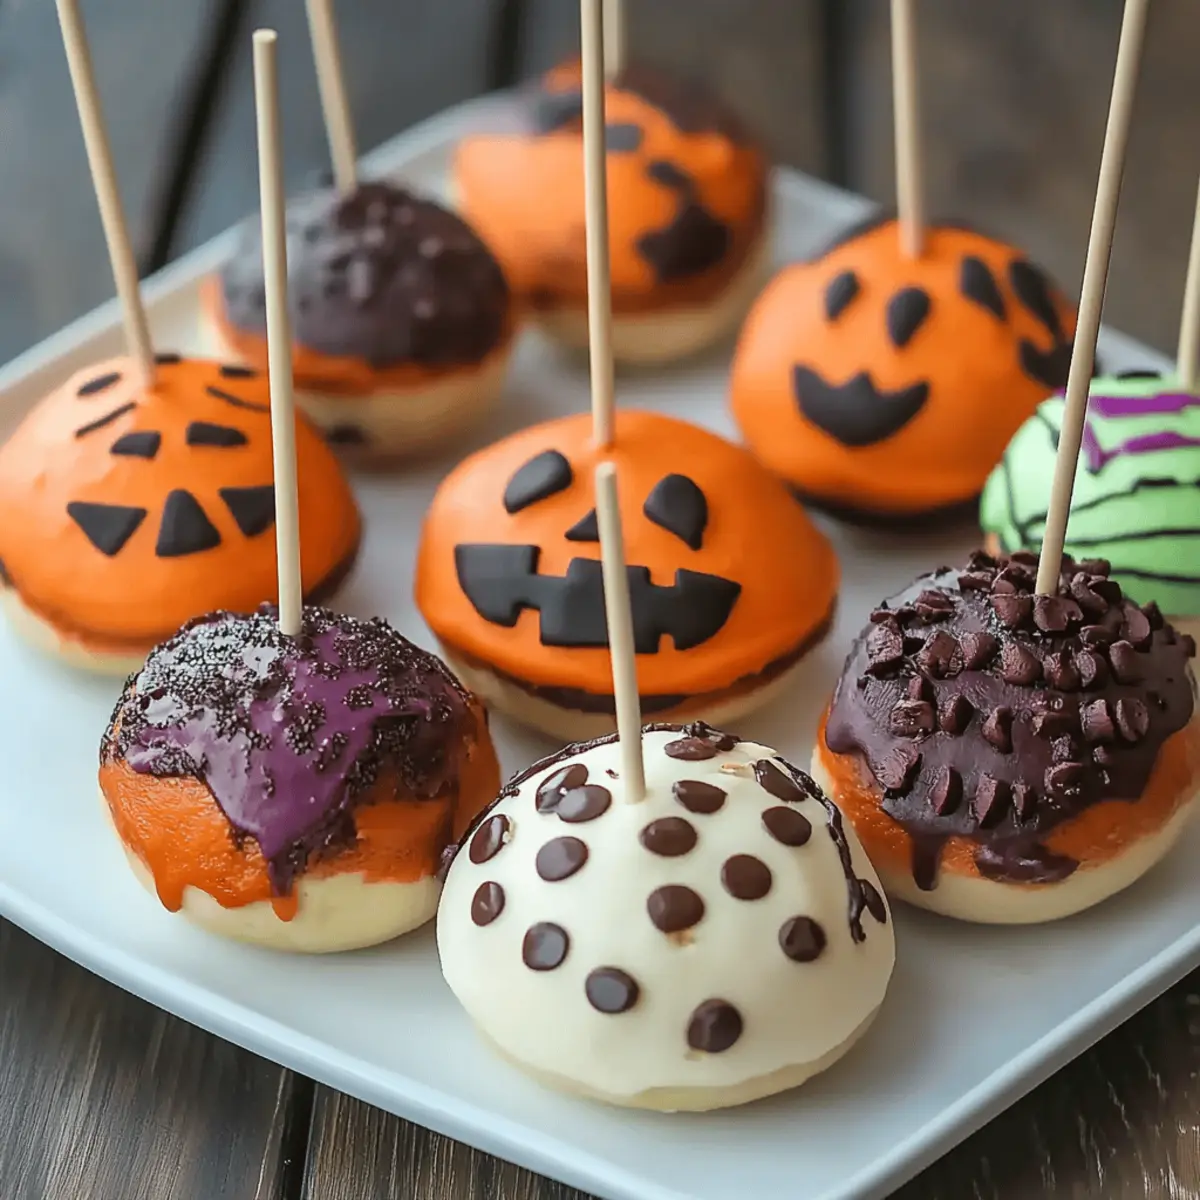
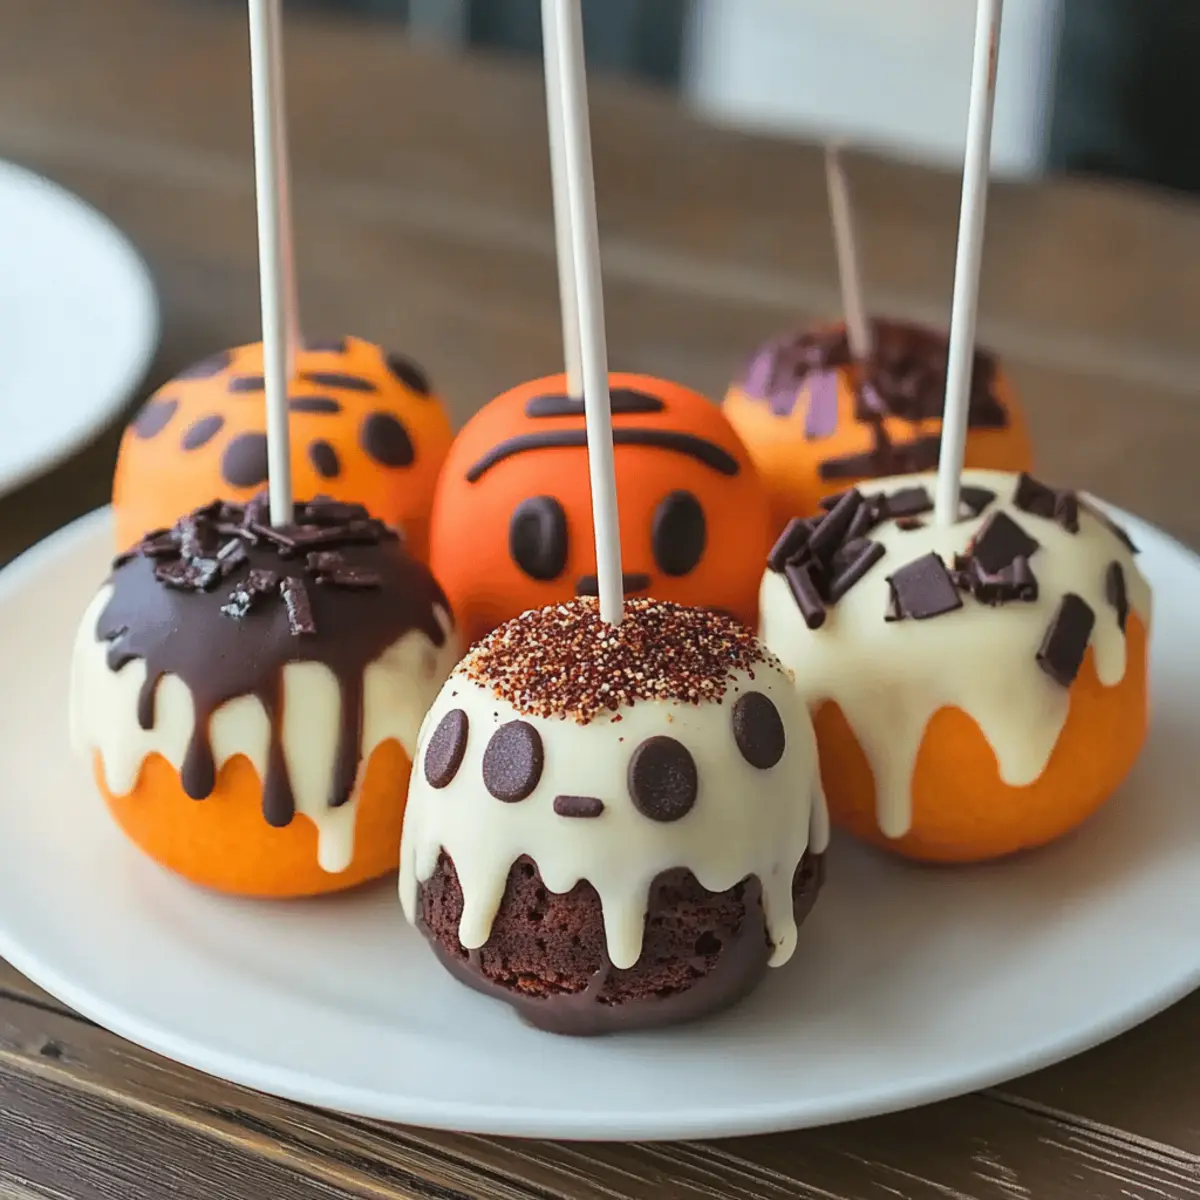
- 12 oz candy melts – Choose colors like orange, black, white, or green for that spooky look!
For Assembly
- 24 lollipop sticks – Essential for transforming cake balls into fun pops!
- Candy eyeballs – Add a quirky touch to each pop for a frightfully fun effect.
- Halloween sprinkles – Perfect for a festive finish that adds crunch and color.
- Colored sugar (orange, black, purple) – Use to enhance the Halloween aesthetic.
Optional Enhancements
- Gel food coloring – Ideal for tinting white chocolate to match your spooky theme.
- Red gel icing – Perfect for adding veins to your candy eyeballs for a creepy touch.
- Green frosting or fondant – Great for creating pumpkin stems that complete the look.
Unleash your creativity with these Halloween Cake Pops ingredients and get ready for a tasty treat that's sure to be a hit!
Step‑by‑Step Instructions for Halloween Cake Pops
Step 1: Bake the Cake
Prepare the box cake mix according to the instructions by preheating your oven to 350°F (175°C). Combine the required eggs, oil, and water in a mixing bowl, then add the cake mix, blending until smooth. Pour the batter into a greased cake pan and bake for 25 minutes, or until a toothpick inserted in the center comes out clean. Once baked, let the cake cool completely on a wire rack.
Step 2: Crumble the Cake
Once your cake is cool, transfer it to a large mixing bowl and crumble it into fine pieces using your hands or a fork. Make sure there are no large chunks left. Gradually add the frosting to the crumbled cake, mixing until the mixture has a sticky dough-like consistency that holds together when pressed. This is the base for your Halloween Cake Pops!
Step 3: Form the Cake Balls
Using a small cookie scoop or your hands, scoop out portions of the cake mixture and roll them into 1-inch balls. Place the shaped balls onto a lined baking sheet, ensuring they don’t touch. These will become the foundation of your Halloween Cake Pops! Once complete, refrigerate the cake balls for 1-2 hours or freeze them for 30 minutes until they are firm enough to handle.
Step 4: Prepare the Lollipop Sticks
Melt a small amount (about 2 oz) of candy melts in a microwave-safe bowl using 30-second intervals, stirring after each interval until smooth. Take each lollipop stick, dip one end into the melted chocolate, and then carefully insert it into the center of each chilled cake ball. This step secures the stick in place and helps the coating adhere. Chill the cake pops for another 10 minutes to allow the chocolate to set.
Step 5: Dip the Cake Pops
Melt the remaining candy melts according to the package instructions. Once fully melted, dip each cake pop into the melted chocolate, ensuring it’s completely covered. Gently tap the stick against the edge of the bowl to remove excess chocolate, creating a smooth coating. This is where your Halloween Cake Pops will start to take shape!
Step 6: Decorate Immediately
While the melted chocolate coating is still wet, get creative! Quickly sprinkle Halloween sprinkles, colored sugar, or attach candy eyeballs onto each cake pop. This will ensure that your decorations stick perfectly. Spend a moment to personalize each pop to make them truly festive and fun for Halloween!
Step 7: Let Cake Pops Dry
Place the decorated cake pops upright in a Styrofoam block or a cardboard box with holes poked in it. Allow them to dry completely at room temperature for about 15-20 minutes or pop them in the refrigerator for 10 minutes if you’re in a hurry. Once they are set, your delightful Halloween Cake Pops are ready to impress at any spooky gathering!
Halloween Cake Pops Variations
Feel free to get creative with your Halloween Cake Pops! Here are some delightful twists to make them your own.
-
Gluten-Free: Use a gluten-free cake mix to accommodate dietary needs without sacrificing flavor. Simple and delicious!
-
Vegan: Swap regular frosting for plant-based frosting and choose a vegan cake mix for a fully vegan dessert that everyone can enjoy.
-
Cheesecake Pops: Mix in cream cheese instead of frosting for a cheesecake-flavored delight that adds a lovely tang to each bite.
-
Flavor Infusion: Enhance with extracts like vanilla, almond, or peppermint to give your cake pops a unique flavor twist that’s sure to surprise!
-
Chocolate Lover: Use chocolate cake mix and chocolate candy melts for an indulgent double chocolate treat that will satisfy any sweet tooth.
-
Spicy Kick: Add a pinch of cayenne pepper or cinnamon to the cake mix for a surprising hint of heat that perfectly balances the sweetness.
-
Nutty Texture: Fold in chopped nuts or crushed cookies into the cake mixture for added texture and a crunchy finish.
-
Colorful Layers: Use multiple cake mixes and layer the crumbs for a visually stunning multi-colored cake pop that will wow your guests.
No matter which variations you choose, your Halloween Cake Pops are bound to become the talk of the party! And if you're looking for more inventive ideas, check out creative dessert inspirations to keep your baking adventures exciting!
Make Ahead Options
These Halloween Cake Pops are perfect for meal prep enthusiasts looking to save time on busy days! You can prepare the cake and form the cake balls up to 3 days in advance; simply refrigerate them tightly covered to keep them fresh. Alternatively, you can freeze the cake balls for up to 1 month and thaw them in the fridge overnight before continuing. Once you're ready to serve, dip the chilled cake balls into the melted candy melts and immediately decorate them with festive sprinkles and candy eyeballs. This method not only ensures that your Halloween Cake Pops turn out just as delicious but also allows you to enjoy a fun baking experience without the last-minute rush!
What to Serve with Halloween Cake Pops
As the festivities of Halloween unfold, delight in crafting a complete spread that will enchant your guests and bring your cake pops to life.
- Spooky Punch: A fruity punch filled with floating eyeball-shaped ice cubes will keep spirits high and thirst quenched during your gathering.
- Cheesy Spider Dip: A creamy cheese dip topped with black olive spiders adds a savory contrast, and it's perfect for chips—or even veggies!
- Ghoulish Veggie Platter: Arrange fresh vegetables in the shape of a spooky scene; serve with a vibrant dip that mirrors Halloween colors.
- Chocolate-Covered Pretzels: These sweet and salty treats provide a crunchy companion to the softness of the cake pops, drizzled in colorful candy melts for fun!
- Adorable Monster Cookies: Enchanting cookies featuring googly eyes and monster faces will not only match the whimsical theme but add variety to the dessert table.
- Pumpkin Spice Hot Chocolate: Warm up your guests with a cozy drink that embraces the season; its rich flavors pair beautifully with sweet cake pops!
- S’mores Bars: Chewy, gooey s’mores bars build a nostalgic vibe, rounding out your spooky treats with a little crunch that complements the pops.
Gather these delightful accompaniments, and let your Halloween celebration be one to remember alongside those charming Halloween Cake Pops!
Expert Tips for Halloween Cake Pops
Chill Well: Ensure your cake balls are properly chilled; this makes them easier to handle and prevents them from falling off the sticks during dipping.
Dipping Technique: When dipping into candy melts, don’t rush! Dip slowly for an even coat and tap gently to remove excess chocolate.
Creative Decorations: Let your Halloween spirit shine by incorporating themed sprinkles and edible decorations. Add candy eyeballs or colored sugar while the coating is still wet for the best adhesion.
Avoid Overmixing: When combining cake crumbs with frosting, don’t overmix. The mixture should be moist but still hold together; too much mixing can lead to dense pops.
Storage Tips: Keep your finished Halloween Cake Pops in an airtight container at room temperature or in the fridge to maintain their freshness and prevent melting.
Storage Tips for Halloween Cake Pops
Room Temperature: Store your Halloween Cake Pops in an airtight container at room temperature for up to 3 days to maintain their freshness.
Fridge: If you’d like to keep them longer, refrigerate the cake pops in a sealed container for up to a week. Make sure they are properly wrapped to avoid absorbing any refrigerator odors.
Freezer: For longer storage, you can freeze the cake pops. Place them in a single layer on a baking sheet until frozen, then transfer to a freezer-safe bag. They can be stored for up to 2 months.
Reheating: To enjoy frozen cake pops, let them thaw in the fridge overnight before serving. Avoid microwaving as this can melt the chocolate coating.
Halloween Cake Pops Recipe FAQs
How do I choose ripe ingredients for my Halloween Cake Pops?
Absolutely! The quality of your ingredients can make all the difference. For the cake mix, look for boxes that are within the expiration date. If you're using fresh eggs, choose those that are clean and free from cracks. For your frosting, ensure it’s well within its expiration on the label for the best taste and texture.
What is the best way to store Halloween Cake Pops and how long do they last?
Very good question! Store your Halloween Cake Pops in an airtight container at room temperature for up to 3 days. If you want them to last longer, refrigerate them for up to a week. Just be sure they are well wrapped to keep them from absorbing any other odors from your fridge!
Can I freeze Halloween Cake Pops for later use?
Yes, you can! To freeze your Halloween Cake Pops, place them in a single layer on a baking sheet until they're completely frozen—this will take about 1-2 hours. Then, transfer them to a freezer-safe bag or container and store for up to 2 months. When you’re ready to enjoy them, let them thaw overnight in the fridge for the best texture.
What if my chocolate coating is not smooth when dipping?
Oh no, that can be frustrating! If your candy melts aren't melting smoothly, try adding a small amount of coconut oil or vegetable oil to the melted chocolate. This will help thin it out for a smoother coating. Always melt in short intervals and stir frequently to avoid overheating!
Are there any dietary considerations for Halloween Cake Pops, such as allergies?
Definitely! Be mindful that traditional cake mix and frostings may contain common allergens like gluten, dairy, and eggs. If preparing for guests, you can look for gluten-free cake mix options and use dairy-free frosting if needed. Always check labels for specifics, and feel free to tweak the recipe to suit dietary needs, even considering your pets by keeping unwrapped chocolate away from them.
Can I use leftover cake for my Halloween Cake Pops?
Absolutely! Leftover cake can be a fantastic way to whip up these tasty treats. Just crumble the leftover cake into fine crumbs, mix in your frosting, and follow through with the rolling and coating steps as you would with freshly baked cake. This not only reduces waste but also lets you enjoy a mix of flavors in your cake pops!
Delightful Halloween Cake Pops for Spooky Sweet Treats
Equipment
- Mixing bowl
- Baking Sheet
- Lollipop sticks
- microwave-safe bowl
- Styrofoam block
Ingredients
For the Cake
- 1 box cake mix Any flavor works, but chocolate and red velvet bring Halloween vibes!
- units Eggs Use as required by the cake mix box instructions for perfect texture.
- cups Oil Follow the box instructions; it adds moisture to the cake.
- cups Water Required amount is specified on the cake mix box.
For the Cake Pop Base
- 0.5 to 1 cup frosting Cream cheese or chocolate frosting elevates the flavor and binds the cake.
For the Coating
- 12 oz candy melts Choose colors like orange, black, white, or green for that spooky look!
For Assembly
- 24 units lollipop sticks Essential for transforming cake balls into fun pops!
- units candy eyeballs Add a quirky touch to each pop for a frightfully fun effect.
- units Halloween sprinkles Perfect for a festive finish that adds crunch and color.
- cups colored sugar Use orange, black, and purple to enhance the Halloween aesthetic.
Optional Enhancements
- units gel food coloring Ideal for tinting white chocolate to match your spooky theme.
- units red gel icing Perfect for adding veins to your candy eyeballs for a creepy touch.
- units green frosting or fondant Great for creating pumpkin stems that complete the look.
Instructions
Step-by-Step Instructions
- Preheat your oven to 350°F (175°C) and prepare cake mix according to instructions, baking for 25 minutes. Let cool.
- Crumble the cooled cake into fine pieces and mix with frosting until it holds together.
- Roll the mixture into 1-inch balls and refrigerate or freeze until firm enough to handle.
- Melt about 2 oz of candy melts and dip lollipop sticks before inserting them into each chilled cake ball.
- Dip each cake pop in melted candy melts, ensuring complete coverage, and remove excess coating.
- While the coating is wet, decorate with sprinkles, sugar, or candy eyeballs.
- Place pops upright to dry for 15-20 minutes at room temperature or refrigerate for 10 minutes to speed up the process.