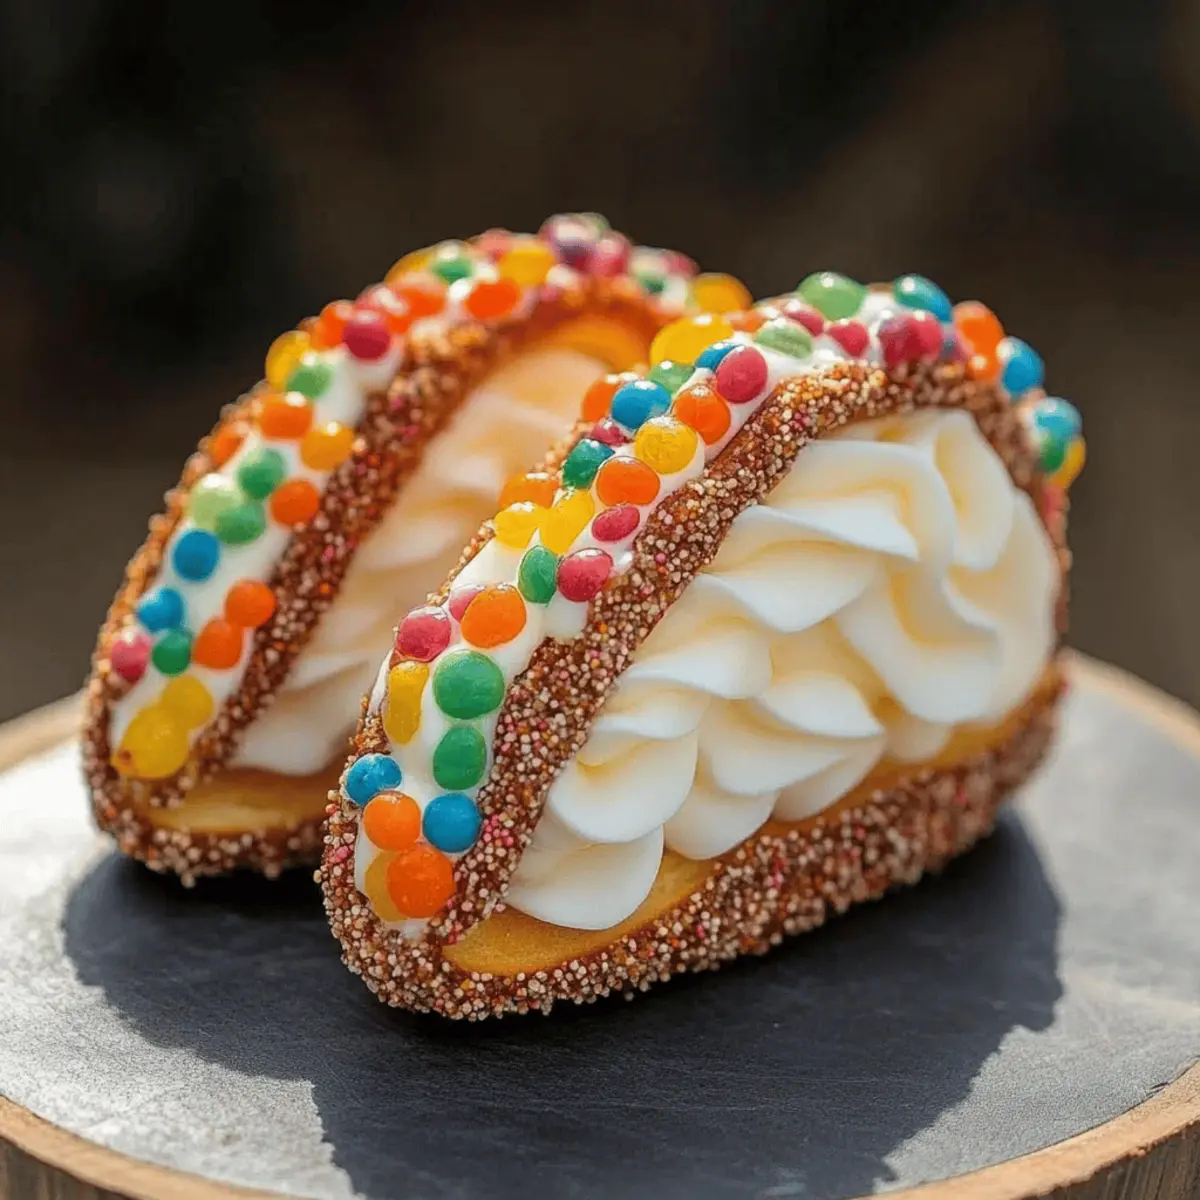
As I rummaged through my pantry for a light-hearted dessert idea, my gaze landed on a box of Fruity Pebbles, and in an instant, inspiration struck—Fruity Pebbles Cheesecake Tacos! These delightful treats blend the nostalgia of childhood cereal with the creamy indulgence of cheesecake, creating a fun, playful dessert that's bound to bring smiles all around. Not only are they quick to whip up, taking just 20 minutes of active prep time, but they also make a fabulous centerpiece for any gathering or cozy night in. Trust me, these colorful tacos are a fantastic way to elevate your dessert game with minimal effort. Are you ready to embark on this tasty adventure?

Why try Fruity Pebbles Cheesecake Tacos?
Unforgettable fun: These tacos transform the classic cheesecake into a whimsical dessert that delights both kids and adults alike.
Quick to make: With only 20 minutes of active prep, you can whip these up in no time, making it perfect for last-minute cravings or surprise guests.
Creative twist: Imagine enjoying your favorite fruity cereal in a taco form—it's a nostalgic yet modern take that’s sure to impress.
Guilty pleasure: The creamy cheesecake filling pairs beautifully with the crunchy cereal shell, creating an irresistible blend of textures that everyone will love.
Versatile: Not just for dessert—these Fruity Pebbles Cheesecake Tacos can be customized with different toppings or flavors to match any occasion.
Crowd-pleaser: Serve them at your next gathering and watch as they become the star of the dessert table, leaving guests asking for the recipe. For more delightful ideas, check out my incredible cheesecake variations and easy taco recipes for your next dinner party!
Fruity Pebbles Cheesecake Tacos Ingredients
For the Cereal Shell
- Fruity cereal – 3 cups; this is the star component that gives a delightful crunch and vibrant color.
- Unsalted butter – ½ cup, melted; helps the cereal stick together for a sturdy shell.
For the Cheesecake Filling
- Cream cheese – 8 oz, softened to room temperature; this forms the creamy base of your cheesecake filling.
- Powdered sugar – ½ cup, sifted; sweetens the filling while providing a smooth texture.
- Pure vanilla extract – 1 tsp; enhances the flavor profile of your cheesecake.
- Whipped cream – 1 cup; lightens the filling for a fluffy consistency.
For Garnishing
- Additional fruity cereal – for garnish; adds a fun, crunchy topping to finish your Fruity Pebbles Cheesecake Tacos beautifully.
Step‑by‑Step Instructions for Fruity Pebbles Cheesecake Tacos
Step 1: Prepare the Cereal Shell
In a mixing bowl, combine 3 cups of fruity cereal with ½ cup of melted unsalted butter. Stir thoroughly until each piece is coated in butter, creating a delectable, crunchy mixture. This should take about 2 minutes. Once mixed, the vibrant colors of the cereal should pop against the glossy butter.
Step 2: Shape the Shells
Firmly press the cereal mixture into small taco-shaped molds or muffin tins. Use your fingers or a spoon to pack the mixture tightly, ensuring a sturdy shell that holds its shape. This should take approximately 5-7 minutes. Chill the formed shells in the refrigerator for at least 30 minutes, allowing them to set and firm up.
Step 3: Make the Cheesecake Filling
While the shells are chilling, use a hand mixer to beat 8 oz of softened cream cheese in a bowl until it is light and fluffy. This process should take around 2-3 minutes. Gradually add in ½ cup of sifted powdered sugar and 1 teaspoon of pure vanilla extract, blending until the mixture is smooth and creamy.
Step 4: Fold in Whipped Cream
Gently fold 1 cup of whipped cream into the cream cheese mixture using a spatula. Be careful not to deflate the whipped cream, which should maintain a light and airy texture. This mixing should take about 2 minutes, resulting in a fluffy cheesecake filling that's perfect for your Fruity Pebbles Cheesecake Tacos.
Step 5: Fill the Shells
Remove the cereal shells from the refrigerator once firm. Generously spoon the luscious cheesecake filling into each shell, using a small offset spatula for ease. Aim for a delightful heaping that showcases the vibrant filling. Make sure each taco is generously filled, taking about 5 minutes to complete this step.
Step 6: Garnish and Serve
To elevate your Fruity Pebbles Cheesecake Tacos, sprinkle additional fruity cereal over the filled shells. This adds an extra crunch and a pop of color. Serve immediately for a delightful treat, or chill them for an additional half-hour for a firmer texture. Enjoy the playful design and delicious flavors of your fun dessert creation!
Make Ahead Options
These Fruity Pebbles Cheesecake Tacos are a fantastic choice for busy home cooks looking to save time without sacrificing flavor! You can prepare the cereal shells up to 24 hours in advance; just be sure to keep them tightly wrapped in plastic wrap to maintain their crispness. The cheesecake filling can be made up to 3 days ahead and stored in an airtight container in the refrigerator. When you're ready to serve, simply fill the taco shells with the cheesecake mixture, garnish with additional fruity cereal, and enjoy the delightful, playful dessert without any last-minute fuss. With these make-ahead options, you'll impress your guests effortlessly!
Fruity Pebbles Cheesecake Tacos Variations
Feel free to take this delightful recipe to new heights with these fun, easy adjustments that will tantalize your taste buds!
-
Gluten-Free: Use gluten-free fruity cereal to transform this treat into a delicious option for those with gluten sensitivities.
-
Healthy Twist: Swap the cream cheese for Greek yogurt for a lighter filling that's still creamy and delicious.
-
Chocolate Lovers: Mix in cocoa powder to the cheesecake filling for a chocolatey twist that adds richness to the sweetness.
-
Nutty Flavor: Fold in some crushed nuts like pecans or almonds with the whipped cream for added crunch and texture.
-
Fruit Infusion: Add diced strawberries or banana slices to the cheesecake mixture for a fresh fruit burst in every bite.
-
Spicy Kick: Stir in a pinch of cinnamon or cayenne pepper to the cheesecake filling for a surprising and delightful heat that contrasts with the sweetness.
-
Vegan: Substitute the cream cheese with a plant-based alternative and use coconut whipped cream for a completely vegan version.
-
Caramel Swirl: Drizzle caramel sauce into the creamy filling before adding it to the taco shells for an irresistible sweet layer that enhances every bite.
Each of these variations offers a unique spin while maintaining the fun and whimsy of the original recipe. Explore your creativity and enhance your dessert experience! For more inspirations, check out my easy taco recipes or explore my incredible cheesecake variations for delicious new twists on classic desserts!
How to Store and Freeze Fruity Pebbles Cheesecake Tacos
Fridge: Store any leftover Fruity Pebbles Cheesecake Tacos in an airtight container for up to 2 days. This helps maintain the fresh flavors and textures.
Freezer: For longer storage, you can freeze the unfilled cereal shells for up to 1 month. Wrap them tightly in plastic wrap and place them in a freezer-safe bag.
Reheating: If desired, allow the shells to thaw in the fridge overnight before filling them again. Avoid reheating filled tacos, as it may affect their texture.
Assembly Tip: Assemble only what you plan to eat, as the filled tacos are best enjoyed fresh to ensure the crunch of the cereal shell!
Expert Tips for Fruity Pebbles Cheesecake Tacos
Chill Your Shells: Ensure the cereal shells are firmly pressed and well-chilled for at least 30 minutes; this prevents them from crumbling when filled.
Don't Rush the Filling: Beat the cream cheese until light and fluffy before adding sugar; this helps create a smooth, creamy mixture for your Fruity Pebbles Cheesecake Tacos.
Folding Technique: When adding whipped cream to the cheesecake mixture, use a gentle folding motion to retain air; this keeps the filling light and airy.
Serving Suggestions: Experiment with toppings such as chocolate sauce, fresh fruit, or a sprinkle of crushed nuts for a delightful twist on your desserts.
Storage Tips: If there are any leftovers, store them in an airtight container in the fridge. Enjoy them within a couple of days for the best texture.
What to Serve with Fruity Pebbles Cheesecake Tacos
Elevate your dessert experience by pairing these vibrant treats with complementary sides and drinks that match their playful spirit.
-
Whipped Cream: A dollop of fresh whipped cream enhances the creamy filling, adding an extra layer of indulgence.
-
Fresh Berries: Juicy strawberries or blueberries offer a tart contrast, brightening each bite while bringing a deliciously fresh element to the table.
-
Chocolate Sauce: Drizzling chocolate sauce over the tacos adds a decadent touch, creating a delightful harmony between fruity and chocolaty flavors.
-
Vanilla Ice Cream: A scoop of vanilla ice cream brings a cool creaminess that pairs perfectly with the crispy cereal shells and cheesecake filling. It's a classic combo!
-
Fruit Salad: A refreshing mix of seasonal fruits complements the sweetness of the tacos, providing a light and zesty balance to your dessert spread.
-
Sparkling Water: Serve with sparkling water for a refreshing drink option that cleanses the palate between each delightful taco.
-
Milkshake: For an indulgent twist, consider pairing with a vanilla or fruity milkshake that echoes the flavors of the tacos while adding a nostalgic touch.
-
Mini Cupcakes: These cute bites can serve as a whimsical side, letting everyone enjoy even more sweet flavors alongside the tacos for that perfect dessert table spread.
These suggestions will not only make your meal visually stunning but also incredibly fun and tasty!
Fruity Pebbles Cheesecake Tacos Recipe FAQs
How do I choose the best fruity cereal for my recipe?
Absolutely! Look for fruity cereals that are fresh and have vibrant colors. Avoid any boxes with dark spots or crumbs at the bottom, which might indicate staleness. Your shells will taste better and look more appealing with a crisp, fresh cereal!
How long can I store leftover Fruity Pebbles Cheesecake Tacos?
You can store leftover Fruity Pebbles Cheesecake Tacos in an airtight container in the refrigerator for up to 2 days. This keeps the flavors fresh, but the cereal shell may lose some of its crunch over time, so it’s best to enjoy them soon after making!
Can I freeze the cereal taco shells?
Yes, absolutely! If you want to keep the shells for longer, freeze the unfilled shells. Wrap them tightly in plastic wrap and place them into a freezer-safe bag. They can be stored in the freezer for up to 1 month. When you’re ready to use them, thaw the shells in the refrigerator overnight before filling them.
What should I do if my cheesecake filling is too runny?
If your cheesecake filling seems too runny, there are a couple of steps you can take to thicken it up. First, ensure your cream cheese is well-beaten until it's fluffy before adding any sugar. If it’s already mixed and still runny, you can add an extra tablespoon of powdered sugar to help thicken it. Alternatively, refrigerate the mixture for about 15-20 minutes to help it firm up before filling the shells.
Are there any dietary considerations for this recipe?
Very! If you’re catering to food allergies, make sure to check the ingredients in your fruity cereal, as some may contain gluten or nuts. For a gluten-free option, use a certified gluten-free cereal. If you need a dairy-free alternative, try using a plant-based cream cheese and a dairy-free whipped cream to create a version that fits your dietary needs!
How do I prevent the cereal shells from falling apart?
To ensure your cereal shells hold together well, make sure to press the mixture firmly into the molds before chilling. Use your fingers or a spoon to compact the mixture tightly, ensuring it binds properly. Allowing the shells to chill for at least 30 minutes helps them set, making them much sturdier when it comes time to fill!
Fruity Pebbles Cheesecake Tacos: A Fun Dessert Twist
Equipment
- Mixing bowl
- Muffin tins or taco molds
- hand mixer
- spatula
Ingredients
For the Cereal Shell
- 3 cups Fruity cereal this is the star component that gives a delightful crunch and vibrant color.
- ½ cup Unsalted butter melted; helps the cereal stick together for a sturdy shell.
For the Cheesecake Filling
- 8 oz Cream cheese softened to room temperature; this forms the creamy base of your cheesecake filling.
- ½ cup Powdered sugar sifted; sweetens the filling while providing a smooth texture.
- 1 teaspoon Pure vanilla extract enhances the flavor profile.
- 1 cup Whipped cream lightens the filling for a fluffy consistency.
For Garnishing
- Additional fruity cereal for garnish; adds a fun, crunchy topping.
Instructions
Step-by-Step Instructions
- In a mixing bowl, combine 3 cups of fruity cereal with ½ cup of melted unsalted butter. Stir thoroughly until each piece is coated in butter, creating a delectable, crunchy mixture.
- Firmly press the cereal mixture into small taco-shaped molds or muffin tins. Chill the formed shells in the refrigerator for at least 30 minutes.
- While the shells are chilling, beat 8 oz of softened cream cheese in a bowl until light and fluffy. Gradually add in ½ cup of sifted powdered sugar and 1 teaspoon of pure vanilla extract, blending until smooth.
- Gently fold 1 cup of whipped cream into the cream cheese mixture using a spatula.
- Remove the cereal shells from the refrigerator. Generously spoon the cheesecake filling into each shell.
- Sprinkle additional fruity cereal over the filled shells. Serve immediately or chill for an additional half-hour.