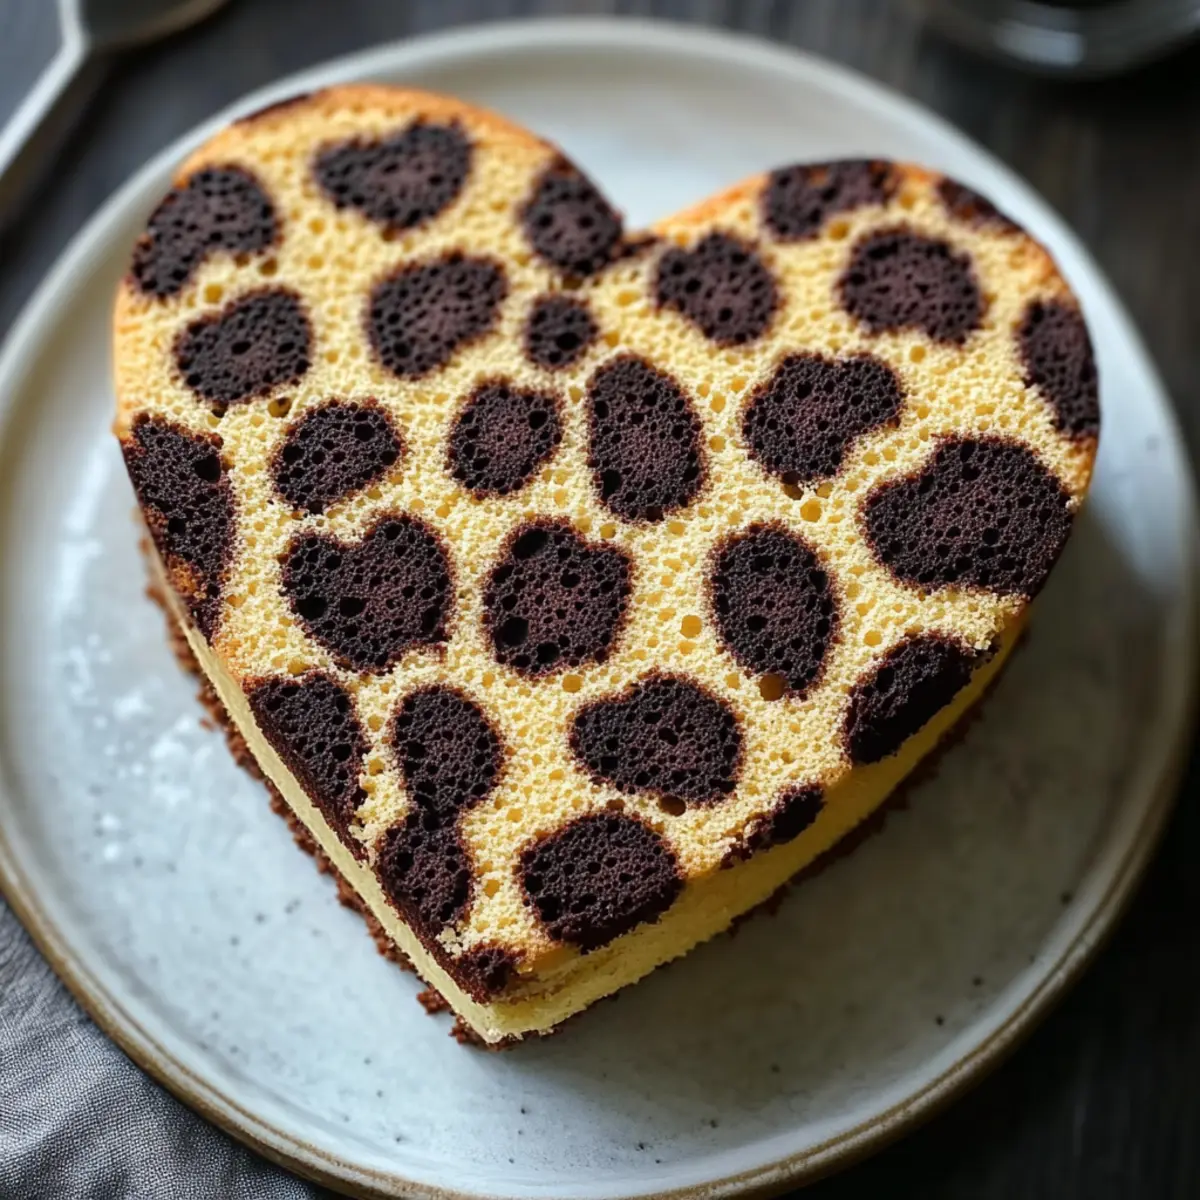
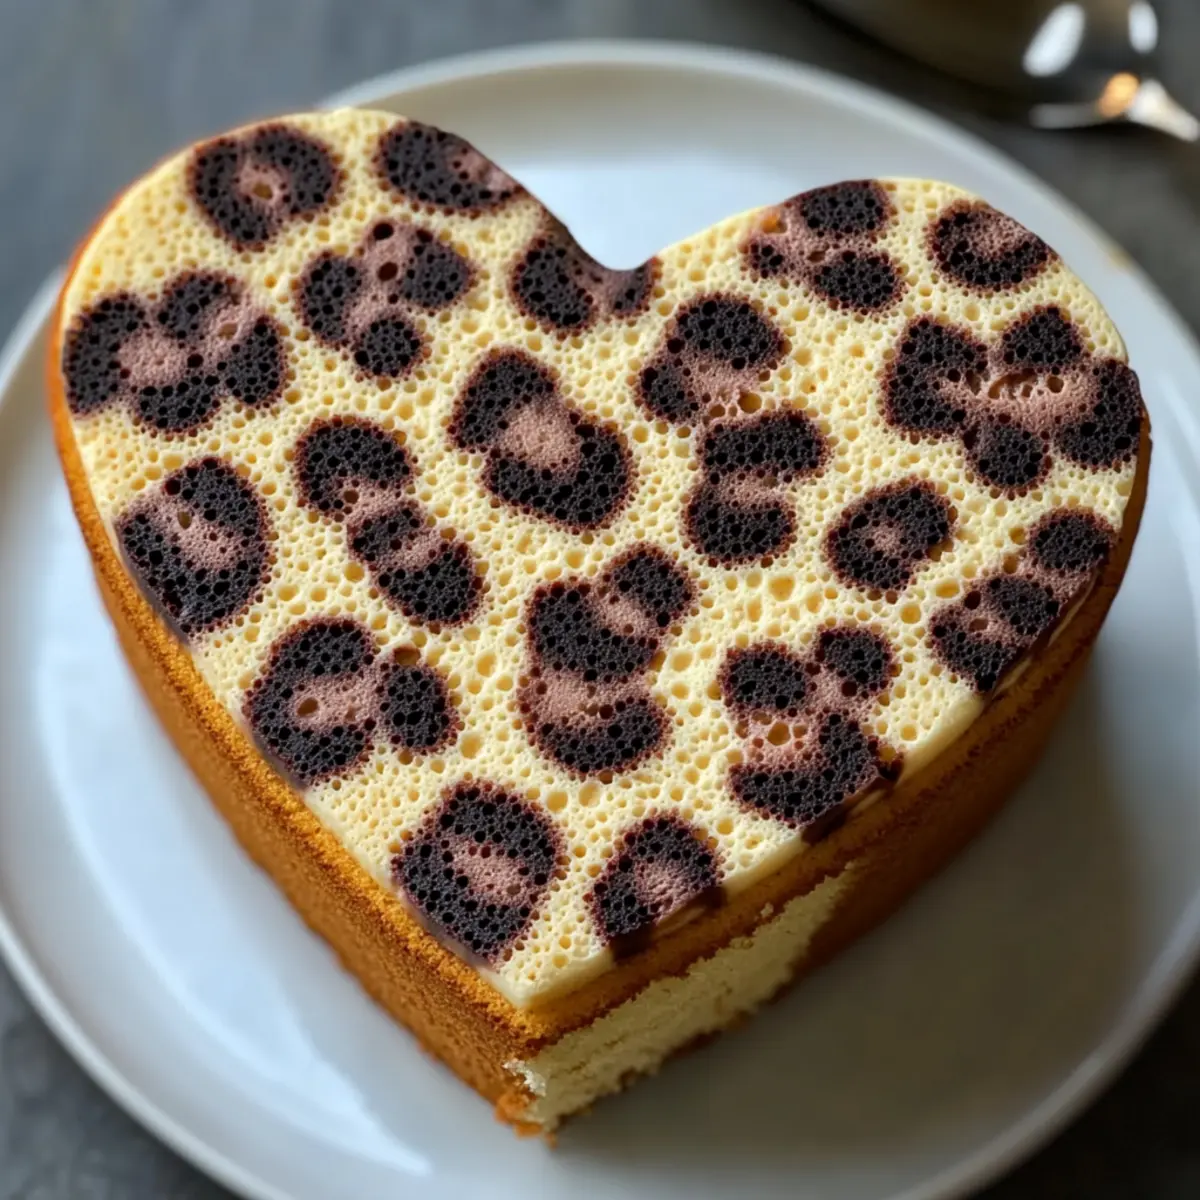
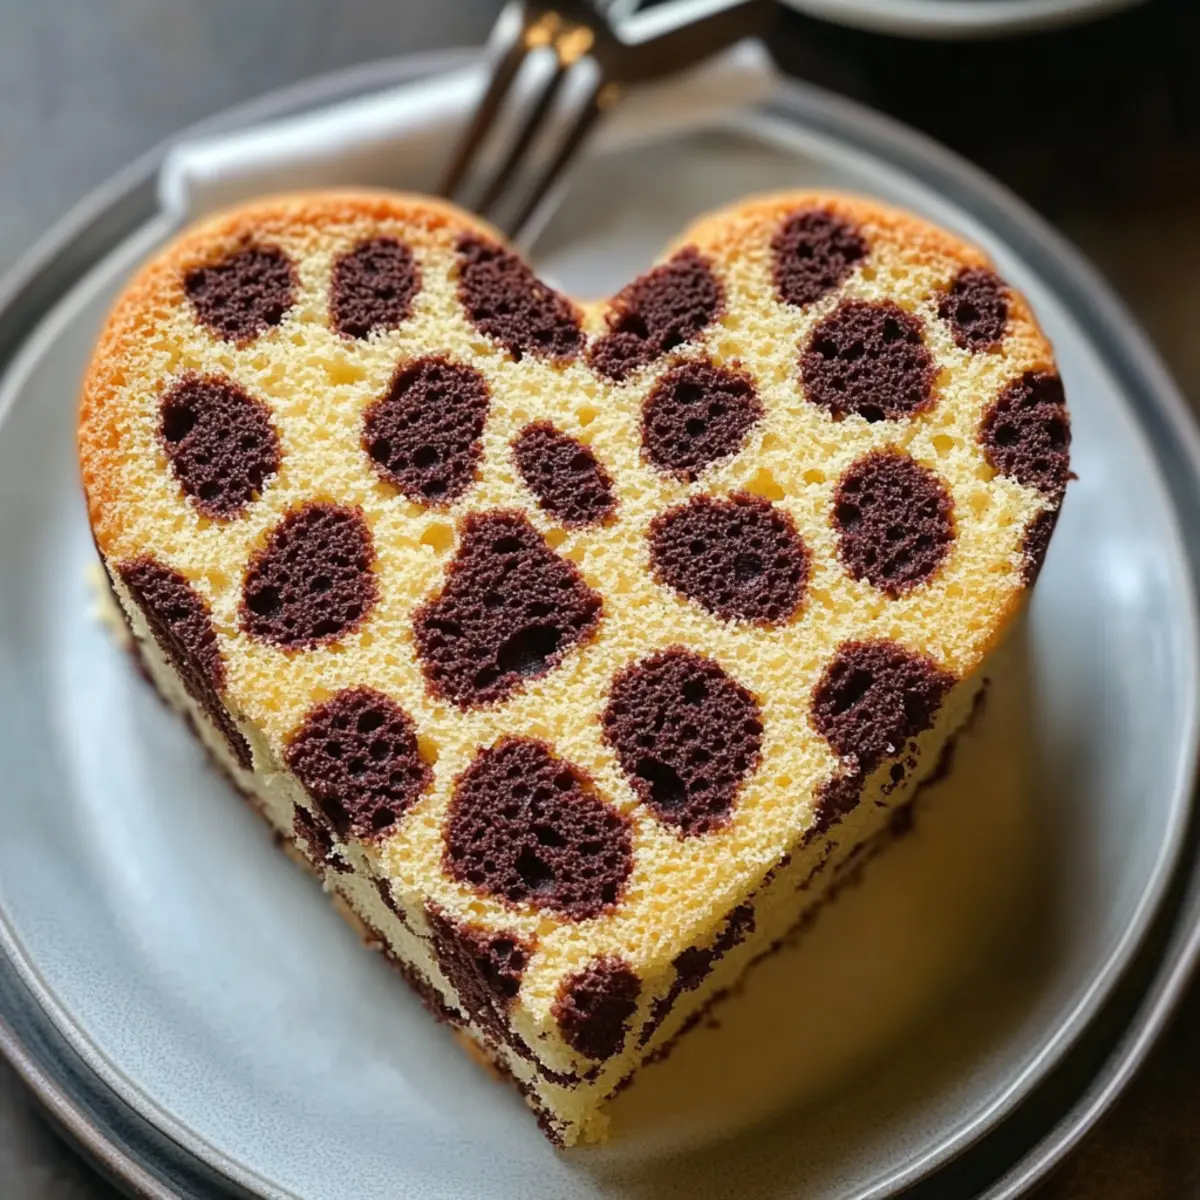
As I lifted the whisk from the mixing bowl, the vibrant swirls of golden yellow, brown, and black batter danced in the light, creating a stunning palette that instantly brightened my kitchen. This Cheetah Print Heart Cake is not just a dessert; it's a celebration of love and creativity, perfect for impressing friends or simply treating yourself. With its eye-catching design and delightful flavors, this cake checks all the boxes—it’s a fun baking project that brings joy to any occasion and stays fresh in the freezer for later cravings. Get ready to unleash your inner artist as we dive into this delicious journey! What special occasion will you make it for?
Why is this cake a showstopper?
Irresistible Appeal: This Cheetah Print Heart Cake is a visual delight, guaranteed to be the centerpiece of any celebration. Fun and Creative: The unique pattern allows you to unleash your inner artist in the kitchen, making baking not just a task, but an enjoyable creative experience. A Flavorful Treat: With a luxurious combination of buttery richness and sweet vanilla, it’s a flavor combo that everyone loves! Crowd-Pleasing: Perfect for birthday parties, anniversaries, or just because—everyone will want a slice! Freezer-Friendly: Bake it ahead of time, as it keeps well in the freezer for satisfying cravings later. Check out how to make it a perfect dessert like our Raspberry Pistachio Cake or Mango Lassi Cake!
Cheetah Print Heart Cake Ingredients
• Prepare to create an eye-catching masterpiece with these essential ingredients!
For the Cake
• All-purpose flour – essential for cake structure; make sure it's leveled when measured.
• Cornstarch – helps achieve a tender crumb; don't skip this for fluffiness.
• Baking powder – a must for lift; ensure it’s fresh for best results.
• Baking soda – enhances browning and aids in rising; use it in moderation.
• Fine sea salt – enhances flavor; a pinch can elevate your cake.
• Unsalted butter – at room temperature for a creamy batter; always use quality butter.
• Granulated sugar – sweetens and helps create a soft texture; you can substitute with coconut sugar for a richer flavor.
• Large eggs – provide moisture and stability; use room temperature eggs for better incorporation.
• Pure vanilla extract – adds depth of flavor; opt for pure rather than imitation for the best taste.
• Whole milk – contributes moisture; can be substituted with almond milk for a dairy-free version.
• Sour cream – adds richness; yogurt can be a good substitute if needed.
For the Buttercream Frosting
• Unsalted butter – ensure it’s softened for easy mixing; cream for a fluffy texture.
• Powdered sugar – gives sweetness and stability; sifting prevents lumps.
• Heavy cream or whole milk – adds creaminess; adjust for desired consistency.
For the Color
• Gel food coloring: golden yellow – provides vibrant color; a little goes a long way.
• Gel food coloring: brown – use to create the cheetah spots; mix until you achieve the desired shade.
• Gel food coloring: black – essential for a striking contrast; ensure even mixing for consistency.
These ingredients are the building blocks for your stunning Cheetah Print Heart Cake that’s sure to impress!
Step‑by‑Step Instructions for Cheetah Print Heart Cake
Step 1: Preheat and Prepare Pans
Begin by preheating your oven to 350°F (175°C). While it's heating, grease and flour your heart-shaped cake pans, or line them with parchment paper to ensure easy removal later. This prepares a smooth canvas for the Cheetah Print Heart Cake layers, allowing them to rise evenly and release without sticking.
Step 2: Mix the Dry Ingredients
In a medium bowl, whisk together 2 ¾ cups of all-purpose flour, 1 tablespoon of cornstarch, 2 ¼ teaspoons of baking powder, ½ teaspoon of baking soda, and ½ teaspoon of fine sea salt. Mix until evenly combined, then set this bowl aside. This step is crucial as it ensures proper leavening and texture in your cake.
Step 3: Cream the Butter and Sugar
In a large mixing bowl, beat 1 cup of softened unsalted butter on medium speed for about 2 minutes until it becomes creamy and light. Gradually add in 1 ¾ cups of granulated sugar, continuing to beat for 3–4 minutes until the mixture is fluffy and pale. Scrape the bowl as needed to incorporate all of the butter and sugar evenly.
Step 4: Incorporate Eggs and Flavor
Next, add in 4 large eggs one at a time, mixing well after each addition to ensure they're fully incorporated. Then, blend in 2 teaspoons of pure vanilla extract. In a separate container, whisk together 1 ¼ cups of whole milk and ½ cup of sour cream until smooth, adding moisture and richness to the batter.
Step 5: Combine Dry and Wet Ingredients
Carefully add the dry ingredients to the wet mixture in three alternating additions, starting and ending with the dry ingredients, with the milk mixture in between. Mix on low speed until just combined and no streaks remain, avoiding overmixing to maintain airiness in your Cheetah Print Heart Cake.
Step 6: Divide and Color the Batter
Reserve about 2 cups of the plain cake batter. In separate bowls, divide 1 cup of the batter: tint one golden yellow and another medium brown. In a fourth bowl, take ½ cup of batter and color it black or very dark brown. These vibrant colors will create the striking pattern in your cake, so mix until the colors are well incorporated.
Step 7: Prepare for Baking
For a sheet cake option, take half of the plain batter and pour it into a lined 9×13 pan. Then, pipe irregular patterns with the brown and black batters on top. Bake for 12–16 minutes, cool, and cut out heart shapes. If making the heart cakes, proceed to the next step for the main layers.
Step 8: Bake the Heart Cake Layers
Pour a thin layer of plain batter into each greased heart pan. Dollop the colored batters randomly on top and use a knife to swirl them lightly. Bake in your preheated oven at 350°F (175°C) for 25–32 minutes for two 8-inch pans, or 40–50 minutes for one deep 9-inch pan, until a toothpick inserted comes out clean.
Step 9: Cool and Level the Cake Layers
Once your cakes are baked, allow them to cool in the pans for about 10 minutes before transferring them to wire racks to cool completely. If there are any domes, level the tops carefully with a serrated knife. For easier frosting later, chill the layers in the refrigerator for 20–30 minutes.
Step 10: Make the Buttercream Frosting
In a mixing bowl, beat 1 ½ cups of softened unsalted butter until smooth. Gradually add in sifted powdered sugar along with ¼ cup of heavy cream or whole milk and 2 teaspoons of vanilla, alternating until the mixture is medium-thick and fluffy. This frosting will be a delightful complement to your Cheetah Print Heart Cake.
Step 11: Color and Prepare the Frosting
Take the bulk of your buttercream and tint it golden tan using gel food coloring. Reserve some untinted frosting for a crumb coat and outside decoration. This step adds character to your cake, creating a fabulous presentation that matches the cheetah print theme.
Step 12: Assemble the Cake Layers
Spread a small amount of buttercream on your serving board to hold the first cake layer in place, then add a layer of buttercream on top before placing the second cake layer. Proceed to crumb coat the sides and top of the entire cake before chilling it in the refrigerator to firm up the frosting, enhancing stability during decoration.
Step 13: Apply the Base Coat
Once your crumb coat is set, use the golden tan buttercream to apply a smooth base coat all over the cake. Aim for a nice and even surface by using a bench scraper or an offset spatula. Afterward, return the cake to the refrigerator to chill while you prepare for the fun decorating stage!
Step 14: Pipe the Cheetah Print
Using piping bags filled with the brown and black buttercream, create the cheetah print design by piping varying sizes of spots onto the chilled cake. Play around with density and sizes to replicate the natural look of a cheetah’s spots, ensuring your cake is as eye-catching as it is delicious.
Step 15: Final Chill and Serve
Chill your beautifully decorated Cheetah Print Heart Cake for 30–45 minutes to set the designs before serving. When ready to serve, slice with a warmed knife for clean edges, allowing everyone to enjoy this stunning dessert that’s as tasty as it is visually appealing.

Make Ahead Options
These Cheetah Print Heart Cakes are ideal for meal prep, ensuring you can enjoy homemade deliciousness even on the busiest days! You can prepare the cake layers and freeze them up to 3 days in advance. Once baked and cooled, wrap each layer tightly in plastic wrap and store them in an airtight container to preserve their moisture. The buttercream frosting can also be made ahead of time and refrigerated for up to 5 days; just give it a quick whip before using it. When you're ready to assemble, let the layers thaw for about 30 minutes, level them if needed, frost, and enjoy a stunning dessert with minimal effort!
What to Serve with Cheetah Print Heart Cake
Elevate your dessert experience with delightful accompaniments that complement this stunning cake beautifully.
-
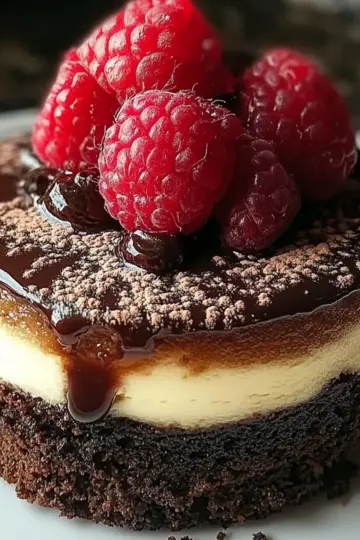
Fresh Berries: The brightness of strawberries, raspberries, or blueberries adds a refreshing contrast to the rich cake flavors. Their natural sweetness enhances each bite, making them a perfect pairing.
-
Whipped Cream: Light and airy whipped cream balances the dense texture of the cake. A dollop on top or on the side provides an elegant touch that feels indulgent yet light.
-
Chocolate Sauce: Drizzle warm chocolate sauce for a decadent experience. The rich, velvety texture enhances the cake's buttery notes, creating an irresistible combination.
-
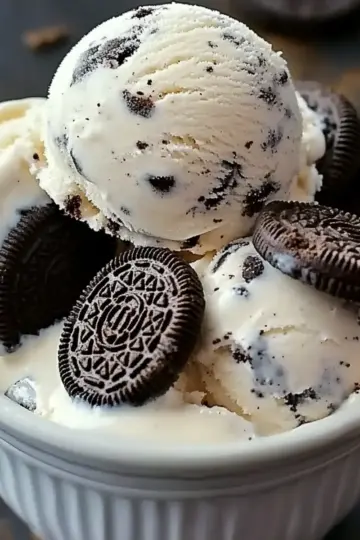
Vanilla Ice Cream: Creamy vanilla ice cream is a classic pairing that cools the palate, adding a delightful contrast to the warm, moist cake. It's a nostalgic favorite that everyone adores!
-
Mango or Passion Fruit Coulis: These vibrant, fruity sauces introduce a tangy brightness that cuts through the sweetness of the cake. Their exotic flavors create a tropical twist on your dessert presentation.
-
Sparkling Wine: A glass of sparkling wine or champagne elevates any celebration. The bubbles lend a festive quality, enhancing the joy of sharing this visually stunning dessert with loved ones.
-
Coffee or Espresso: Pairing a slice with a rich cup of coffee or espresso highlights the cake's sweetness while providing a comforting warmth. This duo is perfect for afternoon gatherings or cozy evenings.
-
Caramel Sauce: A drizzle of silky caramel sauce adds another layer of sweetness and an appealing contrast to the cake’s playful design. Each bite becomes a flavor-packed delight!
Expert Tips for Cheetah Print Heart Cake
• Ingredient Temperature: Use room temperature ingredients like eggs and butter for a smoother batter and better rise.
• Swirling Techniques: For beautiful patterns, use a toothpick or knife to gently swirl the colored batters, but don’t overdo it; subtlety is key!
• Chilling Layers: After baking, chilling the cake layers makes frosting easier and prevents the buttercream from sliding off.
• Color Mixing: Mix gel food coloring into your batter slowly; start with a small amount and build up to achieve the desired shades for your cheetah print.
• Crumb Coating Tips: Apply a thin crumb coat of buttercream to seal in crumbs before adding the final layer of frosting for a clean finish.
• Serving Temperature: Slice the cake with a warmed knife for neat slices; this decadent Cheetah Print Heart Cake is best enjoyed at room temperature!
How to Store and Freeze Cheetah Print Heart Cake
Room Temperature: Keep the Cheetah Print Heart Cake at room temperature for up to 2 days, covered with a cake dome or plastic wrap to maintain freshness.
Fridge: If you need to store it longer, place the cake in the fridge for up to 5 days, wrapped tightly to prevent it from drying out.
Freezer: For longer storage, freeze individual slices or the whole cake wrapped securely in plastic wrap and foil for up to 3 months.
Reheating: When ready to enjoy, thaw in the fridge overnight or at room temperature for a few hours. If frozen, slicing is easier with a warmed knife.
Cheetah Print Heart Cake Variations
Feel free to spice things up and personalize your Cheetah Print Heart Cake with these delicious twists!
- Gluten-Free: Substitute all-purpose flour with a gluten-free blend for a safe, gluten-free treat that still tastes delightful.
- Dairy-Free: Use coconut oil and almond milk instead of butter and milk to cater to dairy sensitivities without sacrificing flavor.
- Chocolate Lovers: Add cocoa powder to the batter to turn your cake into a rich chocolate version. Imagine that velvety texture paired with the cheetah print; it’s a total crowd-pleaser!
- Fruity Twist: Incorporate fresh fruit puree like raspberry or mango into the batter for a sweet and tangy surprise. This adds a refreshing contrast to your rich, creamy frosting.
- Lemon Zest: Brighten up the flavor with a tablespoon of lemon zest in the batter. The citrusy notes give your cake a refreshing boost, perfect for summer gatherings.
- Spicy Kick: Include a pinch of cayenne pepper in the buttercream for a surprising heat that balances the sweetness beautifully. It’s a fun way to tickle the taste buds!
- Nutty Texture: Fold in chopped nuts like pecans or walnuts for added crunch and flavor. The contrast in textures will create a satisfying bite.
- Whipped Cream Topping: For a lighter finish, top your cake with freshly whipped cream instead of buttercream for a soft and airy feel.
Once you’ve conquered this base recipe, explore other enticing desserts like our Lemon Raspberry Cake or the crowd-favorite Summer Berry Cake. Trust me; your options for deliciousness are endless!
Cheetah Print Heart Cake Recipe FAQs
What is the best way to select ripe ingredients for this cake?
Absolutely! For the best results, choose large eggs that are at room temperature, as they mix more easily into your batter. Additionally, make sure your butter is softened to room temperature, which allows it to cream easily with sugar, creating a light texture. When selecting your sour cream and milk, look for fresh products, as quality dairy enhances flavor and texture.
How should I store the Cheetah Print Heart Cake?
To keep your Cheetah Print Heart Cake fresh, store it at room temperature for up to 2 days, covered with a cake dome or plastic wrap. For longer storage, refrigerate it for up to 5 days, tightly wrapped to prevent drying. If you need to store it even longer, freeze individual slices or the entire cake by wrapping securely in plastic wrap and then foil for up to 3 months.
Can I freeze the Cheetah Print Heart Cake?
Very! Freezing this cake is a fantastic way to save it for later enjoyment. To freeze, first let it cool completely. Wrap slices or the whole cooled cake in plastic wrap, ensuring no parts are exposed to air. Then, place the wrapped cake or slices in a freezer-safe bag. When you're ready to enjoy it, thaw overnight in the fridge or for a few hours at room temperature for optimal taste.
What troubleshooting tips do you have for baking this cake?
If your cake sinks in the middle, it may be due to overmixing or too much moisture. To prevent this, mix just until combined, and ensure all ingredients are measured correctly. If you're unsure about the baking time, use a toothpick to check for doneness; it should come out clean or with a few dry crumbs attached. If the cake domes while baking, you can level it after cooling with a serrated knife for a flat surface.
Is this cake suitable for people with dietary restrictions?
When it comes to allergies, this cake contains common allergens like gluten (in the flour) and dairy. To make it gluten-free, consider substituting the all-purpose flour with a 1:1 gluten-free baking blend. For a dairy-free version, use plant-based butter and non-dairy milk alternatives like almond or oat milk. Always double-check ingredient labels to ensure they align with dietary needs.
How do I achieve the perfect cheetah print design?
To create striking patterns, mix your gel food coloring slowly into the reserved cake batter, testing the color intensity on a small amount first. For piping, use different-sized piping tips for your brown and black buttercream to vary the look of the spots. Start piping larger spots and fill in with smaller ones, allowing some colors to overlap for a more natural, wild look. Don’t forget to chill your cake after decorating for a tidy finish!
Irresistibly Fun Cheetah Print Heart Cake Recipe for Any Occasion
Equipment
- Oven
- Mixing bowls
- Electric mixer
- Measuring cups
- measuring spoons
- Piping bags
- Heart-shaped Cake Pans
- Cooling Racks
- Offset Spatula
- Bench scraper
Ingredients
For the Cake
- 2 ¾ cups all-purpose flour leveled when measured
- 1 tablespoon cornstarch for fluffiness
- 2 ¼ teaspoons baking powder ensure it's fresh
- ½ teaspoon baking soda use in moderation
- ½ teaspoon fine sea salt enhances flavor
- 1 cup unsalted butter at room temperature
- 1 ¾ cups granulated sugar can substitute with coconut sugar
- 4 large eggs room temperature
- 2 teaspoons pure vanilla extract opt for pure for best taste
- 1 ¼ cups whole milk can substitute with almond milk
- ½ cup sour cream yogurt can be a substitute
For the Buttercream Frosting
- 1 ½ cups unsalted butter softened
- 4 cups powdered sugar sifted
- ¼ cup heavy cream or whole milk adjust for desired consistency
For the Color
- as needed gel food coloring: golden yellow
- as needed gel food coloring: brown
- as needed gel food coloring: black
Instructions
Step‑by‑Step Instructions
- Preheat your oven to 350°F (175°C) and prepare the cake pans.
- In a medium bowl, whisk together all-purpose flour, cornstarch, baking powder, baking soda, and fine sea salt.
- Beat softened unsalted butter until creamy, then gradually add granulated sugar and beat until fluffy.
- Incorporate eggs, then add vanilla extract, and a mixture of whole milk and sour cream.
- Combine dry and wet ingredients in alternating additions until just mixed.
- Reserve about 2 cups of plain batter, then color remaining batter with food coloring.
- For a sheet cake, pour half of the plain batter into a lined pan and add colored batters. For heart cakes, proceed to next step.
- Pour a thin layer of plain batter into each heart pan, dollop colored batters, and swirl lightly. Bake until a toothpick comes out clean.
- Cool the cakes for 10 minutes in pans before transferring to wire racks. Level tops if domed.
- Beat unsalted butter for buttercream, then gradually add powdered sugar and heavy cream or milk until fluffy.
- Tint buttercream golden tan and reserve some for crumb coat and decoration.
- Assemble cake layers with buttercream in between and on the outside, then chill to set frosting.
- Apply a smooth base coat of golden tan buttercream all over the cake and chill again.
- Pipe the cheetah print design with brown and black buttercream on the chilled cake.
- Chill the decorated cake for 30–45 minutes before serving. Slice with a warmed knife.