As I unwrapped the first candy cane of the season, a rush of nostalgia hit me—it’s more than just a sweet, it’s a memory-maker. What better way to kindle that holiday spirit than by making your very own Homemade Christmas Peppermint Sticks? This recipe combines a perfect balance of fun and creativity, offering you a delightful way to channel your inner candy chef. Not only are these festive treats wonderful for decorating your home, but they also make charming gifts and delicious additions to holiday dessert platters. Plus, the joy of crafting them from scratch ensures a sweet sense of accomplishment. Who wouldn’t want to share a taste of their own holiday magic with loved ones? Ready to dive into this sugary adventure and fill your home with the fragrance of fresh peppermint? Let’s get started!
Why Make Your Own Peppermint Sticks?
Irresistible nostalgia: Each homemade peppermint stick brings back childhood memories, making your holidays extra special.
Creative fun: Stretch, twist and shape these colorful treats, turning your kitchen into a festive workshop!
Perfect for gifting: Share handmade joy; wrap them up for friends and family to enjoy.
Flavorful delight: The fresh peppermint extract elevates these sticks, offering a taste far superior to store-bought options.
Customizable colors: Feel free to play with colors beyond red and white; your creativity knows no bounds!
Dive into the holiday spirit and enjoy making these delightful Christmas Peppermint Sticks that will leave taste buds dancing. If you're eager for more holiday inspirations, check out our guide on Creative Holiday Treats. Happy candy-making!
Christmas Peppermint Sticks Ingredients
• Get ready to create your delightful treats!
For the Candy Mixture
- Granulated sugar – This is the main ingredient that gives your Christmas Peppermint Sticks their sweetness and structure.
- Light corn syrup – It helps prevent the sugar from crystallizing, ensuring a smooth final candy.
- Water – Needed to dissolve the sugar and create the right consistency for your candy.
- Peppermint extract – Essential for that refreshing minty flavor that defines your peppermint sticks.
For Coloring
- Red food coloring – A little goes a long way to add festive color to your candy.
- White food coloring – Perfect for giving your peppermint sticks a lovely creamy appearance.
For Dusting
- Powdered sugar – Dusting the sticks prevents them from sticking together, ensuring a beautiful finish.
Now that you have your ingredients, it’s time to transform your kitchen into a candy haven filled with the sweet aroma of Christmas Peppermint Sticks!
Step‑by‑Step Instructions for Christmas Peppermint Sticks
Step 1: Prepare the Surface
Begin by preparing a clean, flat surface for cooling your Christmas Peppermint Sticks. Lightly dust this area with powdered sugar to prevent the candy from sticking. This is crucial as it creates a non-stick barrier, ensuring your delicious candy can be easily removed later.
Step 2: Combine the Ingredients
In a medium-sized saucepan, combine the 2 cups of granulated sugar, ½ cup of light corn syrup, and ½ cup of water. Stir gently over medium heat until the sugar completely dissolves, forming a clear mixture. Keep an eye on the mixture, as it will take about 5 minutes to dissolve completely before you can move on to boiling.
Step 3: Boil the Mixture
Once the sugar has dissolved, stop stirring and increase the heat to bring the mixture to a boil. Monitor the temperature with a candy thermometer until it reaches 260°F (hard-ball stage). This boiling phase should take about 10 minutes, so watch for bubbling activity to let you know it’s ready.
Step 4: Cool the Mixture
After reaching the desired temperature, remove the saucepan from the heat and let it sit undisturbed for about 5 minutes. This cooling phase is important as it not only stabilizes the mixture but also prepares it for the addition of peppermint extract.
Step 5: Add the Peppermint Extract
Carefully stir in 1 teaspoon of peppermint extract into the cooled mixture. Be cautious, as the candy may bubble up at this point. The peppermint scent will fill your kitchen, enhancing the festive spirit! Stir until fully integrated, ensuring an even distribution of flavor throughout the candy.
Step 6: Divide and Color
Transfer the candy mixture equally into two bowls. In one bowl, add ¼ teaspoon of red food coloring and in the other, incorporate ¼ teaspoon of white food coloring. Stir each bowl thoroughly, ensuring the colors are vibrant and fully incorporated. This step adds the festive hues that will make your Christmas Peppermint Sticks visually appealing!
Step 7: Cool for Handling
Allow the candy to cool for about 10–15 minutes until it’s manageable to handle. The candy should be pliable but not too hot to touch, letting you work with it without burning your hands. Keep an eye on the consistency; it should be sticky yet firm enough for shaping.
Step 8: Stretch and Pull the Candy
Lightly grease your hands with vegetable oil to prevent sticking. Take the red and white candy separately, stretching and pulling them until they become glossy and smooth. This process activates the sugar’s elasticity, making it easier to shape into beautiful candy sticks.
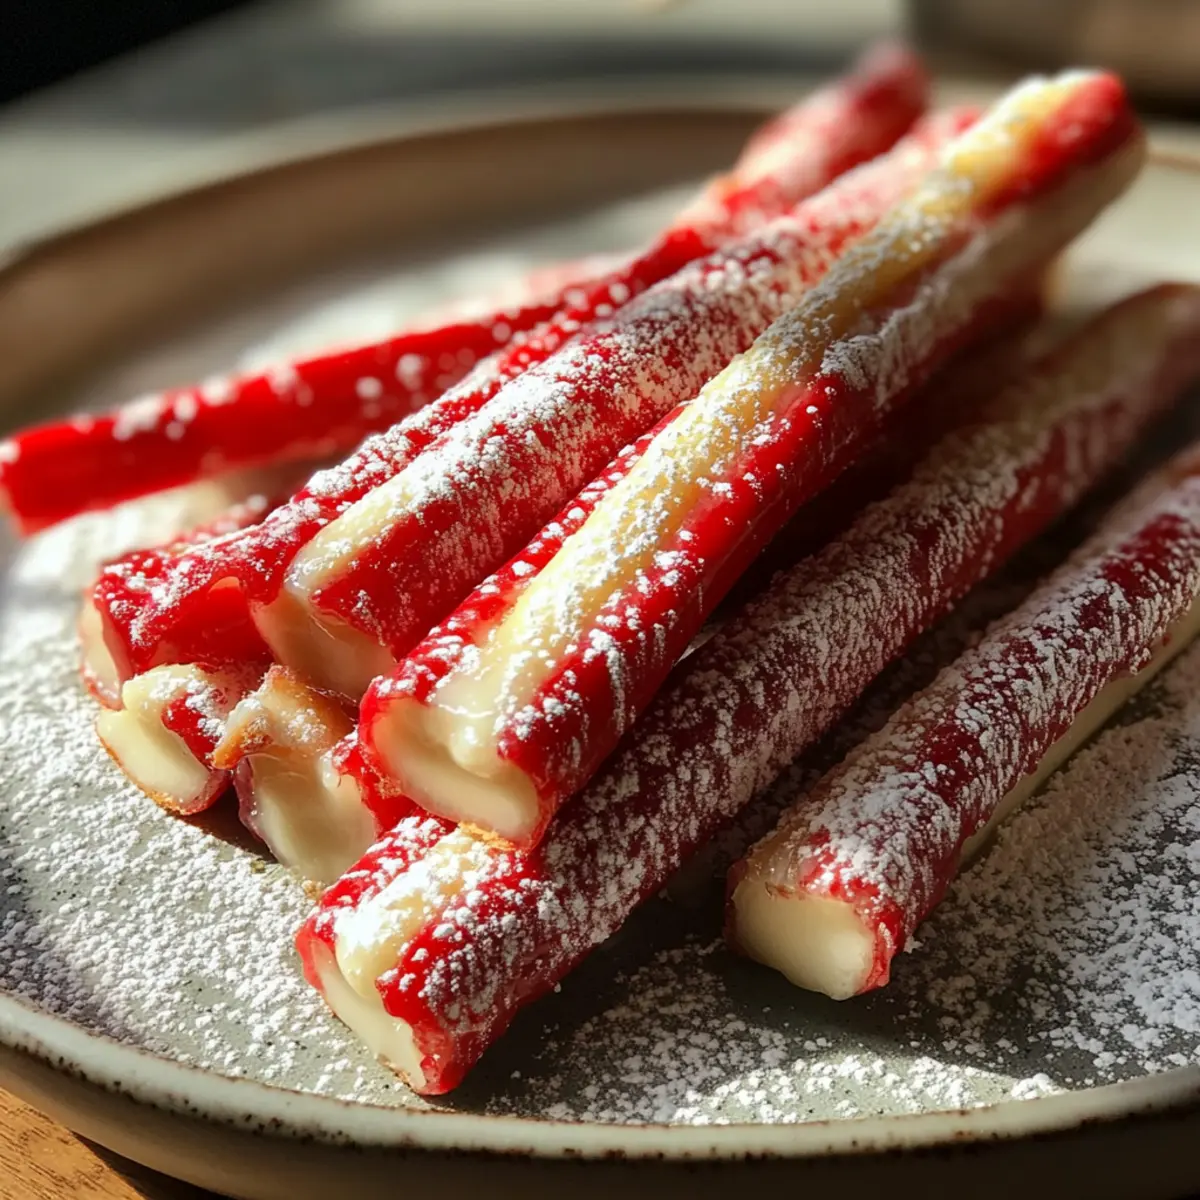
Step 9: Form the Ropes
Roll each color into long ropes, then lay them side by side before twisting them together to create a spiral effect. This fun technique showcases the classic red and white design of your Christmas Peppermint Sticks. Be gentle to maintain the twist throughout!
Step 10: Cut the Sticks
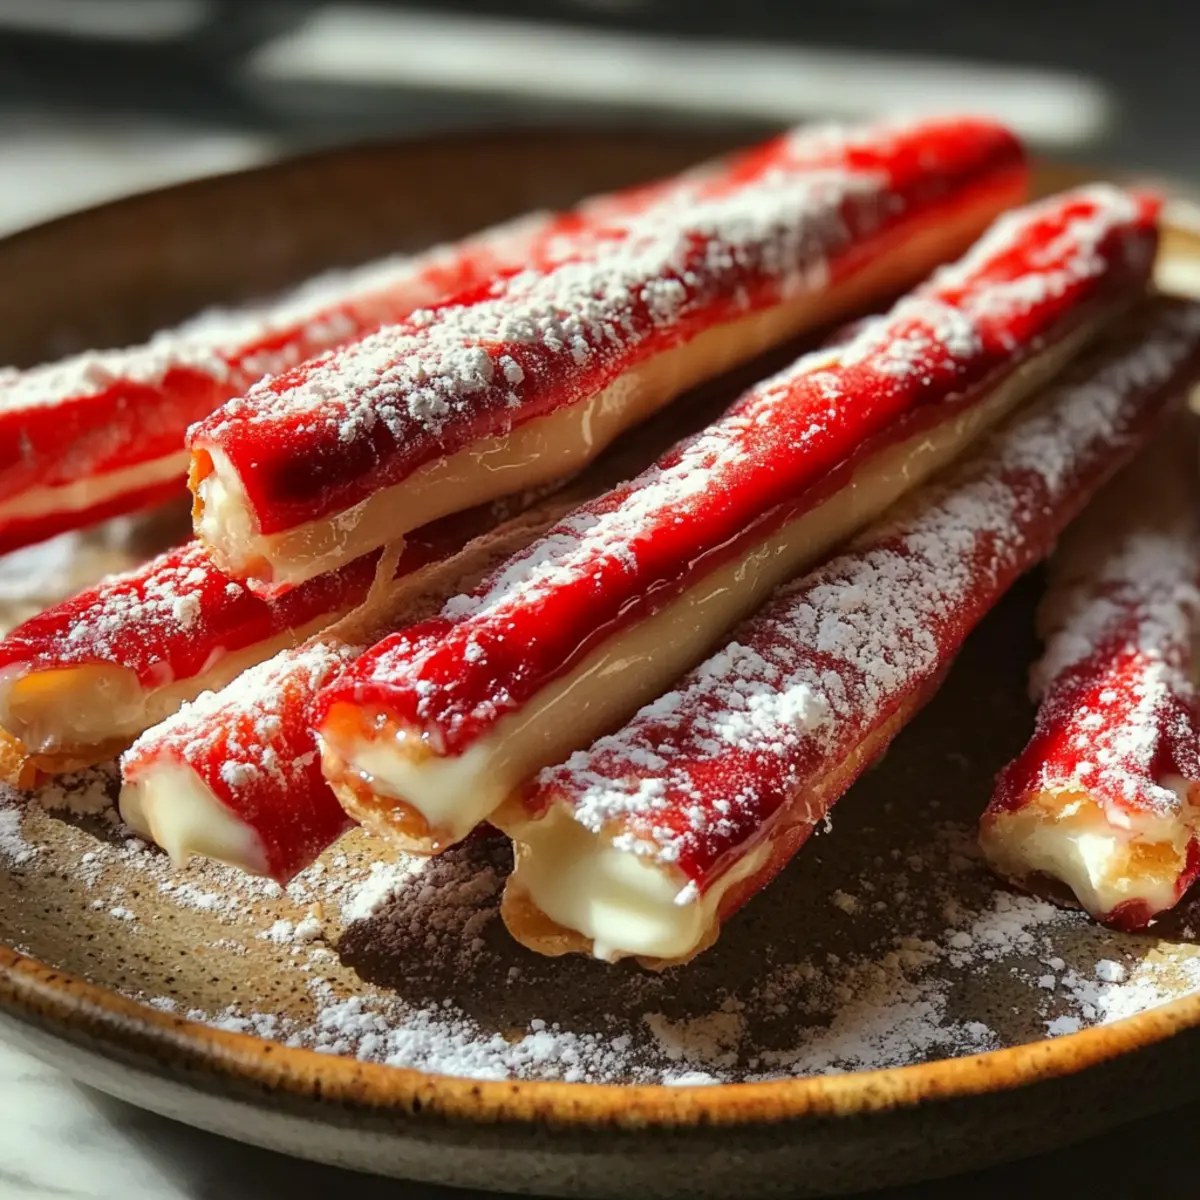
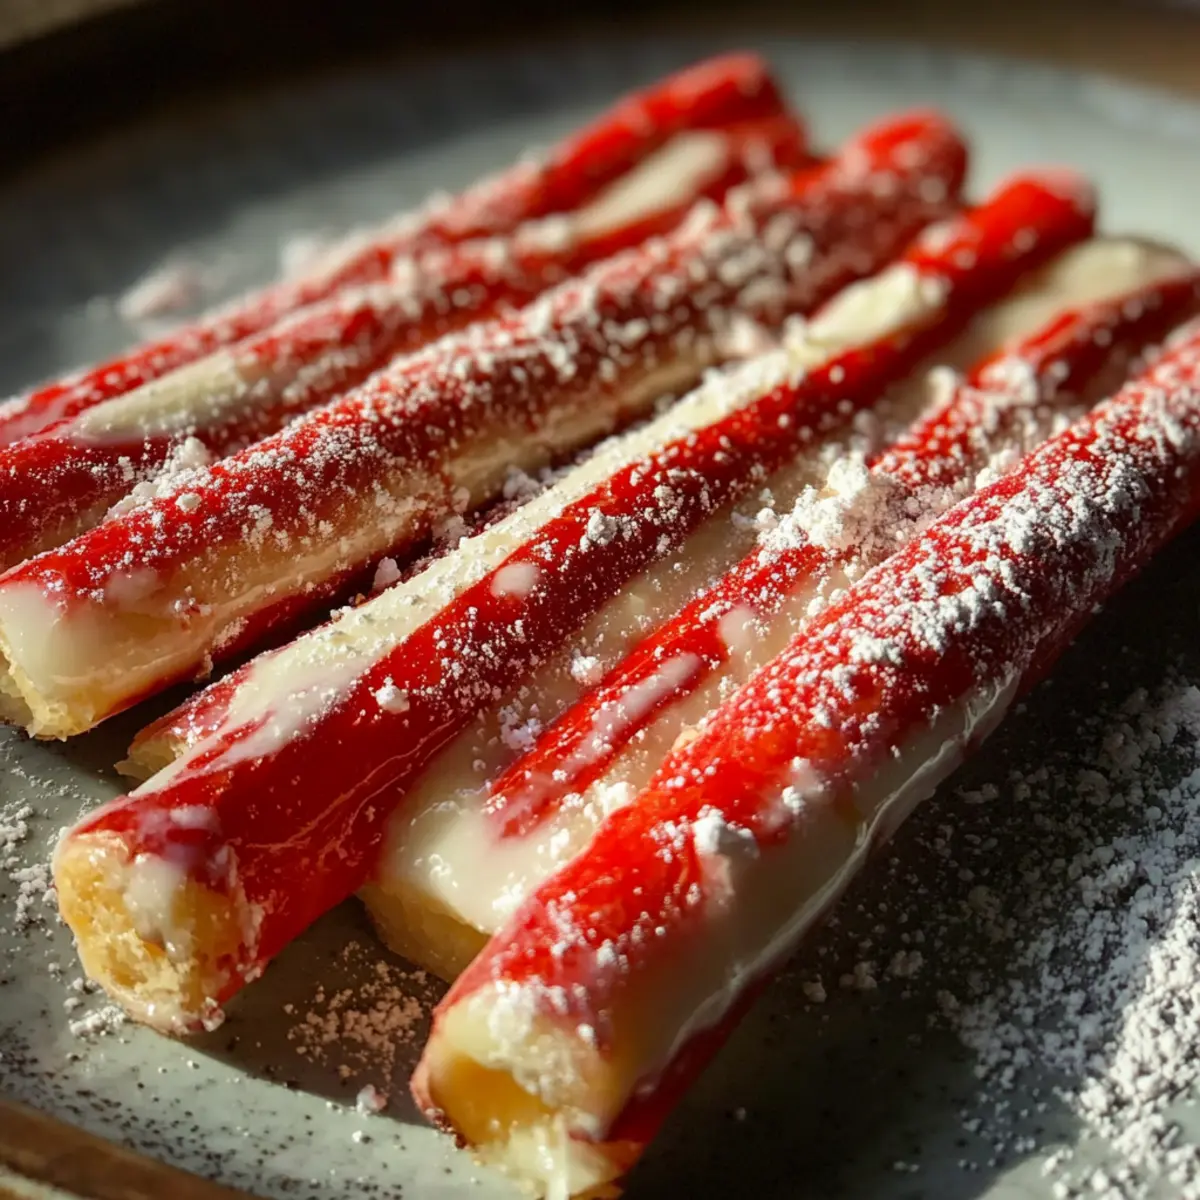
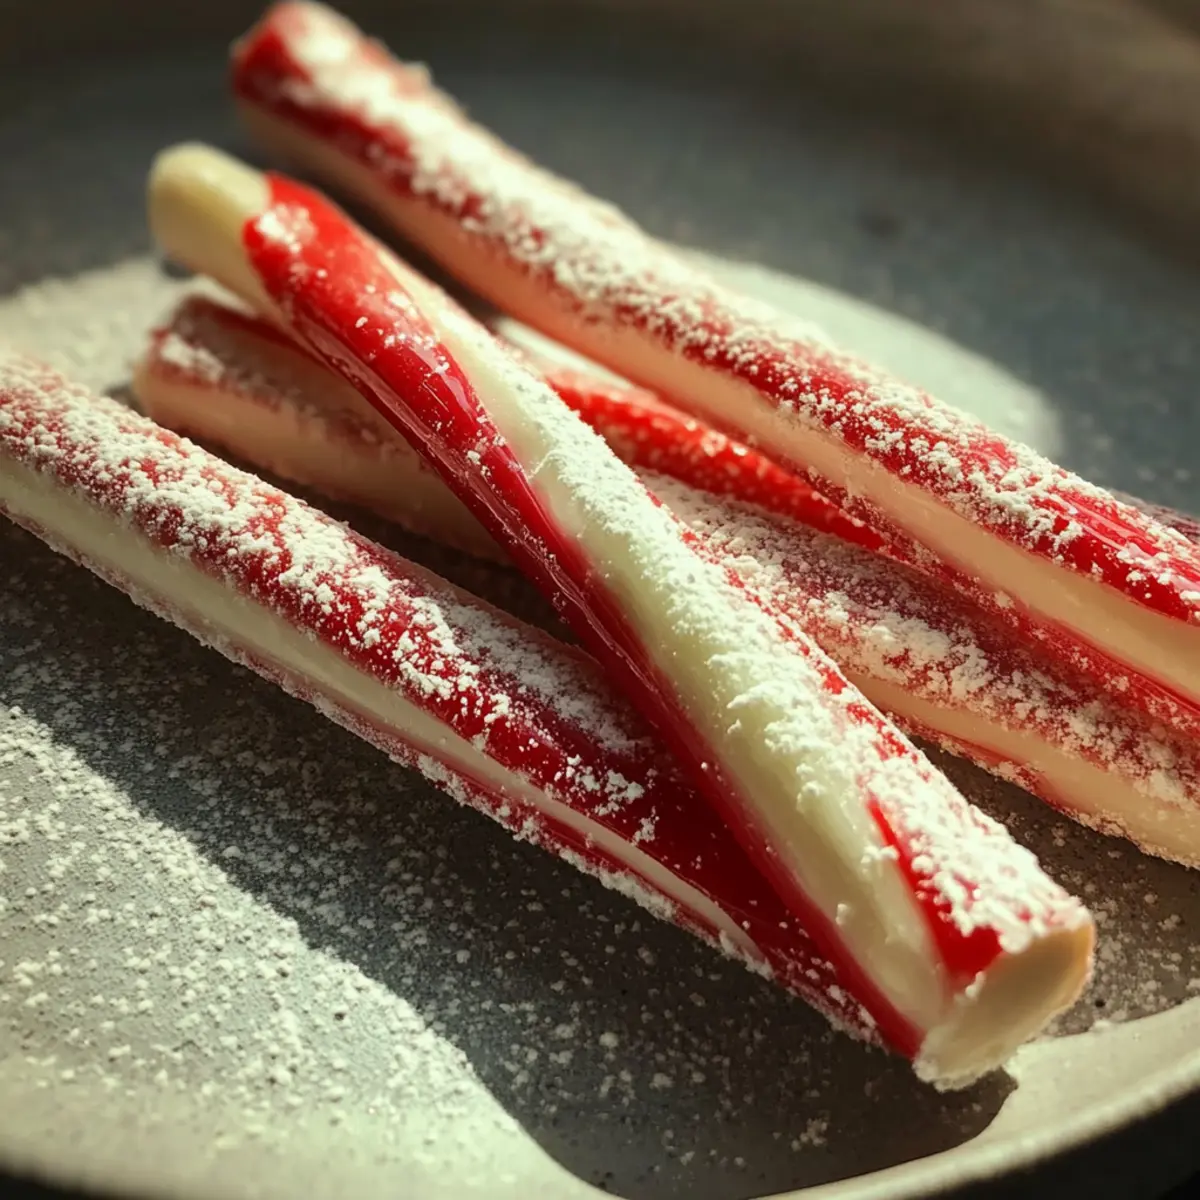
Using a sharp knife or kitchen shears, cut the twisted ropes into 6-inch pieces, forming your peppermint sticks. If desired, pinch the ends to create a neat finish. The distinctive shape adds to the charm of your homemade treats and invites holiday cheer!
Step 11: Cool Completely
Place the cut peppermint sticks onto your prepared surface and allow them to cool completely for about 30 minutes. This final cooling stage is crucial as it solidifies the shape and texture, creating the perfect candy that’s ready for sharing.
Step 12: Dust with Powdered Sugar
Once completely cooled, sprinkle additional powdered sugar over the peppermint sticks to prevent them from sticking together. This final touch ensures that your Christmas Peppermint Sticks maintain their beautiful appearance and are ready for gifting or festive snacking!
How to Store and Freeze Christmas Peppermint Sticks
Room Temperature: Store your Christmas Peppermint Sticks in an airtight container at room temperature for up to 2 weeks to maintain their freshness and prevent them from sticking together.
Fridge: If you'd like to extend their shelf life, keep them in the fridge for up to 4 weeks in a sealed container, but allow them to come to room temperature before serving for the best flavor.
Freezer: For longer storage, freeze the sticks in a single layer on a baking sheet before transferring them to a freezer-safe bag, where they can last for up to 3 months.
Reheating: When you're ready to enjoy your frozen treats, simply let them thaw in the fridge overnight or at room temperature for a few hours—no reheating is necessary!
Expert Tips for Christmas Peppermint Sticks
-
Temperature Matters: Always use a candy thermometer to achieve the right hard-ball stage at 260°F; overheating can cause the candy to become brittle.
-
Careful Mixing: When adding peppermint extract, wait until the candy cools slightly to avoid dangerous bubbling that can burn you.
-
Pliable Dough: Let the candy cool until it’s just warm enough to handle; it should be sticky but able to stretch without tearing.
-
Keep it Greasy: Lightly oil your hands before shaping the candy to keep it from sticking, making the twisting process much easier.
-
Custom Shapes: Don’t hesitate to get creative with the colors! While traditional red and white are festive, consider using green or blue for a fun twist.
Making your own Christmas Peppermint Sticks is a joyful tradition—avoid these common pitfalls to ensure your candy-making adventure is a success!
What to Serve with Christmas Peppermint Sticks?
Creating festive memories goes hand-in-hand with these delightful peppermint treats that can be paired with a variety of festive flavors!
-
Rich Hot Chocolate: The warm, velvety texture of hot chocolate complements the crisp peppermint perfectly, making for a cozy sipping experience. It’s pure holiday bliss!
-
Creamy Vanilla Ice Cream: A scoop of vanilla ice cream serves as a cool counterpart to the zingy peppermint, offering a delightful contrast in temperature and flavor.
-
Gingerbread Cookies: These spiced cookies provide a balance to the candy's sweetness while echoing holiday flavors—the perfect festive combination on any dessert platter!
-
Fluffy Meringue Topping: Light and airy meringue brings a touch of elegance, which can be dolloped on pies or enjoyed on its own alongside the peppermint sticks.
-
Cranberry Spritzers: The tartness of cranberry juice mixed with soda water creates a refreshing drink that enhances the peppermint's sweet tones, ideal for any holiday gathering.
-
Chocolate Dipped Pretzels: The salty crunch of pretzels dipped in sweet chocolate pairs beautifully with peppermint sticks, adding texture and contrast to your holiday spread.
-
Earl Grey Tea: The floral notes in Earl Grey offer an aromatic delight that pairs surprisingly well with the minty flavor, making for a sophisticated afternoon treat.
This array of pairings enhances the festive atmosphere and makes your celebrations even sweeter!
Christmas Peppermint Sticks Variations
Feel free to get creative with your Christmas Peppermint Sticks and tailor them to your taste!
-
Dairy-Free: Substitute corn syrup with agave nectar for a deliciously sweet twist that keeps the candy plant-based.
-
Minty Twist: Experiment by adding a few drops of peppermint essential oil for a bolder flavor. Just remember, a little goes a long way!
-
Color Variations: Play with colors! Use green and white or even shades of blue to make your sticks unique and festive. Let your creativity shine!
-
Spicy Kick: Add a pinch of cayenne pepper to the candy mixture for a surprising and delightful heat that complements the mint perfectly.
-
Chocolate-Dipped: After cooling, dip the ends of each peppermint stick in melted dark or white chocolate for a rich flavor contrast. This adds elegance and decadence!
-
Crushed Candy Canes: Sprinkle crushed candy canes on top of your sticks while they cool for added texture and festive flair. They’ll look beautiful and taste amazing!
-
Flavor Infusion: Replace peppermint extract with other flavors like spearmint, wintergreen, or even orange extract for a fun twist on classic flavors.
-
Nutty Goodness: Mix in finely chopped nuts like almonds or pecans in the ribbon stage for additional crunch and a delightful surprise in every bite.
Explore these fantastic ideas while making your Christmas Peppermint Sticks! If you're interested in more delightful inspirations, check out our guide on Creative Holiday Treats. Happy experimenting!
Make Ahead Options
These Christmas Peppermint Sticks are perfect for meal prep and holiday gatherings! You can prepare the candy mixture up to 24 hours in advance—simply follow steps 1 through 6, then let the mixture cool to room temperature. Store it in an airtight container in the refrigerator to maintain its quality. When you’re ready to roll out your peppermint sticks, allow the mixture to come to room temperature before proceeding with steps 7 through 12. This prep-ahead approach saves you precious time during the hectic holiday season, ensuring your festive treats are just as delicious when finished. Now you can enjoy the spirit of the season without the last-minute rush!
Christmas Peppermint Sticks Recipe FAQs
How do I select the best ingredients for my peppermint sticks?
Absolutely! For this recipe, you'll want to choose granulated sugar that feels dry and free of clumps. The corn syrup should be clear and fresh, and the peppermint extract should have a strong, fresh peppermint scent. When selecting food coloring, ensure it hasn't expired—this can impact the vibrancy of your candy!
What’s the best way to store my homemade peppermint sticks?
Very! Store your Christmas Peppermint Sticks in an airtight container at room temperature for up to 2 weeks. This helps maintain their soft texture while preventing them from sticking together. You can also pop them in the fridge for up to 4 weeks; just allow them to reach room temperature before serving to enhance their flavor.
Can I freeze my peppermint sticks for later?
Of course! For longer storage, freeze your Christmas Peppermint Sticks. Start by laying them out in a single layer on a baking sheet and placing them in the freezer for about 1-2 hours until frozen. Once firm, transfer them to a freezer-safe bag or container. They will keep beautifully for up to 3 months! To thaw, just leave them in the fridge overnight or at room temperature for a few hours before unwrapping.
What should I do if my candy is too hard or too soft?
Not a problem! If your candy turns out too hard, it may be due to cooking it for too long. You can try to warm it gently in the microwave for a few seconds to make it pliable again, but be careful not to overheat it. If it is too soft, ensure that you boiled the mixture to the hard-ball stage (260°F); if not, you can reheat it and try to reach that temperature again, then re-shape it.
Are there any dietary considerations I should be aware of for this recipe?
Definitely! While these Christmas Peppermint Sticks are generally safe, the recipe contains sugar and corn syrup, which should be consumed in moderation, especially for those with diabetes. If you have allergies, check the labels for your corn syrup and food coloring, as brands can vary. Also, avoid giving them to pets, especially dogs, as high sugar content can be harmful to animals.
How can I customize the colors or flavors for my peppermint sticks?
The more the merrier! You can play with different colors beyond the traditional red and white by using various food colorings. Additionally, consider swapping the peppermint extract for other extracts like spearmint or even almond for a unique touch. Just remember to adjust the quantity to suit your flavor preferences; a little goes a long way!
Deliciously Easy Christmas Peppermint Sticks Recipe
Equipment
- medium-sized saucepan
- Candy Thermometer
- Sharp knife or kitchen shears
- Baking Sheet
Ingredients
For the Candy Mixture
- 2 cups Granulated sugar Main ingredient for sweetness and structure.
- ½ cup Light corn syrup Prevents sugar from crystallizing.
- ½ cup Water Needed to dissolve sugar.
- 1 teaspoon Peppermint extract Essential for minty flavor.
For Coloring
- ¼ teaspoon Red food coloring Adds festive color.
- ¼ teaspoon White food coloring Gives a creamy appearance.
For Dusting
- 1 cup Powdered sugar Prevents sticks from sticking together.
Instructions
Step-by-Step Instructions for Christmas Peppermint Sticks
- Prepare a clean, flat surface dusted with powdered sugar to avoid sticking.
- Combine granulated sugar, light corn syrup, and water in a saucepan and stir over medium heat until dissolved.
- Increase heat to boil until the temperature reaches 260°F on a candy thermometer.
- Remove from heat and let sit for 5 minutes to cool.
- Stir in peppermint extract carefully.
- Divide mixture into two bowls, adding red food coloring to one and white to another.
- Cool candy for about 10-15 minutes until manageable.
- Grease hands and stretch each color until glossy.
- Roll into ropes and twist together for a spiral effect.
- Cut twisted ropes into 6-inch pieces.
- Allow cut sticks to cool completely on the prepared surface.
- Dust with additional powdered sugar once cooled.