As I gathered my ingredients for the holiday season, the jingle of candy canes brought to mind a fun twist on festive treats: No-Bake Christmas Treats. This easy recipe is not just a time-saver; it’s a crowd-pleaser, perfect for when you want to impress friends and family without spending hours in the kitchen. Combining sweet and salty elements like marshmallows and pretzels with the crunch of Rice Krispies, these treats are a guaranteed delight. Plus, they’re perfect for making ahead of time and storing in your fridge for holiday get-togethers. Trust me, your loved ones will be clamoring for more! Are you ready to create something magical?
Why Are These Treats So Irresistible?
Simplicity: These No-Bake Christmas Treats come together in just 15 minutes, making them a quick and easy option for any festive gathering.
Flavor Explosion: With a delightful mix of chocolate, peanut butter, and crunchy pretzels, every bite is a delectable experience.
Versatile Delight: You can easily customize these treats by swapping in your favorite mix-ins, such as Christmas Thumbprint Cookies or chopped nuts.
Crowd-Pleaser: Perfect for parties, these treats are sure to impress both kids and adults alike.
Make Ahead: Prepare them in advance and pop them in the fridge, so you're ready for any holiday celebration!
Festive Touch: The crushed candy canes on top provide a beautiful holiday aesthetic and a refreshing crunch that elevates these treats.
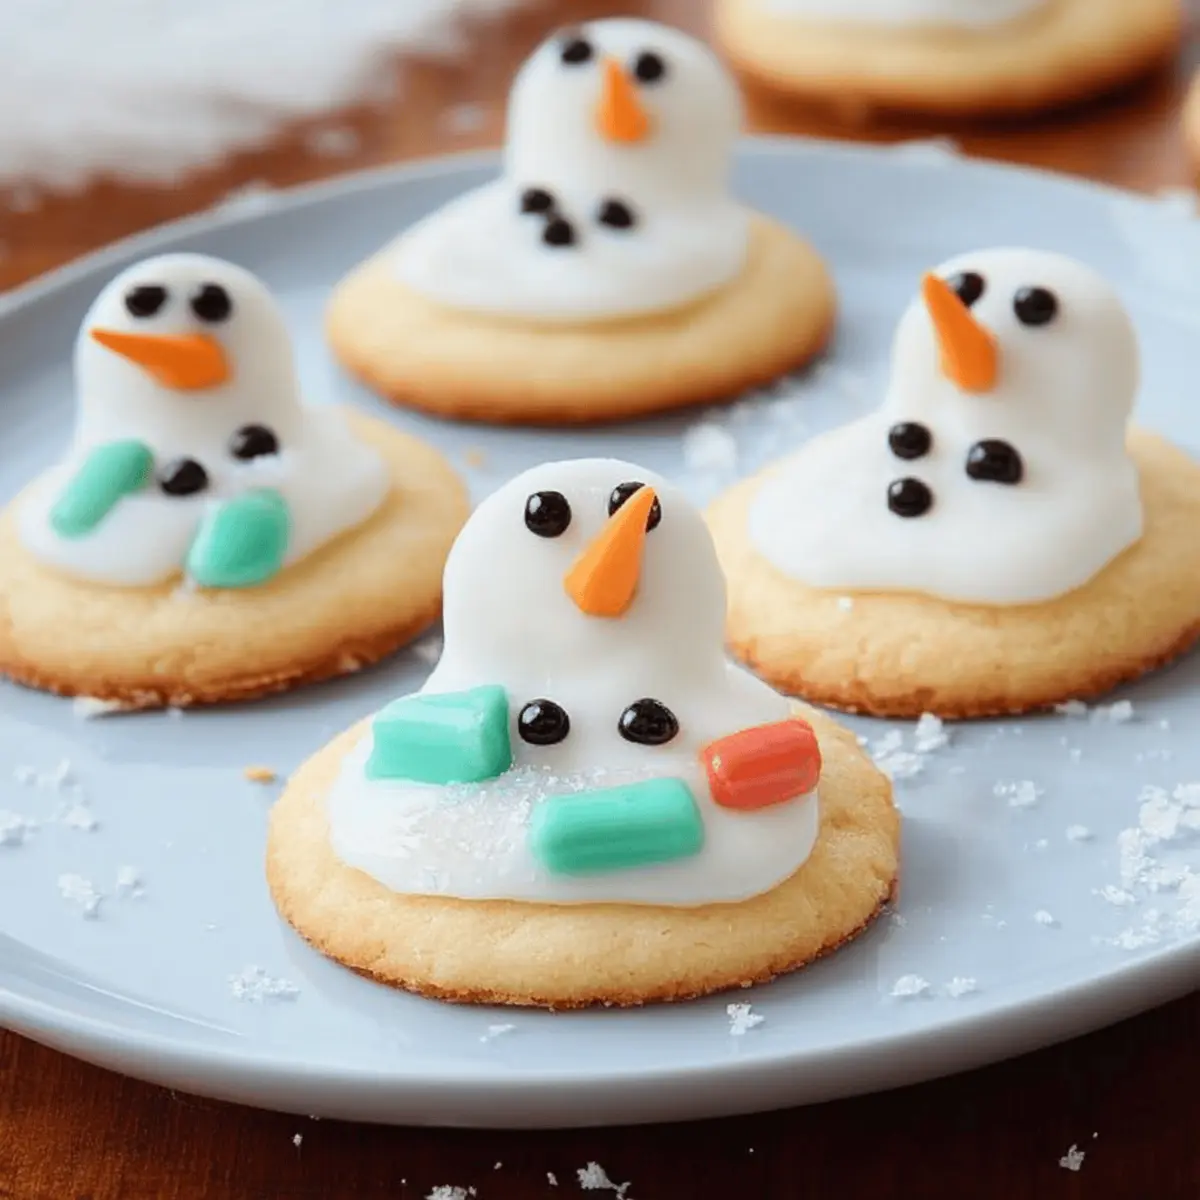
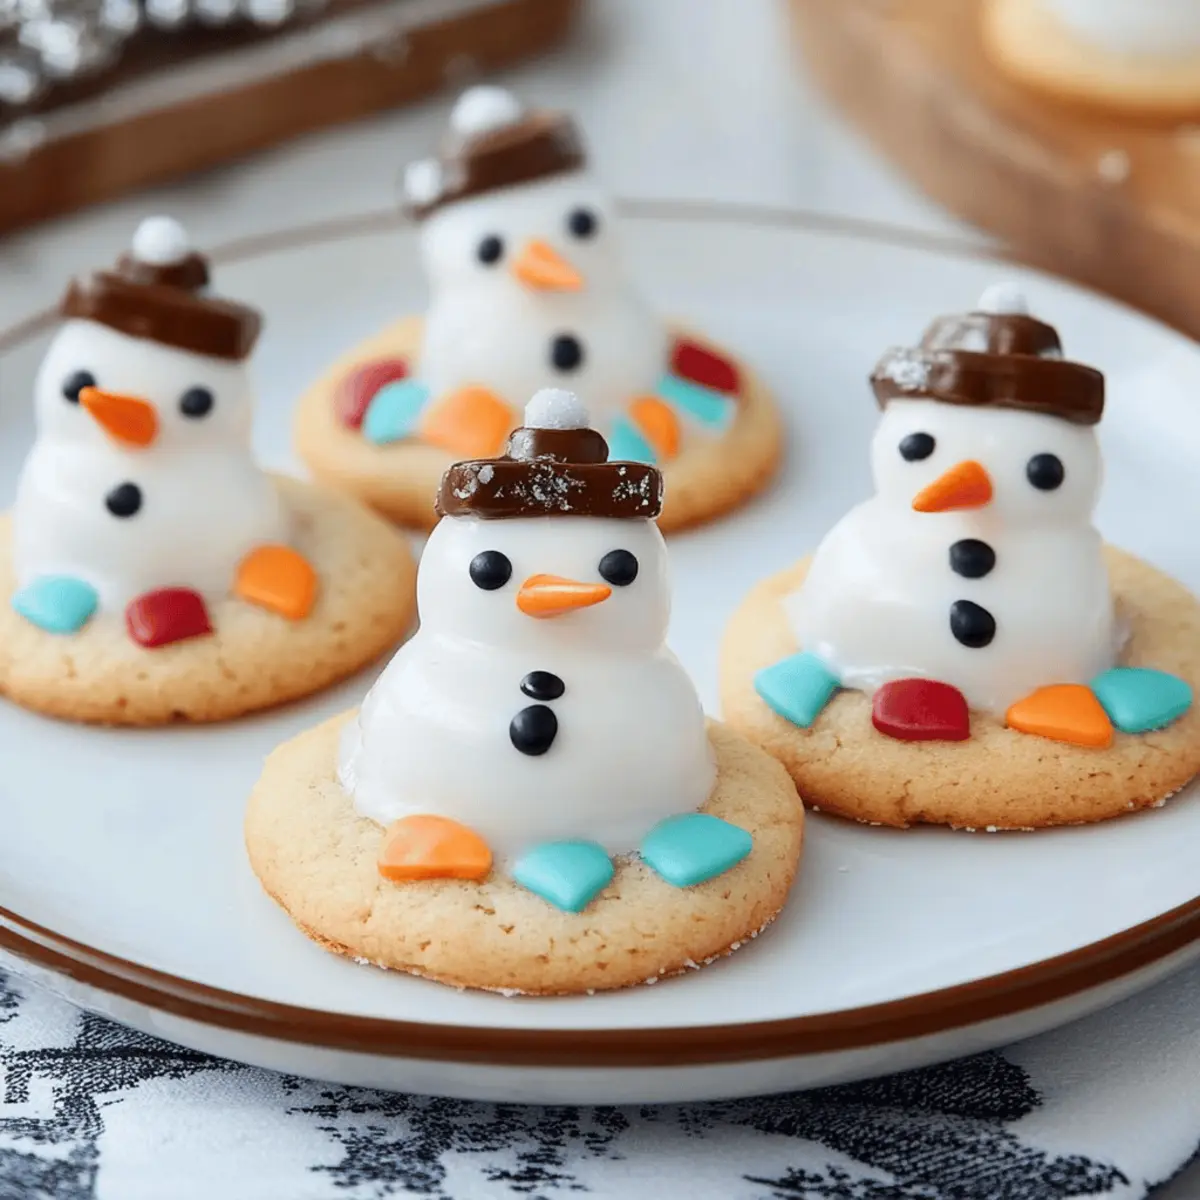
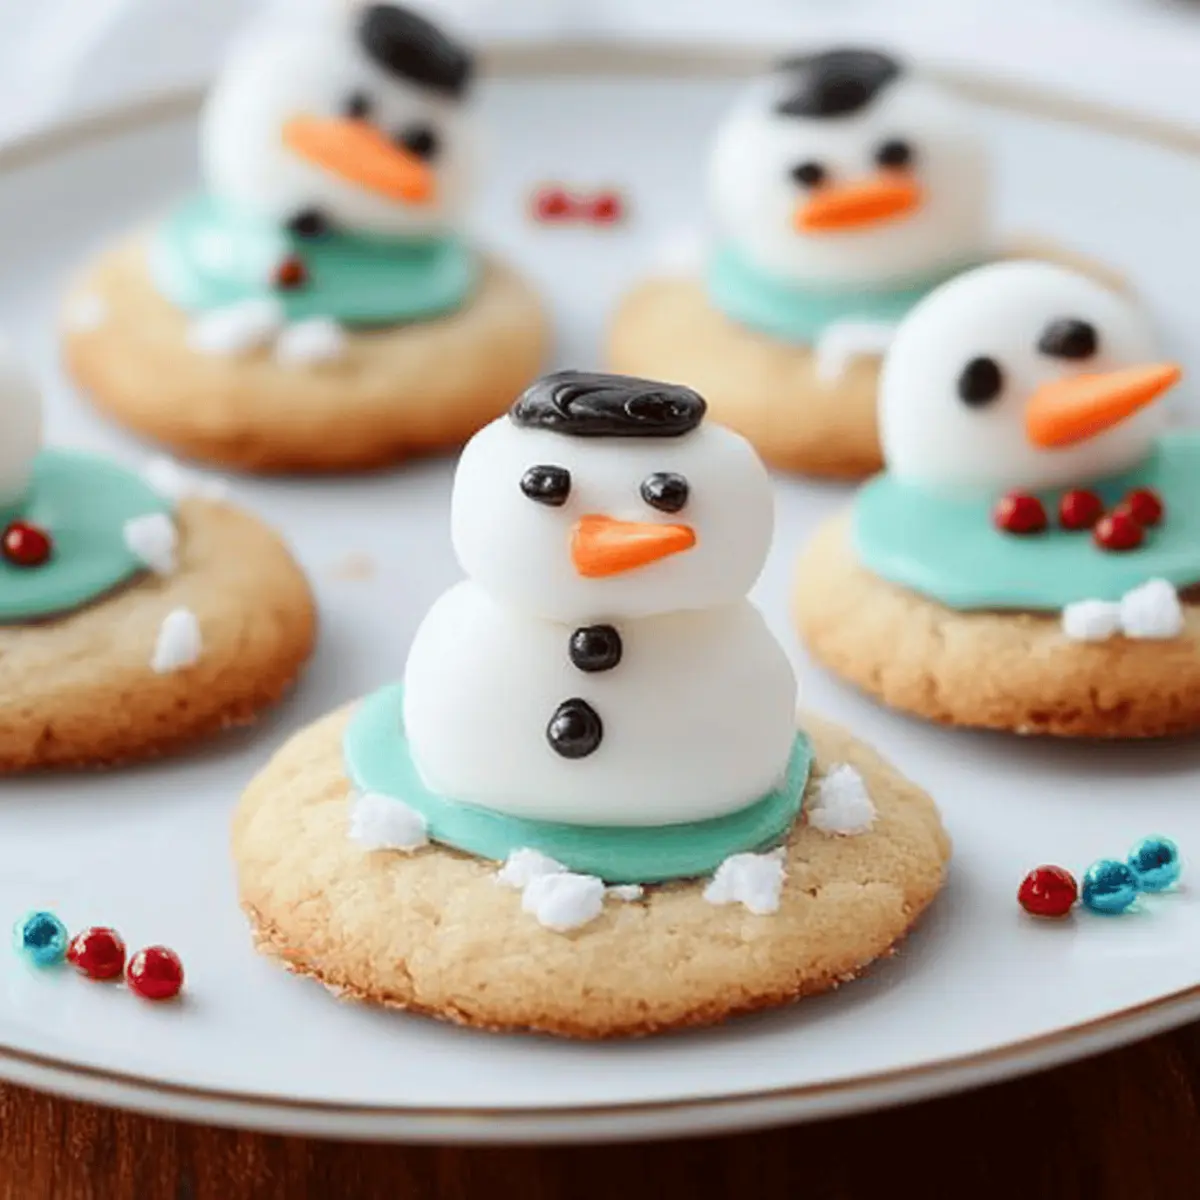
Melted Snowman Cookies Ingredients
Note: Get ready to craft these festive goodies that beautifully resemble melted snowmen!
For the Cookie Base
- 1 cup granulated sugar – adds sweetness to create a perfect cookie foundation.
- ½ cup unsalted butter – helps achieve a rich and creamy texture.
- 1 cup peanut butter – lends a delightful nutty flavor that pairs wonderfully with chocolate.
For the Crunch
- 2 cups Rice Krispies – adds an irresistible crunch that balances the softness of the cookies.
- ½ cup pretzels – offers a salty contrast that enhances overall flavor.
For the Decoration
- 1 cup chocolate chips – perfect for drizzling over the treats to mimic melting snow.
- ½ cup marshmallows – used as mini snowman bodies that are both cute and sweet.
- 1 cup coconut flakes – provides a snowy appearance that makes these cookies festive.
- 1 cup powdered sugar – ideal for creating a deliciously sweet finish.
- 1 cup candy canes, crushed – gives a fun and festive crunch, reminiscent of holiday cheer.
- ½ cup almonds, chopped – adds a nutty flavor and a bit of crunch to the design.
Step‑by‑Step Instructions for Melted Snowman Cookies
Step 1: Melt the Base
In a medium saucepan over medium heat, combine 1 cup of granulated sugar and ½ cup of unsalted butter. Stir frequently until the mixture is melted and bubbly, about 3-5 minutes. Once melted, add 1 cup of peanut butter, whisking until completely smooth and well combined. Remove from heat and let it cool slightly before proceeding.
Step 2: Combine with Crunch
In a large mixing bowl, pour the melted sugar-butter-peanut butter mixture over 2 cups of Rice Krispies. Gently fold them together using a spatula until all the cereal is evenly coated. This mixture will form the crispy base of your Melted Snowman Cookies. Set aside while you prepare the decoration ingredients.
Step 3: Melt the Chocolate
Using a microwave-safe bowl, carefully melt 1 cup of chocolate chips in the microwave, heating in 30-second intervals and stirring until smooth, taking about 1-2 minutes total. Alternatively, melt the chocolate using a double boiler for more precise control. Once melted, allow it to cool slightly while you prepare the cookie shapes.
Step 4: Fold in Fun Additions
In a separate bowl, fold together the crispy Rice Krispies mixture with ½ cup of pretzels, ½ cup of mini marshmallows, 1 cup of coconut flakes, and ½ cup of chopped almonds. This creates a delightful blend of flavors and textures. Ensure everything is mixed well, and prepare to shape into cookies.
Step 5: Shape the Cookies
Wet your hands slightly to prevent sticking, then take small portions of the combined mixture and form them into snowman-shaped cookies. Place each cookie on a baking sheet lined with parchment paper, creating a festive display. Aim for them to be slightly flattened for better decoration.
Step 6: Drizzle the Chocolate
Take the melted chocolate from earlier and drizzle it generously over each snowman-shaped cookie. This step mimics the look of melting snow and adds a delicious touch. Use a spoon or a piping bag for more control in your drizzling art!
Step 7: Add Holiday Crunch
Once all cookies are drizzled with chocolate, sprinkle crushed candy canes over the top while the chocolate is still wet. This not only adds a festive flair but also a delightful crunch to your Melted Snowman Cookies, enhancing both appearance and flavor.
Step 8: Chill and Set
Place the entire baking sheet of cookies into the refrigerator and chill for at least 30 minutes. This allows the chocolate to harden and the flavors to meld beautifully. Keep an eye on them; once the chocolate is firm to the touch, they are ready to come out.
Step 9: Serve and Enjoy
After chilling, remove the cookies from the fridge and break apart any that may have stuck together. Cut into squares or keep them as rounds for serving. With their snowy appearance, these Melted Snowman Cookies are ready to bring festive joy to your table!

Melted Snowman Cookies Variations
Feel free to get creative and make these No-Bake Christmas Treats even more personal with some fun variations!
-
Nut-Free: Substitute peanut butter with sunflower seed butter for a nut-free option that maintains creaminess.
-
Chocolate Lovers: Use white chocolate chips instead of dark for a sweeter, festive look that enhances the holiday spirit.
-
Vegan Version: Opt for dairy-free chocolate and replace butter with coconut oil for a guilt-free treat everyone can enjoy.
-
Spiced Up: Add a teaspoon of cinnamon or nutmeg to the mix for a warm, cozy flavor that resonates with holiday nostalgia.
-
Dried Fruits: Toss in some dried cranberries or chopped apricots for a tart sweetness that contrasts beautifully with the other flavors.
-
Incredible Crunch: Swap out chopped almonds for pecans or hazelnuts for a different nutty goodness that adds delightful crunch.
-
Coconut Lovers: Sprinkle extra coconut flakes atop the melted chocolate for an even more tropical and festive vibe.
-
Heat Things Up: For a little kick, incorporate a pinch of cayenne pepper into the cookie mixture; it will elevate the flavor profile and surprise your taste buds!
Embark on a delightful journey by mixing in your favorite add-ins, perhaps inspired by other treats such as Christmas Thumbprint Cookies or Pistachio Shortbread Cookies. Each twist offers a new experience that your friends and family will absolutely love!
Tips for the Best Melted Snowman Cookies
-
Melt Carefully: When melting chocolate, do it in short intervals. This prevents burning, ensuring a smooth drizzle over your cookies.
-
Uniform Shapes: Make sure to form the cookies into even sizes for consistent cooking and an appealing presentation.
-
Stickiness Solution: If the mixture is too sticky to shape, lightly wet your hands to easily form the cookies without mess.
-
Flavor Balance: Don’t skimp on the pretzels! Their salty crunch creates a delightful contrast with the sweetness of the chocolate and cookies.
-
Chill for Best Results: Allow the cookies to chill until the chocolate is fully set. This step enhances the flavor and makes them easier to serve.
-
Fun Variations: Feel free to customize your Melted Snowman Cookies by adding holiday-themed sprinkles or using different types of chocolate for drizzling!
How to Store and Freeze No-Bake Christmas Treats
Room Temperature: Store your No-Bake Christmas Treats in an airtight container at room temperature for up to 3 days to maintain freshness.
Fridge: These delightful treats can be kept in the fridge for up to a week. Just make sure they’re well-wrapped to prevent them from drying out.
Freezer: For longer storage, freeze the treats in a single layer on a baking sheet, then transfer them to an airtight container, lasting up to 2 months.
Reheating: If you prefer to enjoy them slightly warm, let them thaw in the fridge overnight and then microwave for a few seconds to soften—this will keep the flavors delightful!
What to Serve with No-Bake Christmas Treats
Creating a festive feast is all about the perfect pairings that balance flavors and textures!
-
Warm Cocoa: A comforting cup of rich cocoa mingles beautifully with these sweet treats, highlighting the chocolate elements in every bite.
-
Holiday Fruit Salad: Fresh fruits like pomegranate, oranges, and apples add a burst of color and natural sweetness, refreshing your palate between bites of rich treats.
-
Spicy Gingerbread Cookies: The warm spices of gingerbread cookies complement the sweet and salty flavors of the No-Bake Christmas Treats, creating a harmonious holiday spread.
-
Nutty Cheeseboard: A selection of nuts and creamy cheeses balances the sweetness of your treats while adding delightful textures that guests will love.
-
Minty Mojitos: Refreshing mojitos with muddled mint and zesty lime provide a vibrant and energizing drink choice that pairs perfectly with the sugary treats.
-
Eggnog: This classic creamy holiday beverage enhances the festive spirit, evoking cozy gatherings that make every bite of the No-Bake Christmas Treats even more special.
Elevate your holiday gatherings by mixing and matching these delightful pairings for an unforgettable celebration!
Make Ahead Options
These No-Bake Christmas Treats are perfect for busy home cooks looking to save time during the holiday rush! You can prepare the Rice Krispies mixture up to 24 hours in advance. Simply follow the first four steps of the recipe and store the mixture in an airtight container in the refrigerator. This helps maintain their delicious flavor and crunchy texture. When you're ready to serve, just shape them into cookies, drizzle with melted chocolate, and sprinkle the crushed candy canes over the top. Chilling the assembled treats for at least 30 minutes ensures they set beautifully, making them just as delightful as if they were made fresh that day!
No-Bake Christmas Treats Recipe FAQs
How do I know if my ingredients are ripe or fresh?
Absolutely! When selecting your ingredients, look for butter that is creamy and free of discoloration. Your peanut butter should be smooth, with no signs of oil separation. For chocolate chips, choose those without any chalky texture. Additionally, ensure your marshmallows are fluffy and white, as any dark spots or hard pieces indicate they're past their prime.
What is the best way to store No-Bake Christmas Treats?
Very! Store your No-Bake Christmas Treats in an airtight container at room temperature for up to 3 days, or pop them in the fridge for up to a week if you want to keep them even fresher. Make sure to layer parchment paper between treats to prevent sticking!
Can I freeze the treats, and how?
Absolutely! To freeze your treats, first, place them in a single layer on a baking sheet lined with parchment paper. Freeze for about 1-2 hours until they are firm, then transfer them to an airtight container or a freezer bag. They can be stored in the freezer for up to 2 months. When you're ready to enjoy, simply thaw them in the fridge overnight.
My treats are sticky and hard to shape, what should I do?
No worries! If your mixture is too sticky, lightly wet your hands with water before shaping the treats. This will help prevent the mixture from sticking to your hands and allow for easier shaping. If you find that they aren’t holding together well, adding a bit more Rice Krispies may help!
Are these treats safe for people with nut allergies?
If you're catering to those with nut allergies, it’s best to skip the peanut butter and replace it with sunflower seed butter or another nut-free alternative. Always check the labels of chocolate chips, as some brands may contain traces of nuts.
How long do the treats last after being made?
These festive treats can be stored at room temperature for up to 3 days, but if you want to keep them for a week, I recommend placing them in the fridge to retain their deliciousness. They’ll stay fresh as long as they are kept in an airtight container!
Melted Snowman Cookies that Bring Holiday Joy to Your Table
Equipment
- medium saucepan
- large mixing bowl
- microwave-safe bowl
- spatula
- Parchment Paper
Ingredients
For the Cookie Base
- 1 cup granulated sugar adds sweetness to create a perfect cookie foundation
- ½ cup unsalted butter helps achieve a rich and creamy texture
- 1 cup peanut butter lends a delightful nutty flavor that pairs wonderfully with chocolate
For the Crunch
- 2 cups Rice Krispies adds an irresistible crunch that balances the softness of the cookies
- ½ cup pretzels offers a salty contrast that enhances overall flavor
For the Decoration
- 1 cup chocolate chips perfect for drizzling over the treats to mimic melting snow
- ½ cup marshmallows used as mini snowman bodies that are both cute and sweet
- 1 cup coconut flakes provides a snowy appearance that makes these cookies festive
- 1 cup powdered sugar ideal for creating a deliciously sweet finish
- 1 cup candy canes, crushed gives a fun and festive crunch, reminiscent of holiday cheer
- ½ cup almonds, chopped adds a nutty flavor and a bit of crunch to the design
Instructions
Step‑by‑Step Instructions for Melted Snowman Cookies
- In a medium saucepan over medium heat, combine 1 cup of granulated sugar and ½ cup of unsalted butter. Stir frequently until the mixture is melted and bubbly, about 3-5 minutes. Once melted, add 1 cup of peanut butter, whisking until completely smooth and well combined. Remove from heat and let it cool slightly before proceeding.
- In a large mixing bowl, pour the melted sugar-butter-peanut butter mixture over 2 cups of Rice Krispies. Gently fold them together using a spatula until all the cereal is evenly coated. This mixture will form the crispy base of your Melted Snowman Cookies. Set aside while you prepare the decoration ingredients.
- Using a microwave-safe bowl, carefully melt 1 cup of chocolate chips in the microwave, heating in 30-second intervals and stirring until smooth, taking about 1-2 minutes total. Alternatively, melt the chocolate using a double boiler for more precise control. Once melted, allow it to cool slightly while you prepare the cookie shapes.
- In a separate bowl, fold together the crispy Rice Krispies mixture with ½ cup of pretzels, ½ cup of mini marshmallows, 1 cup of coconut flakes, and ½ cup of chopped almonds. This creates a delightful blend of flavors and textures. Ensure everything is mixed well, and prepare to shape into cookies.
- Wet your hands slightly to prevent sticking, then take small portions of the combined mixture and form them into snowman-shaped cookies. Place each cookie on a baking sheet lined with parchment paper, creating a festive display. Aim for them to be slightly flattened for better decoration.
- Take the melted chocolate from earlier and drizzle it generously over each snowman-shaped cookie. This step mimics the look of melting snow and adds a delicious touch. Use a spoon or a piping bag for more control in your drizzling art!
- Once all cookies are drizzled with chocolate, sprinkle crushed candy canes over the top while the chocolate is still wet. This not only adds a festive flair but also a delightful crunch to your Melted Snowman Cookies, enhancing both appearance and flavor.
- Place the entire baking sheet of cookies into the refrigerator and chill for at least 30 minutes. This allows the chocolate to harden and the flavors to meld beautifully. Keep an eye on them; once the chocolate is firm to the touch, they are ready to come out.
- After chilling, remove the cookies from the fridge and break apart any that may have stuck together. Cut into squares or keep them as rounds for serving. With their snowy appearance, these Melted Snowman Cookies are ready to bring festive joy to your table!