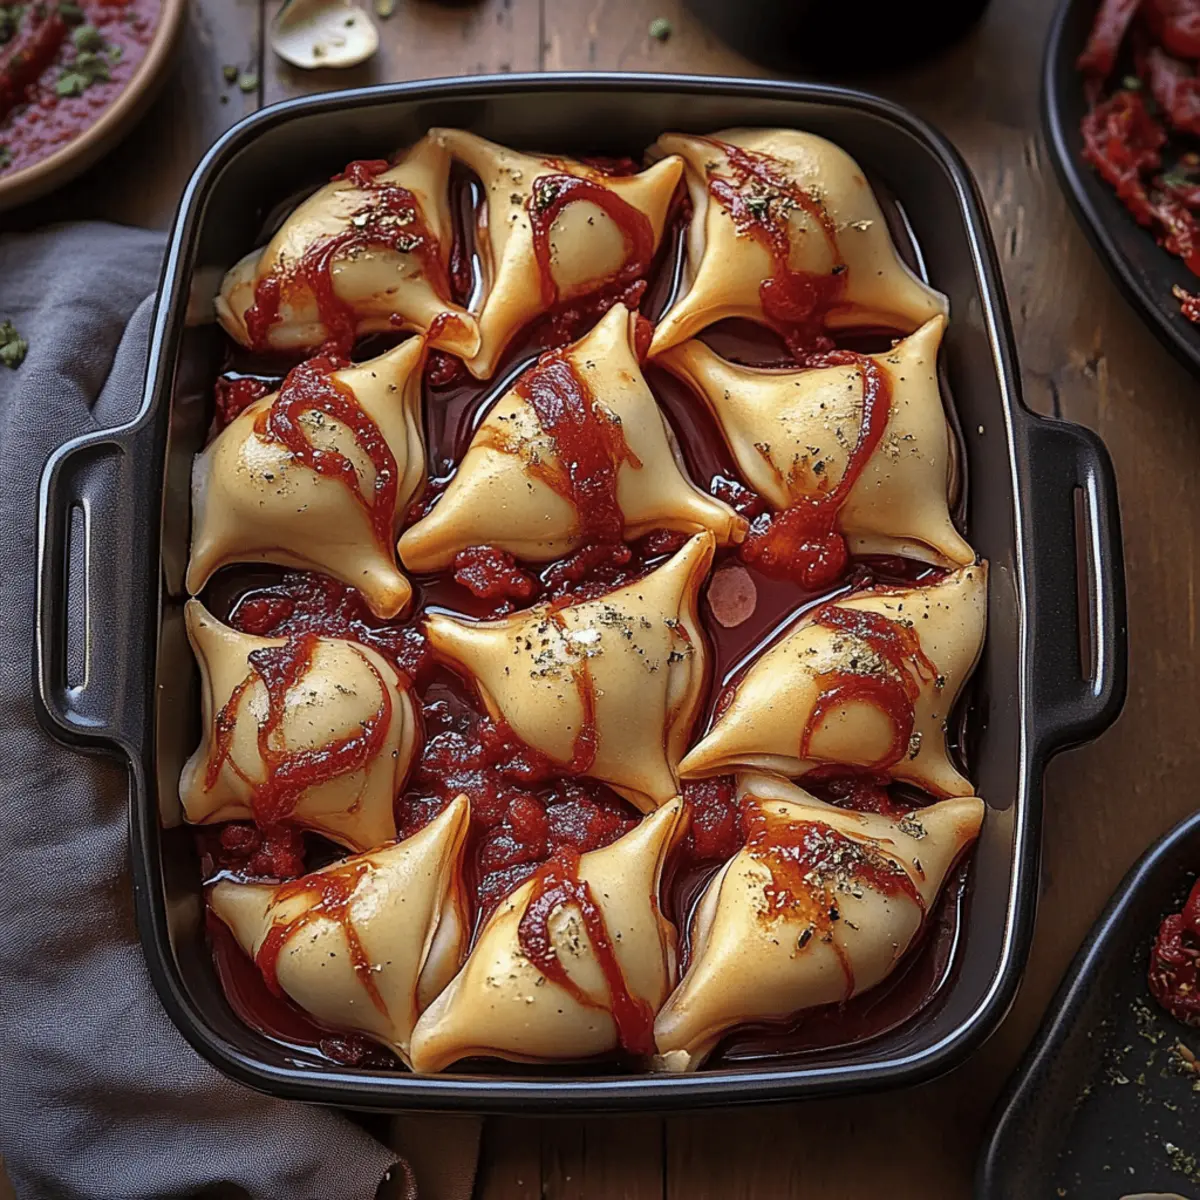
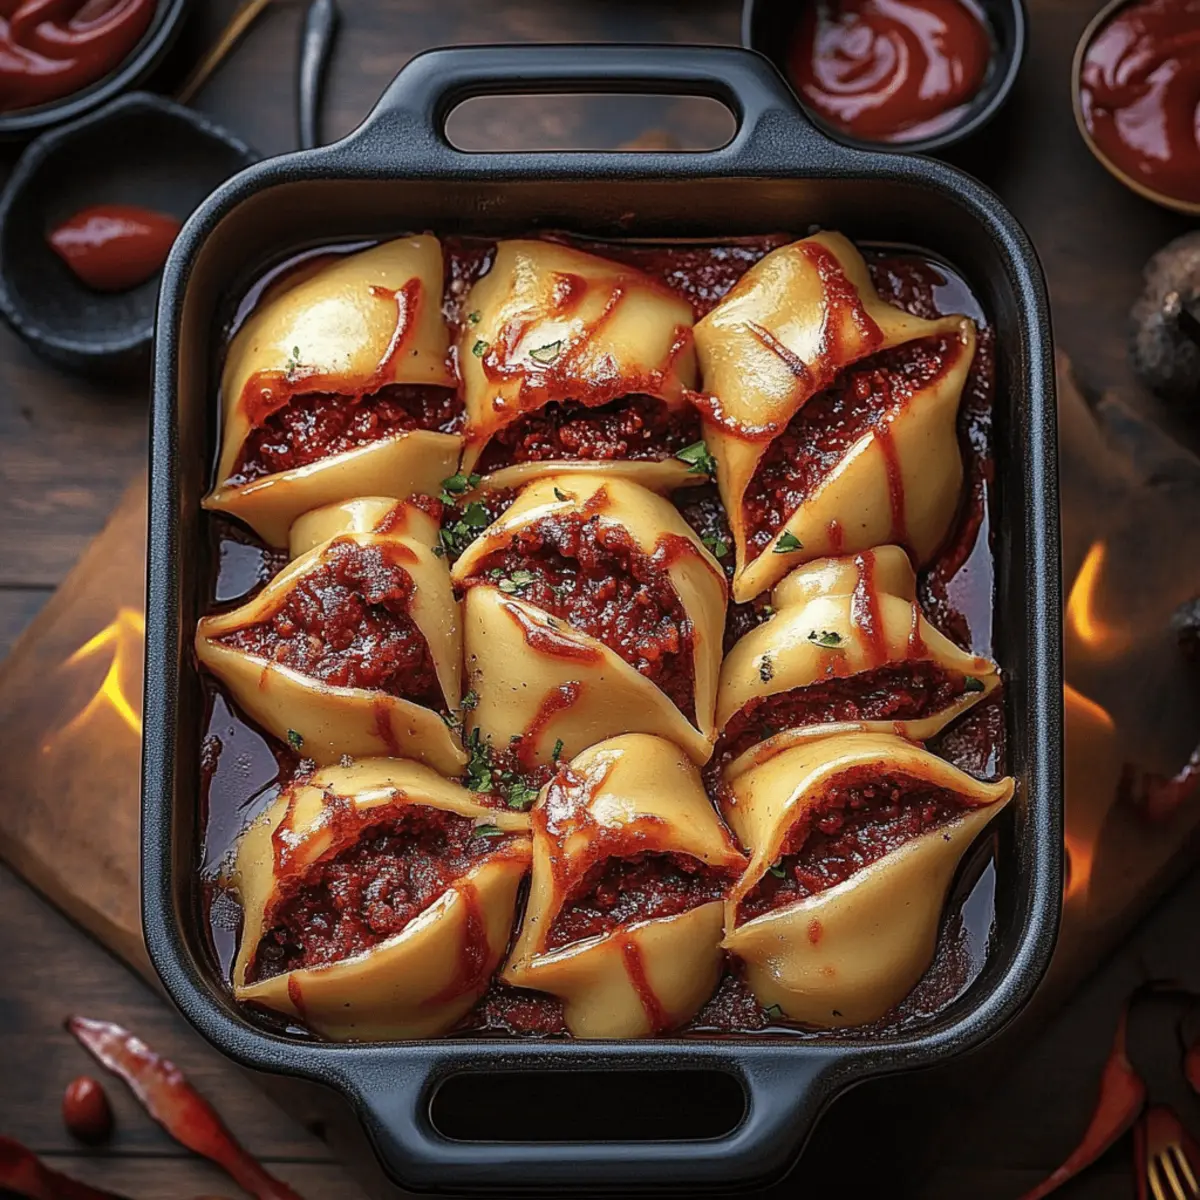
The oven door creaked open, releasing a warm, inviting aroma as I pulled out a bubbling dish of Zombie Guts Stuffed Shells. Inspired by a whimsical Halloween kitchen adventure, this recipe is a feast for the eyes and the taste buds, effortlessly transforming dinner into something fun and creative. Filled with a creamy blend of cheeses and hidden beet puree for a vibrant twist, these shells are not only a delight to prepare but also offer a comforting, crowd-pleasing dinner option. Perfect for those evenings when you want to wow your family or friends without spending hours in the kitchen, they're a healthy upgrade to typical stuffed pasta dishes. Ready in just under an hour, you'll be amazed by how quickly these spooky yet scrumptious shells come together. Are you ready to impress your loved ones with a playful take on a classic? Let’s dive into the recipe!
Why Are Zombie Guts Stuffed Shells a Hit?
Whimsical and fun: These Zombie Guts Stuffed Shells add a playful twist to your dinner table, making mealtime more enjoyable for everyone.
Unique twist: The incorporation of beet puree not only enhances the nutritious profile but also gives a vibrant hue to the sauce, delighting both the eye and palate.
Quick and easy: With a total prep and cook time of under an hour, you can whip up a stunning dish without spending all night in the kitchen.
Crowd-pleaser: Perfect for family dinners or entertaining friends, these shells are bound to spark delicious conversation around the table.
Versatile: Feel free to customize the stuffed filling or sauces based on what you have on hand, making them adaptable to your cravings.
Get ready to experience a delightful blend of flavors that will have everyone coming back for seconds!
Zombie Guts Stuffed Shells Ingredients
Dive right into creating your very own Zombie Guts Stuffed Shells with these essential ingredients!
For the Shells
- 12 jumbo pasta shells – These big pasta pockets are perfect for holding all that gooey goodness.
For the Cheese Filling
- 1 cup ricotta cheese – A creamy base that provides a delightful texture and flavor.
- ½ cup grated Parmesan cheese – Adds a rich, savory touch to your filling.
- 1 cup shredded mozzarella cheese – For that deliciously melty, gooey finish!
- 1 tablespoon fresh parsley, chopped – Brings a hint of freshness and vibrant color to the mix.
- 1 teaspoon garlic powder – Infuses the filling with a warm and comforting flavor.
- Salt – To taste, enhances all the other flavors in your cheesy filling.
- Pepper – A pinch adds a subtle kick that'll keep you coming back for more.
For the Sauce
- 2 cups tomato sauce – The perfect base that brings everything together, giving your Zombie Guts its signature look.
- 1 cup beet puree – Adds a pop of color and nutrition, making them truly “zombie guts”!
For Garnishing
- Balsamic glaze, for drizzling (optional) – A sweet and tangy touch that elevates the entire dish.
- Black garlic oil, for drizzling (optional) – Provides an umami flavor that’s simply unforgettable.
Gather these ingredients and prepare to amaze everyone with your Zombie Guts Stuffed Shells!
Step‑by‑Step Instructions for Zombie Guts Stuffed Shells
Step 1: Preheat the Oven
Begin your culinary adventure by preheating your oven to 375°F (190°C). This ensures a perfectly baked dish once your Zombie Guts Stuffed Shells are assembled and ready to go. While the oven warms up, you can gather your ingredients and get everything prepped for cooking, creating a cozy atmosphere in your kitchen.
Step 2: Cook the Pasta
Cook the jumbo pasta shells according to the package instructions until they’re al dente, usually about 8-10 minutes. Drain the shells in a colander and let them sit to cool for a few moments. This step is crucial to avoid overcooking while you prepare the cheesy filling, so keep an eye on them!
Step 3: Prepare the Cheese Filling
In a mixing bowl, combine the ricotta cheese, grated Parmesan cheese, shredded mozzarella cheese, chopped parsley, garlic powder, and a generous pinch of salt and pepper. Mix everything together until it’s well combined and creamy, forming a delicious filling for your Zombie Guts Stuffed Shells.
Step 4: Stuff the Shells
Carefully fill each cooked pasta shell with the cheesy mixture using a spoon or a piping bag for ease. Make sure to pack the filling generously but don't overstuff; you want them to hold together beautifully without spilling. Set the filled shells aside as you prepare the sauce.
Step 5: Make the Sauce
In a separate bowl, mix the tomato sauce and beet puree until thoroughly combined, resulting in a vibrant and flavorful sauce that embodies the spooky essence of Zombie Guts Stuffed Shells. Adjust the seasoning with salt and pepper according to your preference for ultimate taste satisfaction.
Step 6: Assemble the Dish
Spread a thin layer of the beet-tomato sauce in the bottom of a baking dish, creating a delicious base for your shells. Use a spatula for an even spread. Then, place the stuffed shells snugly on top of the sauce, ensuring they fit comfortably without crowding one another.
Step 7: Enrobe the Shells
Once the shells are neatly arranged, pour the remaining beet-tomato sauce over the top, making sure each shell is generously covered. This adds moisture and flavor during baking, ensuring your Zombie Guts Stuffed Shells come out flavorful and luscious.
Step 8: Bake
Cover the baking dish tightly with aluminum foil to keep moisture in and place it in the preheated oven. Bake for 25 minutes, allowing the flavors to meld and the filling to heat thoroughly. You’ll know it’s time to remove the foil when a delightful aroma fills the air.
Step 9: Finish Baking
Remove the foil and bake for an additional 10 minutes, or until the cheese on top is bubbly and golden. This step brings a beautiful finish to your Zombie Guts Stuffed Shells, making them visually enticing and irresistible when served.
Step 10: Garnish and Serve
After baking, let the dish rest for a few minutes before serving. Drizzle with balsamic glaze or black garlic oil for an added layer of flavor, if desired. Plate up your Zombie Guts Stuffed Shells, and enjoy a uniquely delicious meal that will thrill your taste buds!
How to Store and Freeze Zombie Guts Stuffed Shells
Fridge: Store any leftover Zombie Guts Stuffed Shells in an airtight container in the refrigerator for up to 3 days. This keeps them fresh and ready for quick reheating!
Freezer: To freeze, wrap the baked and cooled shells tightly in plastic wrap and then place them in a freezer-safe container. They can be frozen for up to 3 months.
Reheating: When ready to enjoy, simply thaw overnight in the fridge, then reheat in the oven at 350°F (175°C) for about 20 minutes, or until heated through.
Assembly Tip: For best flavor, consider freezing before baking. Just assemble and freeze the stuffed shells in the baking dish with sauce, then bake from frozen, adding an extra 10 minutes to cooking time.
Expert Tips for Zombie Guts Stuffed Shells
-
Prep Ingredients First: Gather and prep all your ingredients before you start cooking. This helps streamline the process and ensures nothing gets forgotten or overlooked.
-
Avoid Overcooking Shells: Cook the jumbo pasta shells until just al dente. Overcooked shells can break apart during stuffing and baking, ruining your Zombie Guts Stuffed Shells.
-
Pack the Filling: Don’t be shy when stuffing the shells! Generously fill each one with the cheesy mixture, but avoid overstuffing to prevent spills during baking.
-
Sauce Layering: Spread a thin base layer of beet-tomato sauce in the baking dish before placing in the stuffed shells. This adds moisture and allows the flavors to meld beautifully.
-
Rest Before Serving: Allow the dish to rest for a few minutes after baking. This not only makes it easier to serve but also lets the flavors settle, enhancing your enjoyment!
-
Customize: Feel free to experiment with different cheeses or herbs in your filling for a personalized take on these Zombie Guts Stuffed Shells.
Make Ahead Options
These Zombie Guts Stuffed Shells are a fantastic option for meal prep that can save you time during busy weeknights! You can prepare the entire dish up to 24 hours in advance by assembling the stuffed shells and layering them in the baking dish with the sauce. Cover tightly with plastic wrap and refrigerate to maintain freshness and prevent drying. When you're ready to enjoy them, simply remove the wrap and bake directly from the fridge, adding an extra 5-10 minutes to the cooking time. This way, you’ll have a comforting, crowd-pleasing meal that’s just as delicious as when freshly made!
What to Serve with Zombie Guts Stuffed Shells
Create a delightful feast around these whimsical shells that will make your dinner table come alive!
-
Garlic Bread: A crunchy, buttery side that complements the saucy filled shells with every irresistible bite, perfect for soaking up any leftover sauce.
-
Caesar Salad: Crisp romaine tossed in tangy dressing provides a refreshing contrast to the creamy stuffed shells, adding a delightful crunch to your plate.
-
Roasted Vegetables: Seasoned bell peppers, zucchini, and carrots offer a colorful medley that brings an added layer of nutrition and flavor to the meal.
-
Herb-Infused Quinoa: Light and fluffy quinoa with fresh herbs creates an earthy foundation, allowing the bold flavors of the stuffed shells to shine even more.
-
Wine Pairing: A glass of medium-bodied red wine, like a Chianti or Merlot, enhances the savory notes of the dish, making for a wonderfully grown-up dining experience.
-
Chocolate Mousse: Finish off with a rich, velvety dessert that balances the hearty meal, leaving everyone with a sweet memory to savor.
These pairing ideas will elevate your dining experience while providing contrast and balance to the Zombie Guts Stuffed Shells!
Zombie Guts Stuffed Shells Variations
Feel free to play with this recipe and truly make it your own with a few delicious twists!
-
Dairy-Free: Substitute the ricotta, Parmesan, and mozzarella with a blend of cashew cream and nutritional yeast for a creamy, cheesy flavor.
-
Vegetable Boost: Add chopped spinach or kale to the cheese filling for extra nutrients and a vibrant green color. A delightful surprise for the family!
-
Meaty Marvel: Incorporate cooked ground beef or turkey into the cheese filling for an added protein boost that will satisfy the heartiest of appetites.
-
Gluten-Free: Use gluten-free jumbo pasta shells or even zucchini boats for a lighter, vegetable-based option that's just as satisfying.
-
Spicy Kick: Mix in some crushed red pepper flakes or diced jalapeños into the cheese mixture for a delightful heat that will wake up your taste buds beautifully.
-
Herb Infusion: Experiment with different herbs like basil or oregano in your cheese filling for a fragrant twist that takes the flavor profile to new heights.
-
Creamy Sauce: Blend the tomato sauce with a splash of heavy cream or a vegan alternative for a richer sauce that adds a luxurious touch to your Zombie Guts.
-
Smoky Flavor: Drizzle some smoked paprika or use a chipotle-infused sauce to amp up the flavor with a subtle smokiness that'll leave everyone wanting more.
With these creative substitutions, you're sure to find the perfect combination that fits your family's taste and transforms your Zombie Guts Stuffed Shells into unique masterpieces! If you're curious about making them even more fun, check out Whimsical Zucchini Boats to see a similar playful take on stuffed pasta.
Zombie Guts Stuffed Shells Recipe FAQs
What type of pasta should I use for Zombie Guts Stuffed Shells?
Absolutely, jumbo pasta shells work best for this recipe! Their size is perfect for holding the delicious cheese filling without falling apart during the cooking process. If you can't find jumbo shells, you can use manicotti as a substitute, but keep an eye on cooking time as they may vary.
How should I store leftover Zombie Guts Stuffed Shells?
Leftover Zombie Guts Stuffed Shells can be stored in an airtight container in the refrigerator for up to 3 days. Before storing, let them cool completely to avoid excess moisture, which can make them soggy. When you're ready to enjoy them again, simply reheat in the oven or microwave until heated through.
Can I freeze Zombie Guts Stuffed Shells?
Yes! To freeze Zombie Guts Stuffed Shells, wrap the baked and cooled shells tightly in plastic wrap and place them in a freezer-safe container. They’ll keep well for up to 3 months. For the best flavor, consider freezing them before baking by assembling them in the baking dish with the sauce and then freezing directly.
What should I do if my cheesy filling is too runny?
If your filling seems too runny, don’t worry! You can thicken it by adding an extra scoop of ricotta cheese or a bit of shredded mozzarella. Additionally, try refrigerating the filling for about 30 minutes. Chilling will help it firm up, making it easier to stuff into the pasta shells without leaking.
Are there any dietary considerations for Zombie Guts Stuffed Shells?
Yes! If you’re cooking for someone with dietary restrictions, you can modify this recipe to suit their needs. For a gluten-free option, use gluten-free jumbo pasta shells available in many grocery stores. Additionally, if someone has a dairy allergy, you can try using dairy-free cheese alternatives, keeping in mind that the texture and taste may vary slightly.
How can I ensure the pasta shells don’t stick together during cooking?
To prevent the pasta shells from sticking together, make sure to stir them gently during the initial cooking process, especially within the first few minutes. After draining, rinse them briefly under cold water to halt the cooking process and reduce stickiness. Additionally, you can toss them lightly in a bit of olive oil to keep them separated before stuffing!
Zombie Guts Stuffed Shells That Will Thrill Your Taste Buds
Equipment
- Oven
- Baking dish
- Mixing bowl
- colander
- spatula
- spoon or piping bag
Ingredients
For the Shells
- 12 jumbo pasta shells
For the Cheese Filling
- 1 cup ricotta cheese A creamy base that provides a delightful texture and flavor.
- ½ cup grated Parmesan cheese Adds a rich, savory touch to your filling.
- 1 cup shredded mozzarella cheese For that deliciously melty, gooey finish!
- 1 tablespoon fresh parsley, chopped Brings a hint of freshness and vibrant color to the mix.
- 1 teaspoon garlic powder Infuses the filling with a warm and comforting flavor.
- Salt To taste, enhances all the other flavors in your cheesy filling.
- Pepper A pinch adds a subtle kick that'll keep you coming back for more.
For the Sauce
- 2 cups tomato sauce The perfect base that brings everything together, giving your Zombie Guts its signature look.
- 1 cup beet puree Adds a pop of color and nutrition, making them truly 'zombie guts'!
For Garnishing
- balsamic glaze for drizzling (optional) – A sweet and tangy touch that elevates the entire dish.
- black garlic oil for drizzling (optional) – Provides an umami flavor that's simply unforgettable.
Instructions
Step-by-Step Instructions
- Preheat your oven to 375°F (190°C).
- Cook the jumbo pasta shells according to the package instructions until they’re al dente, usually about 8-10 minutes. Drain and let cool.
- In a mixing bowl, combine ricotta, Parmesan, mozzarella, parsley, garlic powder, and a pinch of salt and pepper. Mix until creamy.
- Carefully fill each cooked pasta shell with the cheesy mixture. Set aside.
- In a separate bowl, mix tomato sauce and beet puree until combined. Adjust seasoning with salt and pepper.
- Spread a thin layer of beet-tomato sauce in the bottom of a baking dish. Place stuffed shells on top.
- Pour the remaining beet-tomato sauce over the stuffed shells.
- Cover with aluminum foil and bake for 25 minutes.
- Remove foil and bake for an additional 10 minutes, until cheese is bubbly and golden.
- Let the dish rest for a few minutes, then drizzle with balsamic glaze or black garlic oil before serving.