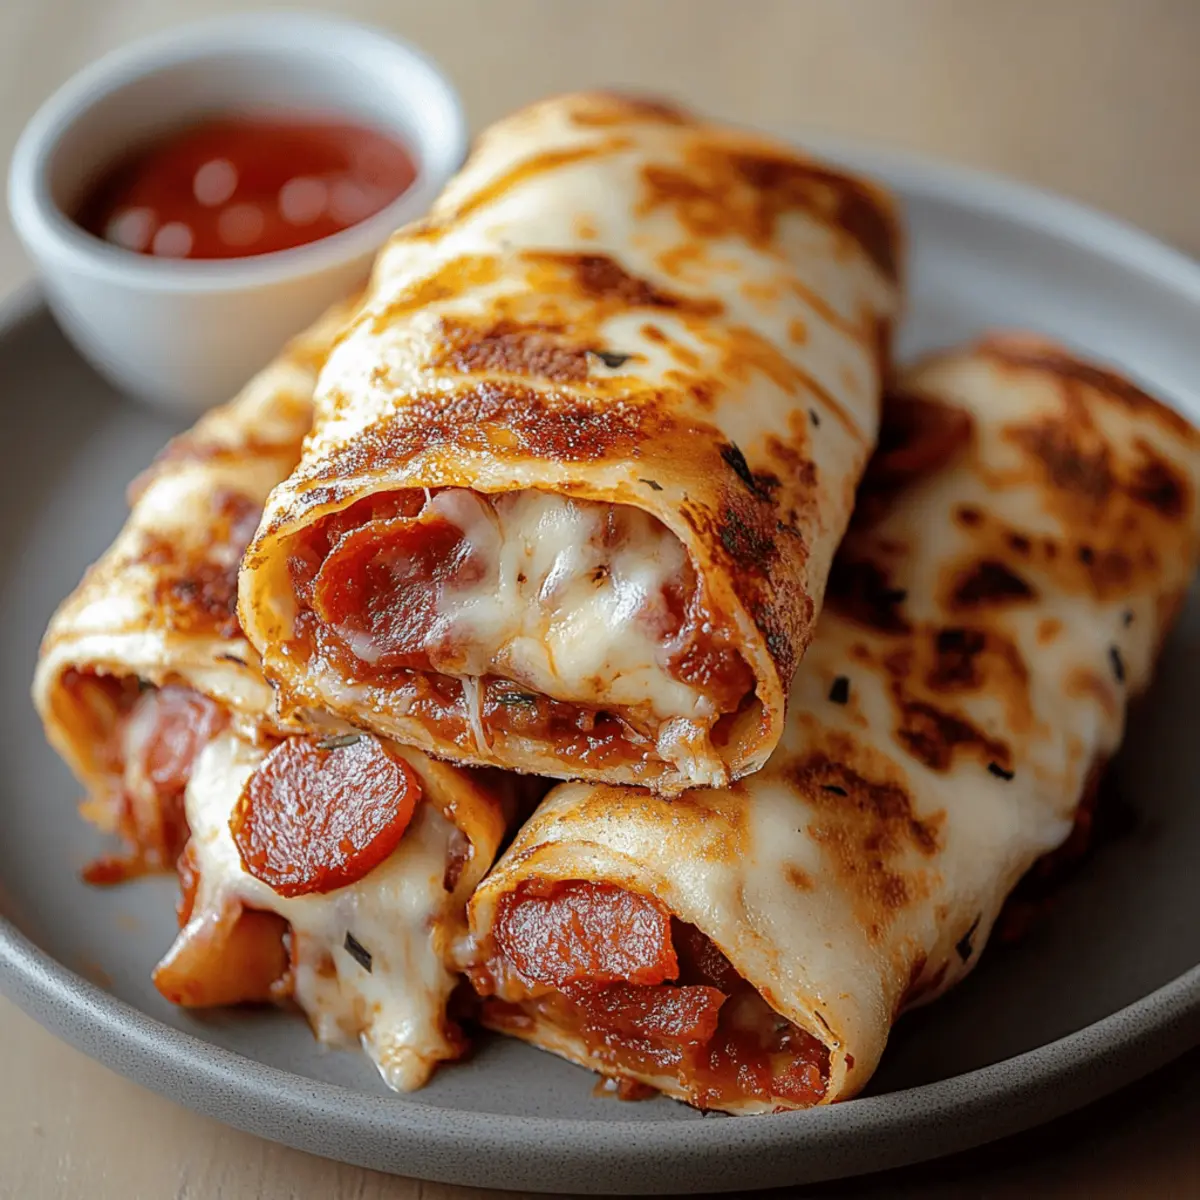
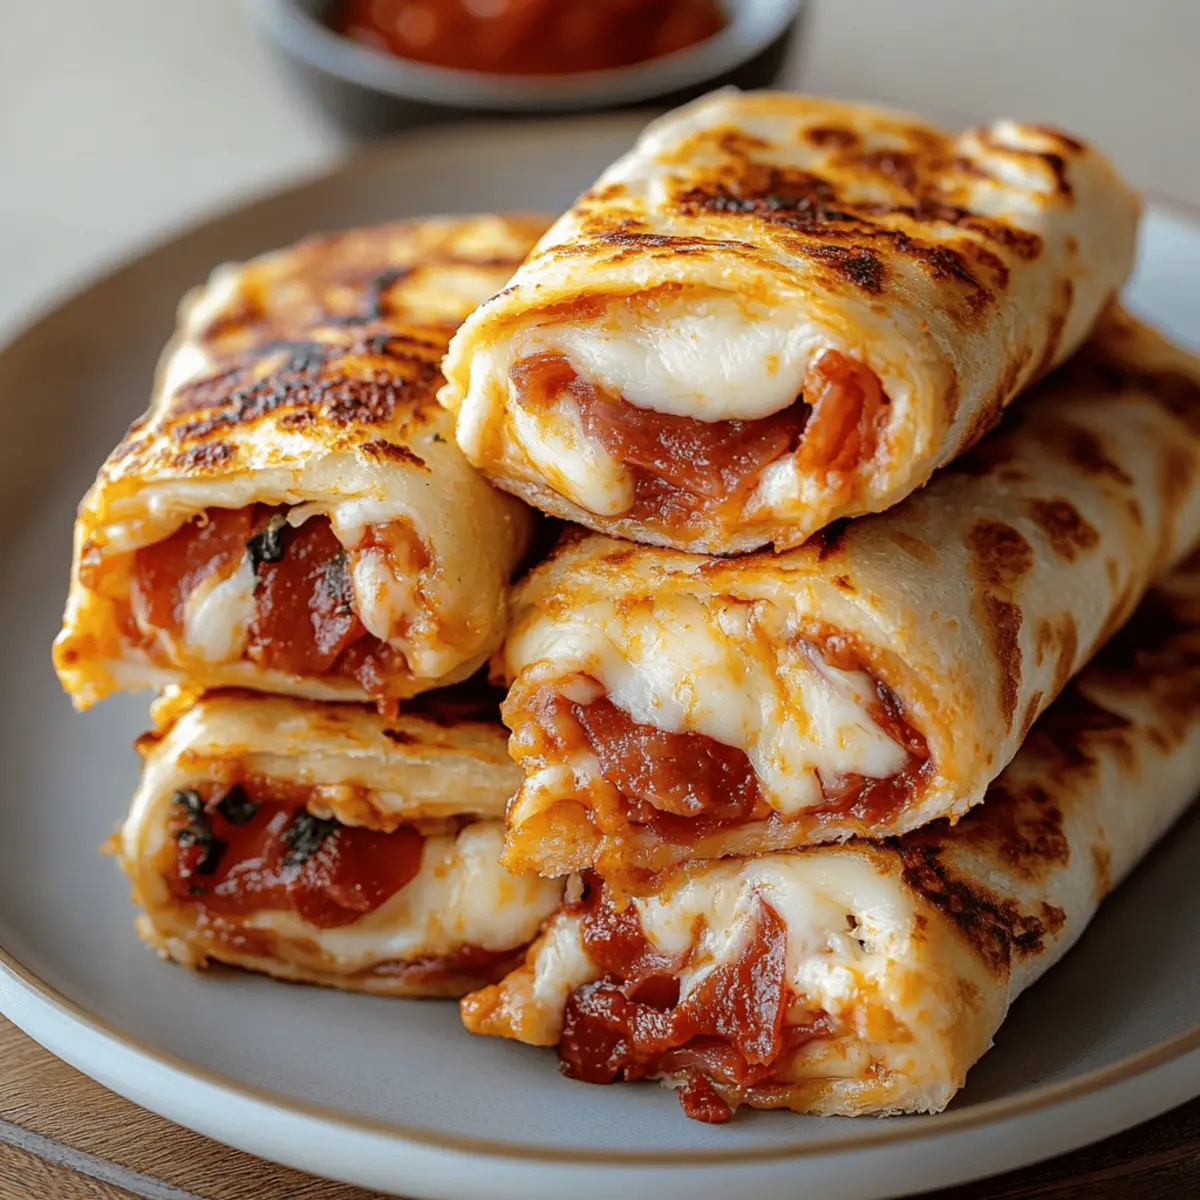
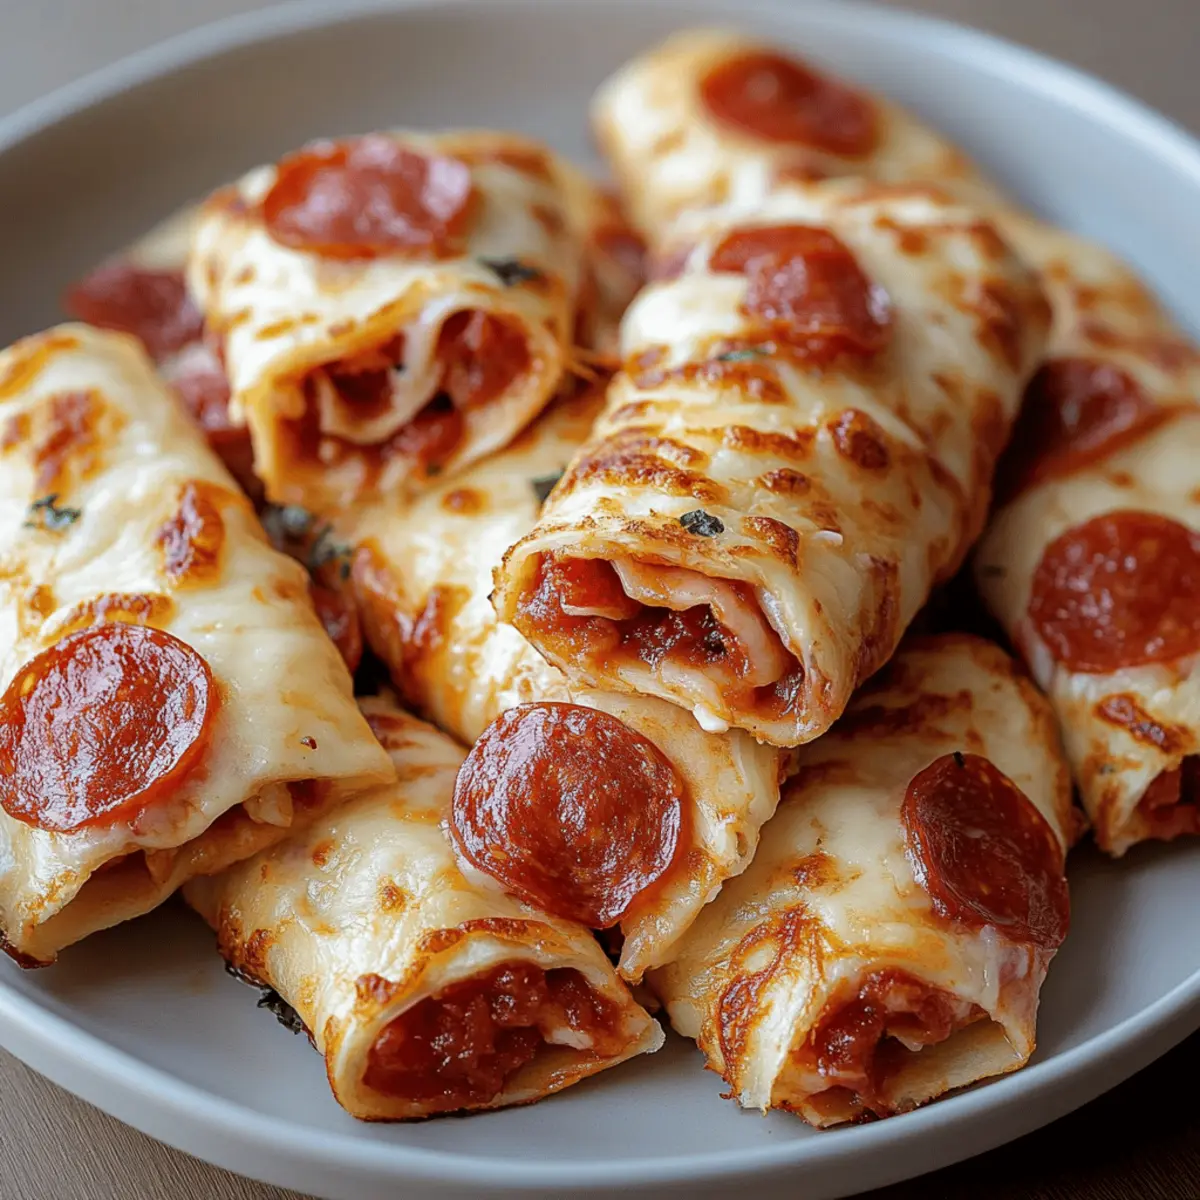
As I lifted the golden-brown roll-up from the baking sheet, a waft of melted cheese and zesty marinara danced around me, making my mouth water. These Cheesy Pepperoni Pizza Roll Ups have quickly become my go-to indulgence when I'm craving something delicious without the fuss of traditional pizza. Not only are they a breeze to whip up in just 17 minutes, but they’re also low-carb, making them a guilt-free pleasure on busy weeknights. Imagine delighting your family or friends with a snack that combines the nostalgia of pizza and a fun, cheesy twist! Whether you’re planning a movie night or simply treating yourself after a long day, these roll-ups are sure to become a staple in your kitchen. How do you like to customize your pizza flavors?
What makes these roll-ups a must-try?
Ease of Preparation: With just a quick prep time of 5 minutes, you can have these delicious Cheesy Pepperoni Pizza Roll Ups ready in no time!
Flavor Explosion: Each bite features gooey mozzarella paired with savory pepperoni and zesty marinara, creating a taste sensation that satisfies pizza cravings without the heavy crust.
Nostalgic Comfort: Enjoy the classic pizza experience in a fun, portable form that's perfect for sharing during game nights or family gatherings.
Versatile Options: Swap in your favorite toppings or use different sauces to shake things up; the possibilities are endless!
Healthier Choice: At only 180 calories per roll-up, these low-carb treats make it easy to indulge without the guilt. If you’re looking for other tasty options, check out my other post on healthy snack ideas.
Crowd-Pleasing Appeal: Whether for a casual snack or a party appetizer, these roll-ups are sure to impress family and friends.
Cheesy Pepperoni Pizza Roll Ups Ingredients
For the Roll Ups
• Mozzarella cheese – offers a delightful meltiness that brings out the pizza flavors in these roll ups.
• Marinara sauce – choose a zesty brand for an added flavor boost in the roll-up.
• Low-carb tortillas – perfect for a guilt-free base that holds all the cheesy goodness.
• Olive oil – brushing on the outside ensures a golden, crispy finish.
• Pepperoni slices – feel free to add more or try other toppings to customize your Cheesy Pepperoni Pizza Roll Ups!
Step‑by‑Step Instructions for Cheesy Pepperoni Pizza Roll Ups
Step 1: Preheat Your Oven
Begin by preheating your oven to 375°F (190°C). This is crucial for achieving that perfectly golden-brown finish on your Cheesy Pepperoni Pizza Roll Ups. While the oven heats up, gather your baking sheet and line it with parchment paper for easy cleanup later.
Step 2: Prepare the Tortillas
Lay the low-carb tortillas flat on a clean surface. This is the base of your roll-ups, so ensure they are smooth and free from wrinkles. Taking a moment to check their condition will help prevent any tearing during the rolling process.
Step 3: Add Marinara Sauce
Spread about 2 tablespoons of marinara sauce evenly over each tortilla, making sure to leave a half-inch border around the edges. This will add moisture and flavor to your Cheesy Pepperoni Pizza Roll Ups while preventing a soggy bottom.
Step 4: Sprinkle Cheese
Sprinkle shredded mozzarella cheese evenly over the sauce layer on each tortilla. The gooeyness of the cheese is what these roll-ups are all about, so don’t be shy! A generous layer will ensure each bite is wonderfully chewy and cheesy.
Step 5: Layer the Pepperoni
Next, arrange your pepperoni slices atop the mozzarella cheese. For maximum flavor, spread them out so each roll-up is packed with those savory bites. Adjust the quantity based on your preference for a cheesy versus meaty experience in each Cheesy Pepperoni Pizza Roll Up.
Step 6: Roll It Up
Now it’s time to roll each tortilla tightly from one end to the other, being careful not to tear the tortillas. Your goal is to create a whirl of flavors inside that holds together beautifully. A tight roll helps keep everything contained as they bake.
Step 7: Brush with Olive Oil
Take a pastry brush and lightly brush the outside of each roll-up with olive oil. This step is key for getting that irresistible, crispy exterior on your Cheesy Pepperoni Pizza Roll Ups. The olive oil also enhances the flavor, making each bite delectable.
Step 8: Arrange on Baking Sheet
Place the rolled-up tortillas seam-side down on your prepared baking sheet. Ensure they are not touching to allow for even cooking and crisping on all sides. This spacing will also help them brown up beautifully in the oven.
Step 9: Bake to Perfection
Slide the baking sheet into your preheated oven and bake for 10-12 minutes. Keep an eye on them — they’re done when they turn golden brown and you see melted cheese bubbling out from the ends. Your kitchen will smell amazing during this time!
Step 10: Cool and Serve
Once baked, remove the roll-ups from the oven and let them cool slightly. This will make handling them easier. Slice each roll-up into bite-sized pieces and serve warm, allowing everyone to indulge in the cheesy goodness of your Cheesy Pepperoni Pizza Roll Ups.
Cheesy Pepperoni Pizza Roll Ups Variations
Feel free to get creative and tailor these Cheesy Pepperoni Pizza Roll Ups to suit your taste and dietary preferences!
-
Vegetarian Delight: Swap out pepperoni for a medley of roasted vegetables like bell peppers and mushrooms. This twist captures all the savory flavors without the meat.
-
Spicy Kick: Add sliced jalapeños to the mix for a fiery flavor explosion. You’ll love the heat that complements the gooey cheese!
-
Low-Fat Version: Use reduced-fat mozzarella cheese and whole wheat tortillas. You won’t sacrifice flavor while keeping it lighter and healthier!
-
Buffalo Style: Replace marinara with buffalo sauce and add shredded chicken for a tangy and spicy alternative that’s perfect for game day. Pair it with ranch for a creamy dip!
-
Extra Crunch: Combine the mozzarella with a sprinkle of parmesan cheese on top before baking. It adds an irresistible crunch and depth of flavor.
-
Sweet Twist: Spread a thin layer of fig or apple jam instead of marinara, and use prosciutto in place of pepperoni. This creates an unexpected sweet and savory delight that's sure to impress.
-
Herb-Infused: Mix dried oregano and basil into the cheese for added flavor. The aroma will remind you of a traditional pizza right out of an Italian pizzeria.
-
All-in-One Meal: Add cooked spinach and ricotta cheese for a rich, creamy filling. Enjoy every bite knowing you’ve packed in those nutrients while still satisfying your pizza cravings.
Incorporating these variations will help you discover endless possibilities while savoring these delightful roll-ups. Don’t forget to check out my other post on easy pizza night ideas for more inspirations!
Make Ahead Options
These Cheesy Pepperoni Pizza Roll Ups are perfect for meal prep! You can prepare the roll-ups up to 24 hours in advance by assembling them without baking. Simply follow the steps up to brushing the olive oil and place the assembled roll-ups seam-side down on a baking sheet. Cover them tightly with plastic wrap and refrigerate to maintain their quality. When you're ready to enjoy, preheat your oven and bake them directly from the fridge, adding an extra minute or two if needed. This way, you'll have a delicious snack ready to go with minimal effort, perfect for busy weeknights!
What to Serve with Cheesy Pepperoni Pizza Roll Ups
Your meal isn’t complete without the perfect accompaniments to elevate those cheesy morsels to a delightful feast.
-
Crispy Caesar Salad: A fresh Caesar salad adds a crunchy element that balances the gooey roll-ups perfectly.
-
Garlic Bread Sticks: Soft and buttery garlic bread sticks enhance the Italian theme and are perfect for dipping into marinara.
-
Roasted Veggies: Colorful roasted vegetables bring a delightful freshness and nutrition, complementing the richness of the roll-ups.
-
Zesty Coleslaw: A tangy coleslaw provides a refreshing crunch and contrasts beautifully with the savory flavors of the roll-ups.
Together, these pairings create a vibrant table, letting everyone mix and match their favorites for a satisfying meal.
-
Wine Pairing: Consider a light red wine, like Chianti, to bring out the flavors of the pepperoni while adding an elegant touch to your gathering.
-
Chocolate Chip Cookies: For dessert, fresh chocolate chip cookies serve as a warm, sweet finish to a fun, casual meal that kids and adults will love.
Expert Tips for Cheesy Pepperoni Pizza Roll Ups
Prevent Sogginess: Use a generous amount of marinara but avoid over-saucing the edges to keep them crisp.
Cheese Selection: Opt for whole milk mozzarella for the cheesiest melt, enhancing your Cheesy Pepperoni Pizza Roll Ups.
Perfect Rolling: Roll tightly but gently; loose rolls may unravel during baking and compromise flavor distribution.
Oven Watch: Keep an eye on them in the last few minutes—each oven is different, and you want that perfect golden-brown finish!
Customizable Toppings: Try swapping pepperoni for veggies or different meats for a fun twist—experiment and find your favorite combination!
How to Store and Freeze Cheesy Pepperoni Pizza Roll Ups
Fridge: Store leftover Cheesy Pepperoni Pizza Roll Ups in an airtight container in the fridge for up to 3 days to maintain freshness and flavor.
Freezer: For longer storage, place cooled roll-ups in a single layer on a baking sheet and freeze until solid, then transfer them to a freezer bag for up to 2 months.
Reheating: To reheat, place frozen roll-ups on a baking sheet and bake at 375°F (190°C) for 15-20 minutes or until heated through and crispy. You can also use the microwave, but for the best texture, oven reheating is recommended.
Enjoying with Dips: When serving reheated roll-ups, pair them with extra marinara or your favorite dipping sauce for a delicious twist!

Cheesy Pepperoni Pizza Roll Ups Recipe FAQs
How do I select the best peppers?
When choosing pepperoni, look for slices that are bright red and without any dark spots. Fresh pepperoni should feel slightly oily, indicating they are well-preserved and flavorful. Always check the expiration date!
How should I store leftover Cheesy Pepperoni Pizza Roll Ups?
Store your leftover Cheesy Pepperoni Pizza Roll Ups in an airtight container in the refrigerator for up to 3 days. This will keep them fresh and maintain their delightful flavors for your next snack attack!
Can I freeze these roll-ups?
Absolutely! To freeze your Cheesy Pepperoni Pizza Roll Ups, allow them to cool completely after baking. Place them in a single layer on a baking sheet and freeze until solid, about 1-2 hours. Once frozen, transfer them to a freezer bag, where they can stay good for up to 2 months.
How do I reheat frozen Cheesy Pepperoni Pizza Roll Ups?
For the best results, preheat your oven to 375°F (190°C) and place frozen roll-ups on a baking sheet. Bake for 15-20 minutes, or until heated through and crispy. Alternatively, you can use a microwave, but reheating in the oven will help them get that perfect texture.
Are there any allergy considerations with this recipe?
If you or anyone else has dietary restrictions, keep in mind that this recipe contains dairy (mozzarella cheese) and can easily be modified for allergies. Substitute with dairy-free cheese for a lactose-free option or choose gluten-free tortillas if you have a gluten sensitivity.
What can I do if the roll-ups unravel during baking?
If your roll-ups unravel, it usually means they were not rolled tightly enough. For the best results, make sure to roll them firmly but gently and ensure the seam is placed on the bottom of the baking sheet. A tight roll is crucial for holding in all the cheesy goodness!
Irresistible Cheesy Pepperoni Pizza Roll Ups in Minutes
Equipment
- Baking Sheet
- Parchment Paper
- Oven
- Pastry brush
Ingredients
For the Roll Ups
- 1 cup Mozzarella cheese shredded
- 2 tablespoons Marinara sauce zesty brand recommended
- 4 pieces Low-carb tortillas
- 2 tablespoons Olive oil for brushing
- 15 slices Pepperoni slices adjust quantity based on preference
Instructions
Step-by-Step Instructions
- Preheat your oven to 375°F (190°C) and prepare a baking sheet lined with parchment paper.
- Lay the low-carb tortillas flat on a clean surface, ensuring they are smooth and free from wrinkles.
- Spread about 2 tablespoons of marinara sauce evenly over each tortilla, leaving a half-inch border around the edges.
- Sprinkle shredded mozzarella cheese evenly over the sauce layer on each tortilla.
- Arrange pepperoni slices atop the mozzarella cheese, adjusting the quantity based on your preference.
- Roll each tortilla tightly from one end to the other, being careful not to tear them.
- Lightly brush the outside of each roll-up with olive oil using a pastry brush.
- Place the rolled-up tortillas seam-side down on the prepared baking sheet, ensuring they are not touching.
- Bake in the preheated oven for 10-12 minutes, until golden brown and melted cheese bubbles out from the ends.
- Remove from the oven, let cool slightly, slice into bite-sized pieces and serve warm.