As I stood in my kitchen, the warm aroma of melting butter and sugar filled the air, taking me back to simpler times. There’s something magical about creating classic Chocolate Chip Cookies, a recipe that never fails to light up any gathering. This delightful treat not only comes together in just a few simple steps, but it also impresses both friends and family, making it a true crowd-pleaser. Whether enjoyed fresh from the oven or stored for later, these cookies are a hug in dessert form. Plus, with endless variations—think crunchy nuts or a sprinkle of sea salt—there’s always room for creativity. So, are you ready to bake up some nostalgia and craft your perfect batch? Let’s dive into the recipe!
Why Are Chocolate Chip Cookies Timeless?
Nostalgia: There's an unmistakable warmth that wafts through your home as these cookies bake, evoking cherished memories of childhood.
Simplicity: With just a handful of pantry staples, this recipe is easy to whip up, making it perfect for both novice and seasoned bakers alike.
Versatility: Whether you prefer classic chocolate chips or want to experiment with nuts or even add a touch of sea salt, the possibilities are endless!
Crowd-Pleaser: Perfect for gatherings, these cookies delight everyone, from kids to adults, ensuring that every bite brings smiles and compliments.
Make-Ahead Magic: Bake a batch today and savor them later, or even freeze some for unexpected cravings! With these timeless cookies, you're never far from a comforting treat—just like my Cinnamon Roll Cupcakes or Churro Cupcakes Cinnamon.
Chocolate Chip Cookie Ingredients
For the Dough
• All-purpose flour – Provides the structure needed for chewy cookies.
• Baking soda – Helps the cookies rise and become fluffy.
• Unsalted butter – Ensures a rich, buttery flavor while allowing you to control the saltiness.
• Granulated sugar – Adds sweetness and a crisp texture to the edges.
• Brown sugar – Brings moisture and a hint of caramel flavor to the cookies.
• Salt – Balances the sweetness and enhances all the flavors.
• Vanilla extract – Infuses a warm, comforting aroma that complements the chocolate beautifully.
• Large eggs – Acts as a binder and contributes to the chewy texture.
For the Chocolate
• Semisweet and/or milk chocolate chips – The classic option for gooey chocolate pockets in every bite.
• Chopped nuts (optional) – Adds a delightful crunch and an earthy flavor; walnuts or pecans work well.
These Chocolate Chip Cookies are a timeless classic, sure to warm your heart and home!
Step‑by‑Step Instructions for Chocolate Chip Cookies
Step 1: Preheat the Oven
Begin by preheating your oven to 375°F (190°C). This ensures a perfectly baked batch of Chocolate Chip Cookies. While the oven is warming, gather your baking sheets and line them with parchment paper, giving your cookies a non-stick surface that aids in even baking.
Step 2: Combine Dry Ingredients
In a small bowl, whisk together 2 ¼ cups of all-purpose flour and ½ teaspoon of baking soda. This step is important for the structure of your cookies, allowing them to rise beautifully. Once mixed, set the bowl aside; you'll add this to your wet ingredients shortly for a delightful Chocolate Chip Cookie dough.
Step 3: Cream Butter and Sugars
In a large mixing bowl, use an electric mixer to cream together 1 cup of room temperature unsalted butter, ½ cup granulated sugar, 1 cup packed brown sugar, and 1 teaspoon salt. Mix on medium speed until the mixture is smooth and creamy, about 2-3 minutes, which will give your cookies that rich, buttery flavor.
Step 4: Add Eggs and Vanilla
To your creamed butter and sugar mixture, add 2 teaspoons of vanilla extract and the 2 large eggs, one at a time. Beat everything together until it's well blended. This step adds moisture and depth to your Chocolate Chip Cookies, creating the required dough consistency.
Step 5: Incorporate Dry Ingredients
Gradually blend the flour mixture into your wet ingredients, mixing until just combined. Be careful not to over-mix, as this can lead to tough cookies. You want the dough to remain soft and slightly sticky, which is essential for achieving that chewy texture we all love in Chocolate Chip Cookies.
Step 6: Stir in Chocolate Chips and Nuts
Fold in 2 cups of semisweet and/or milk chocolate chips, along with 1 cup of optional chopped nuts if you desire a crunchy texture. Use a spatula to gently mix these in until evenly distributed. This is the moment when your batter transforms into a chocolate lover’s dream!
Step 7: Scoop the Dough
Using a rounded tablespoon or a cookie scoop, drop heaping tablespoons of dough onto your prepared baking sheets. Make sure to space them about 2 inches apart to allow for spreading during baking. This ensures each Chocolate Chip Cookie has plenty of room to puff up beautifully.
Step 8: Bake Your Cookies
Place the baking sheets in the preheated oven and bake for 9-11 minutes. Keep an eye on them; they should be golden brown around the edges while remaining soft in the center. This perfect balance is key to achieving that wonderfully chewy Chocolate Chip Cookie you seek.
Step 9: Cool and Enjoy
Once baked, remove the cookies from the oven and let them cool on the baking sheets for a few minutes before transferring them to a wire rack. This cooling period ensures they firm up nicely, making them ready to enjoy warm or later! The delightful aroma of chocolate will fill your kitchen, promising happiness with every bite.
Make Ahead Options
These Chocolate Chip Cookies are perfect for busy home cooks looking to save time! You can prepare the dough up to 24 hours in advance by mixing all the ingredients and storing it in an airtight container in the refrigerator. For longer storage, shape the dough into cookie balls and freeze them for up to 3 months. When you're ready to bake, simply place them on the baking sheet, letting them sit at room temperature for about 10-15 minutes before baking. This way, your cookies will still rise beautifully and taste just as delicious as if baked fresh. Enjoy the convenience of having homemade cookies on hand for those sweet cravings!
Chocolate Chip Cookies Variations
Feel free to put your own spin on these classic cookies and discover delightful new flavors!
-
Nuts Added: Incorporate 1 cup of walnuts or pecans for a delicious crunch and nutty flavor. These additions will elevate your cookie experience, bringing texture and warmth to every bite.
-
Dark Chocolate: Swap semisweet chips for dark chocolate chips for a richer, slightly bitter taste that amplifies the sweetness.
-
Peanut Butter Swirl: Add ½ cup of creamy peanut butter to the butter mixture for a lovely nutty flavor and a soft bite. It adds an irresistible creaminess that pairs beautifully with the chocolate.
-
Oatmeal Chocolate Chip: Mix in 1 cup of rolled oats to the dough for extra chewiness and fiber. The oats give a heartier texture, making your cookies satisfying and delicious.
-
Salted Caramel: Fold in some caramel bits for a gooey surprise, and sprinkle flaky sea salt on top before baking for a sweet-salty finish. This twist will take your cookies to a decadent new level!
-
Cinnamon Spice: Add 1 teaspoon of ground cinnamon to the flour mixture for a warm, aromatic flavor. It adds a comforting spice that will remind you of cozy autumn days.
-
Coconut Delight: Toss in 1 cup of shredded coconut for a tropical touch that contrasts beautifully with the chocolate. It gives an exciting texture and a hint of sweetness that’s simply delightful.
-
Mexican Hot Chocolate: Spice things up by adding a dash of cayenne pepper and cinnamon for a warm kick. This variation creates a unique flavor profile that will surprise and delight your taste buds!
Whichever variation you choose, remember that these cookies are perfect for sharing or savoring by yourself! For more delightful inspiration, consider trying my Cinnamon Roll Cupcakes or Churro Cupcakes Cinnamon. Enjoy baking!
What to Serve with Chocolate Chip Cookies?
Nothing pairs better with your freshly baked treats than a little extra comfort and joy to create a heartwarming ambiance.
- Ice Cream Sundae: The creamy, cold richness of ice cream drizzled with chocolate sauce perfectly complements warm cookies for a delightful treat.
- Milkshake Delight: Thick and frosty milkshakes bring a nostalgic, playful element, enhancing the sweetness of the cookies in every bite.
- Coffee Brew: A warm, robust cup of coffee balances the chocolatey sweetness, making it a perfect pairing for an afternoon pick-me-up.
- Fruit Salad: A refreshing mix of seasonal fruits cuts through the richness, offering a light contrast to the cookies' deliciousness.
- Chocolate Sauce: Drizzling warm chocolate sauce enhances the chocolatey goodness, creating an indulgent experience sure to please any chocoholic.
Imagine hosting friends for a cozy gathering, filled with laughter, delicious food, and the aroma of fresh-baked cookies all around. Everything from warm drinks to chilled fruit adds a lovely touch for a perfect dessert spread.
How to Store and Freeze Chocolate Chip Cookies
Room Temperature: Keep your freshly baked chocolate chip cookies in an airtight container at room temperature for up to 3 days to maintain their softness and flavor.
Fridge: If you want to store them longer, place the cookies in the fridge in an airtight container for up to a week, but note that they may lose some of their chewy texture.
Freezer: For longer storage, freeze your chocolate chip cookies in a single layer on a baking sheet, then transfer to a freezer-safe bag or container. They can last up to 3 months!
Reheating: When ready to enjoy, reheat frozen cookies in the oven at 350°F (175°C) for about 5-7 minutes to regain that fresh-baked deliciousness.
Tips for the Best Chocolate Chip Cookies
Use Room Temperature Butter: Ensure your butter is at room temperature for a smooth consistency, preventing lumps in your cookie dough.
Don’t Overmix: When blending the dry ingredients, mix until just combined to keep your Chocolate Chip Cookies soft and chewy. Overmixing can lead to tough cookies.
Chill the Dough: For thicker cookies, refrigerate the dough for 30 minutes before baking; this helps them maintain their shape in the oven.
Watch the Baking Time: Keep a close eye on your cookies, as baking times can vary. Remove them when the edges are golden but the centers still appear slightly underbaked for that perfect, chewy texture.
Experiment Wisely: Consider adding unique mix-ins like toffee bits or different types of chocolate to elevate your classic recipe and surprise your loved ones!
Chocolate Chip Cookies Recipe FAQs
How do I choose ripe chocolate chips?
Absolutely! While chocolate chips don't go "ripe" like fruit, I recommend using high-quality semisweet or milk chocolate chips for the best flavor. Look for chips that are shiny and have a smooth texture—avoid any that appear dull or have white spots, as they might be old or have been improperly stored.
What’s the best way to store chocolate chip cookies?
To keep your freshly baked chocolate chip cookies soft and delicious, store them in an airtight container at room temperature for up to 3 days. If you’d like to extend their life, you can refrigerate them for up to a week, although they may lose some of their chewiness.
Can I freeze chocolate chip cookies?
Yes! To freeze your chocolate chip cookies, first, arrange them in a single layer on a baking sheet and freeze until solid. Then, transfer them to a freezer-safe bag or container, where they’ll stay fresh for up to 3 months. When you’re ready to enjoy, simply reheat them in a 350°F (175°C) oven for about 5-7 minutes.
What should I do if my cookies come out too flat?
If your chocolate chip cookies turn out too flat, it could be due to melted butter or too little flour. Next time, ensure your butter is at room temperature, not melted. Also, try measuring your flour correctly—spoon it into the measuring cup and level it off to avoid packing it too tightly.
Are there any dietary considerations for chocolate chip cookies?
Yes, absolutely! If you have allergies, be cautious with chocolate chips, as they may contain traces of nuts or dairy. For a nut-free version, simply skip the chopped nuts. If you're baking for pets, note that chocolate is toxic to dogs, so be sure to keep your treats safely stored away from little paws!

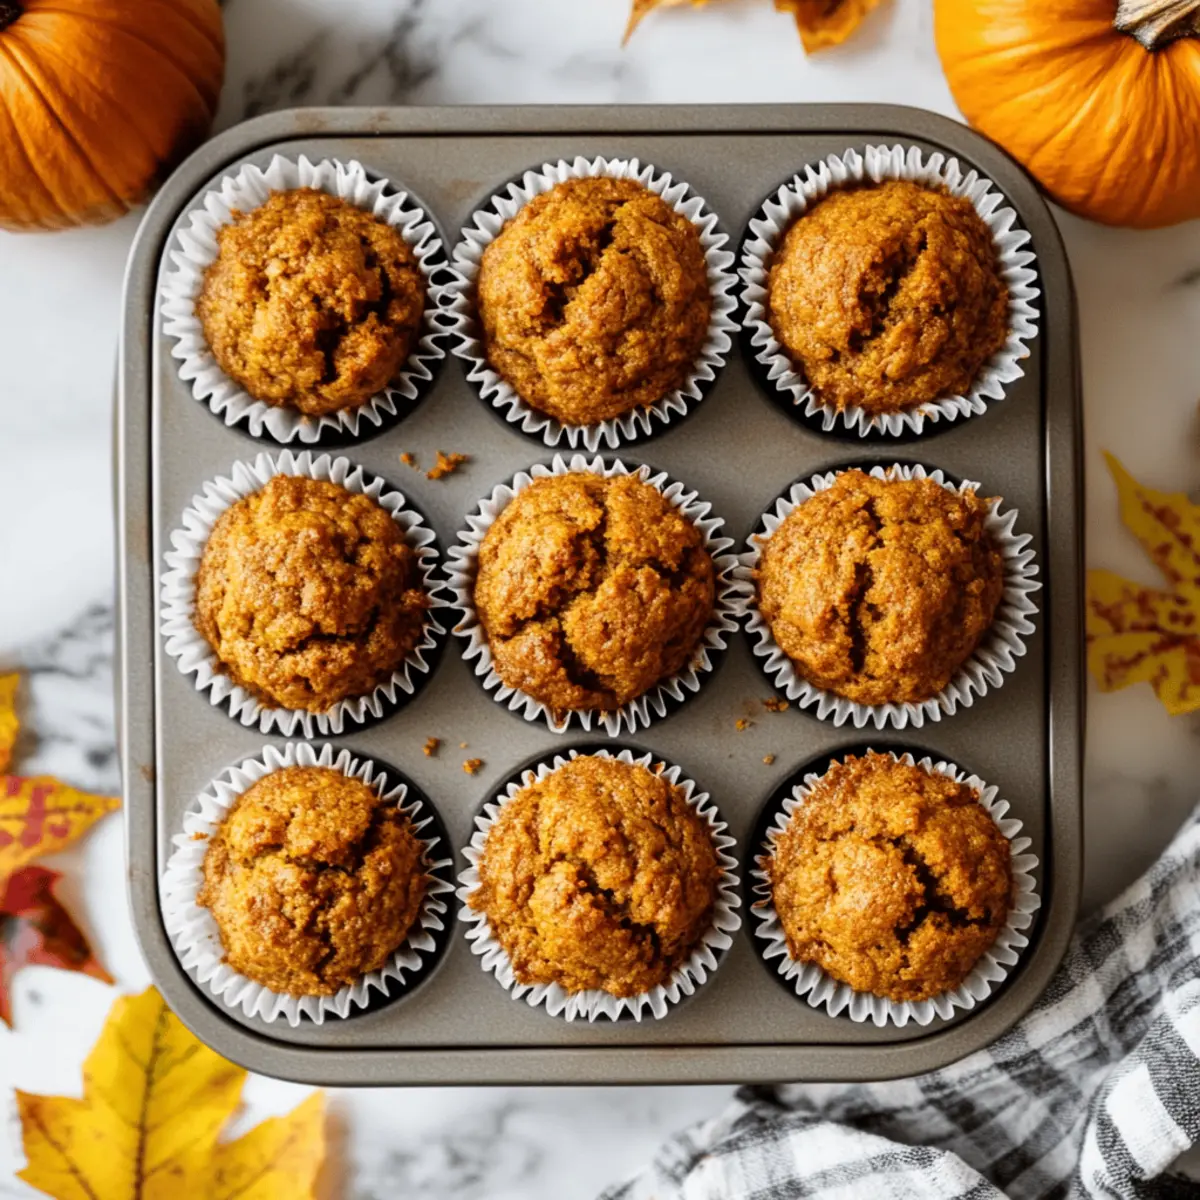
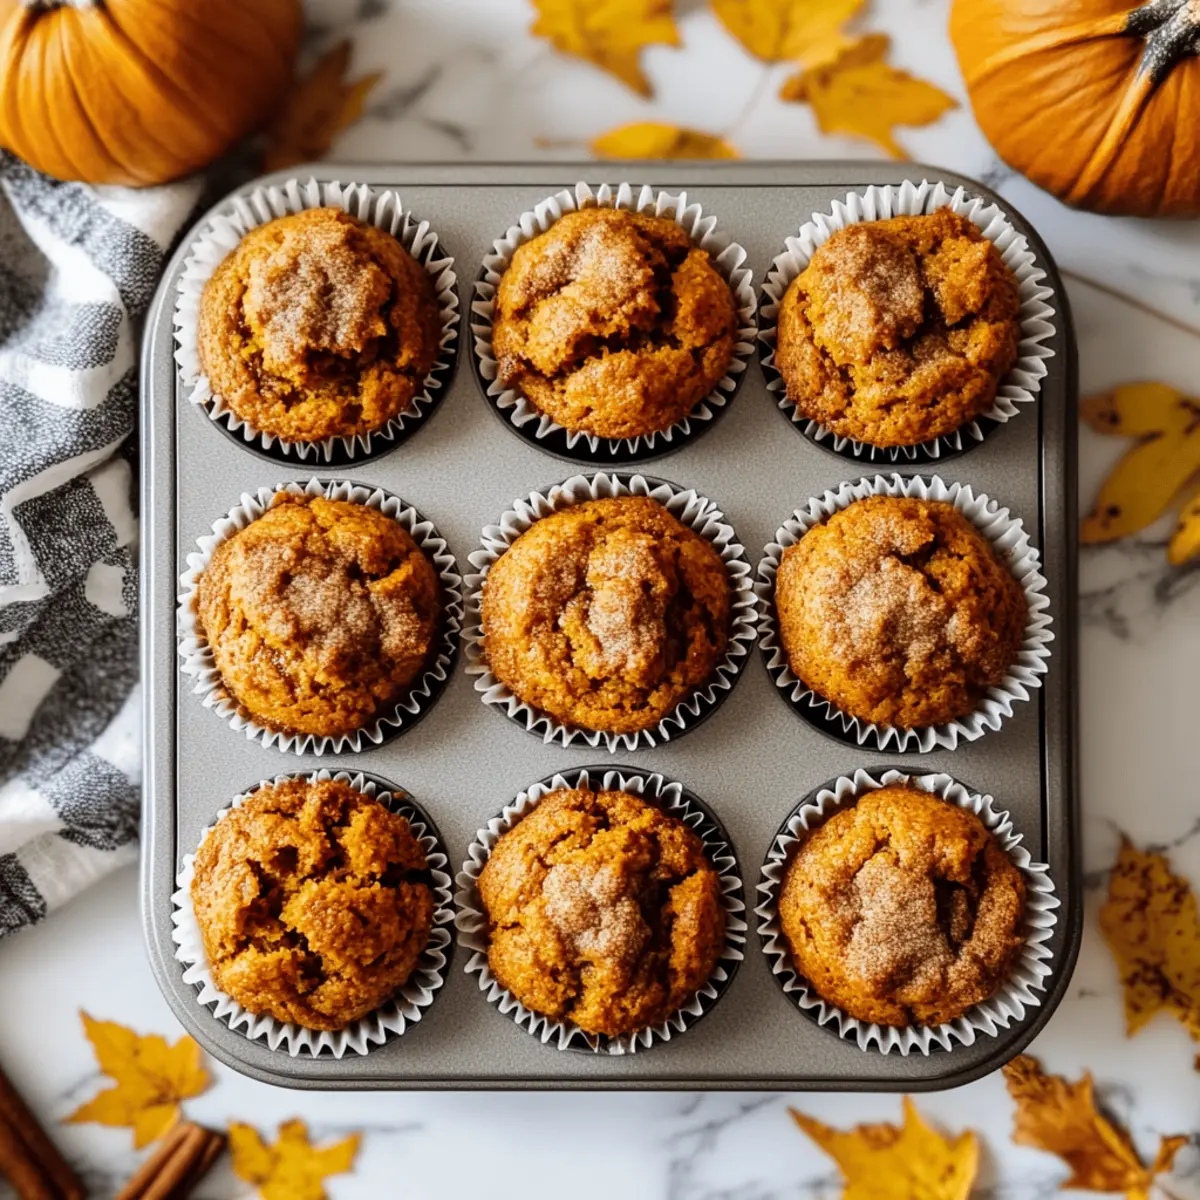
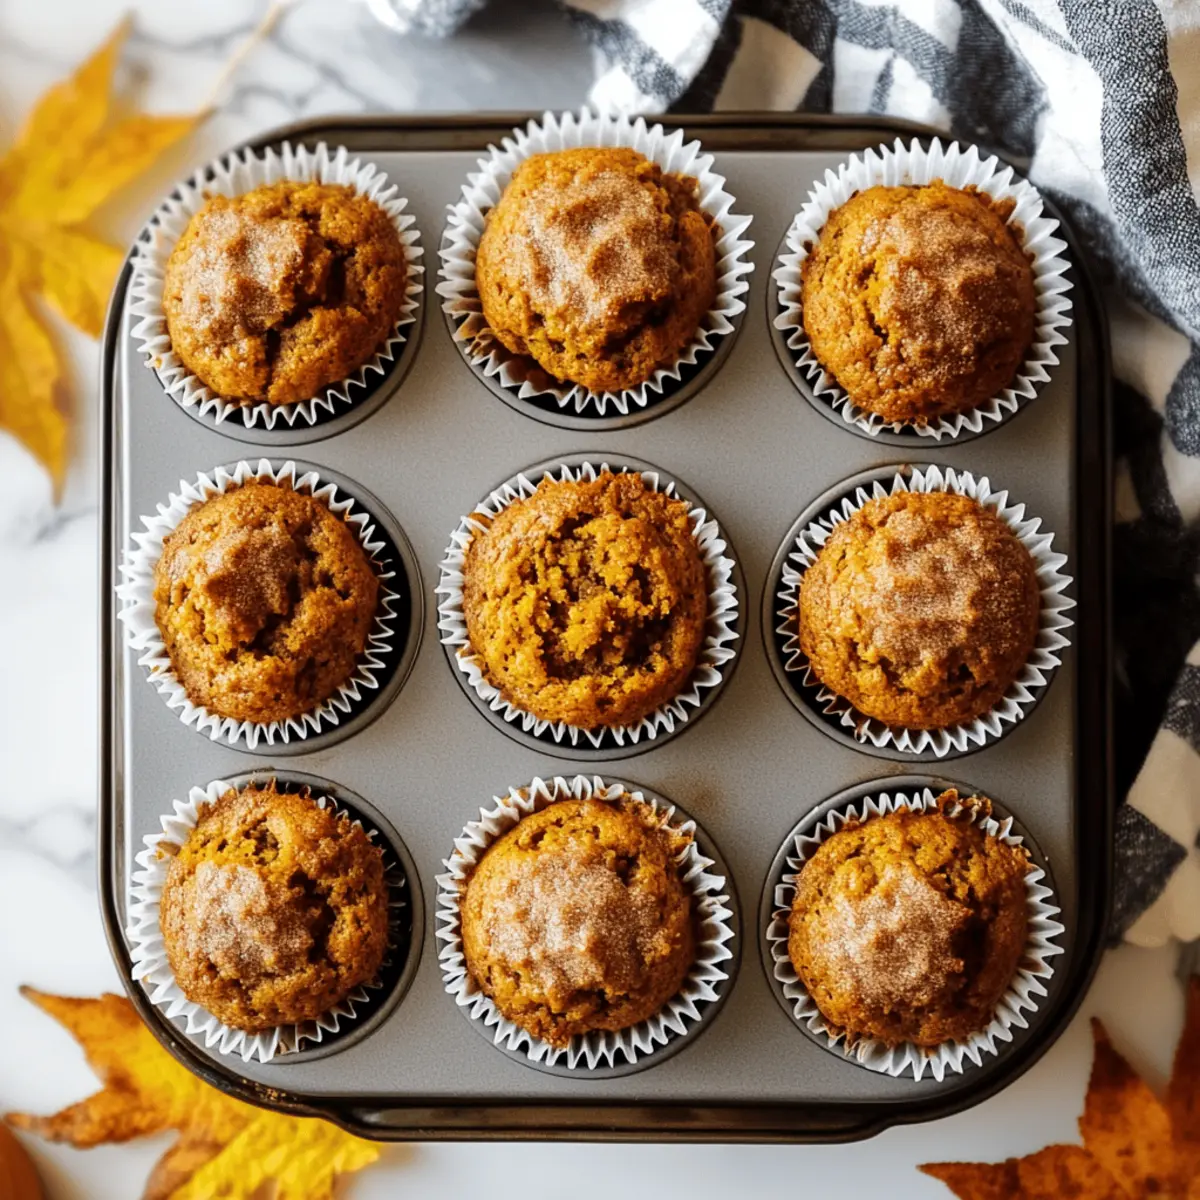
Delicious Pumpkin Cinnamon Muffins for Cozy Mornings
Equipment
- Oven
- Mixing bowl
- Muffin tin
- Whisk
- spatula
Ingredients
For the Muffins
- 1 cup Pumpkin puree Canned or homemade
- 1 cup Granulated sugar
- 2 large Eggs Room temperature
- ½ cup Vegetable oil
- 1 teaspoon Vanilla extract
- 2 cups All-purpose flour
- 1 teaspoon Baking powder
- 1 teaspoon Baking soda
- ½ teaspoon Salt
- 2 teaspoons Ground cinnamon
- 1 teaspoon Ground nutmeg
Instructions
Baking Instructions
- Preheat the oven to 350°F (175°C) and line a muffin tin with paper liners.
- In a mixing bowl, combine pumpkin puree, sugar, eggs, vegetable oil, and vanilla extract. Mix well.
- In another bowl, whisk together flour, baking powder, baking soda, salt, cinnamon, and nutmeg.
- Gradually add the dry ingredients to the wet mixture, stirring until just combined.
- Spoon the batter into the prepared muffin tin, filling each cup about ⅔ full.
- Bake for 18-20 minutes or until a toothpick inserted into the center comes out clean.
- Allow the muffins to cool in the tin for a few minutes before transferring them to a wire rack.