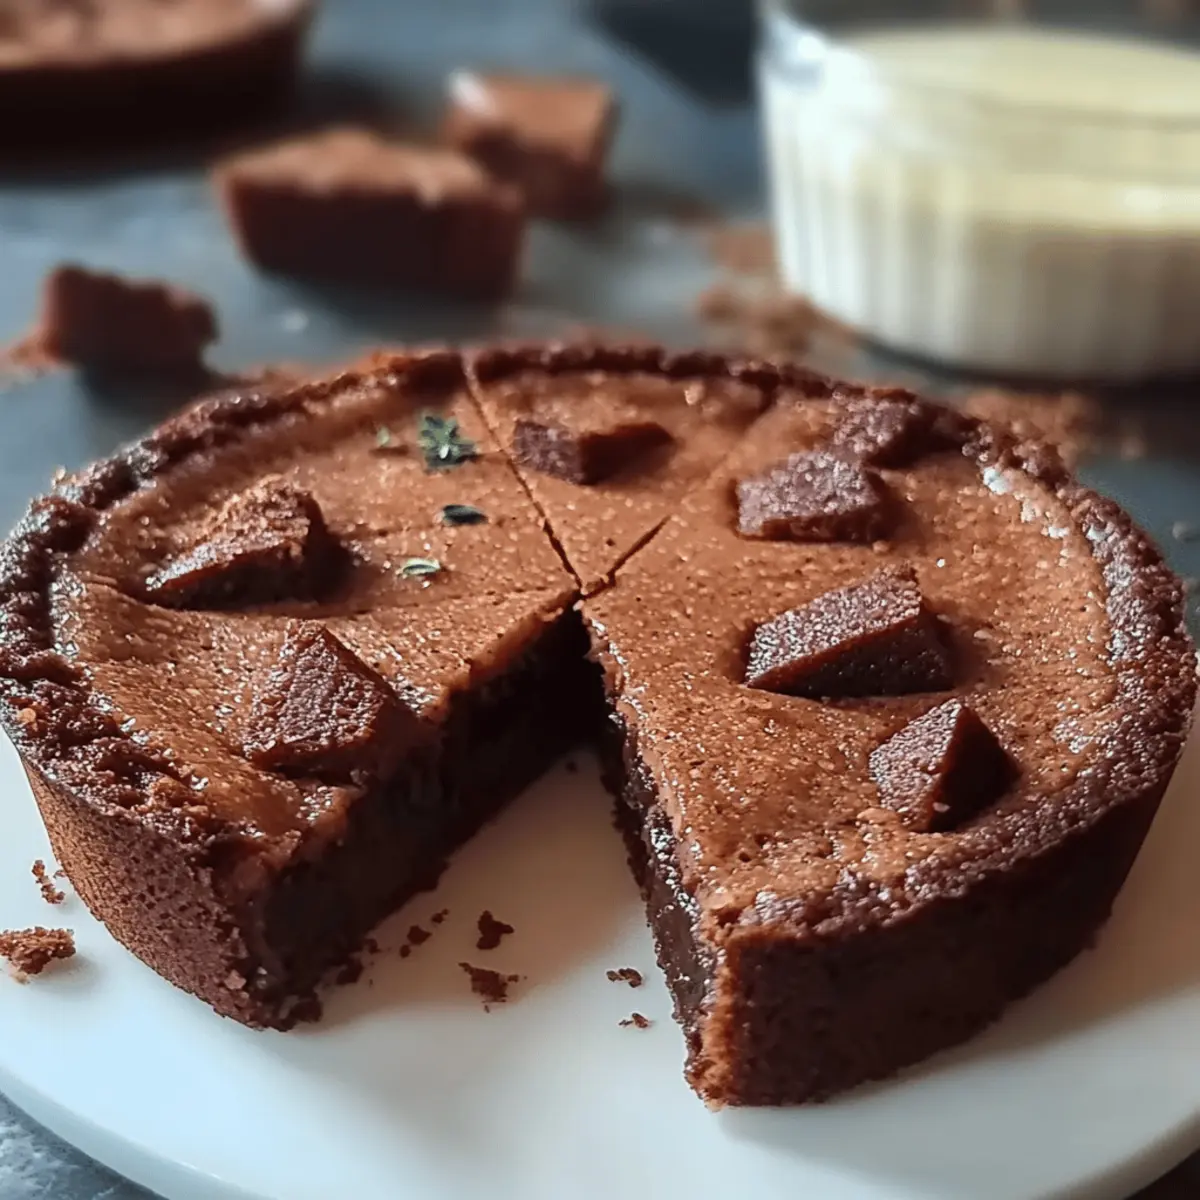
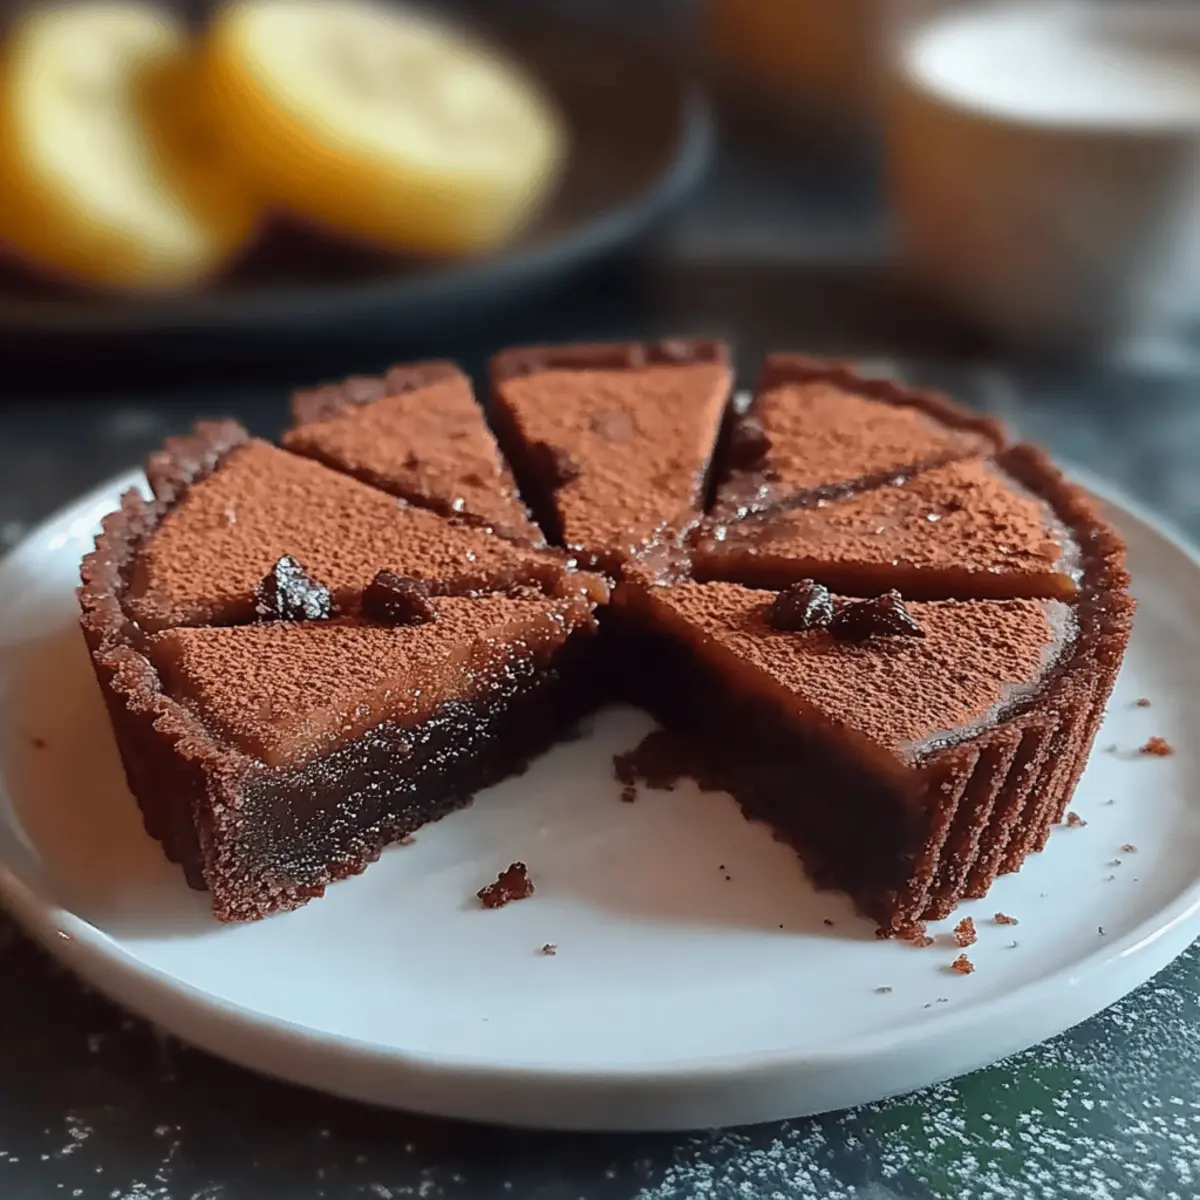
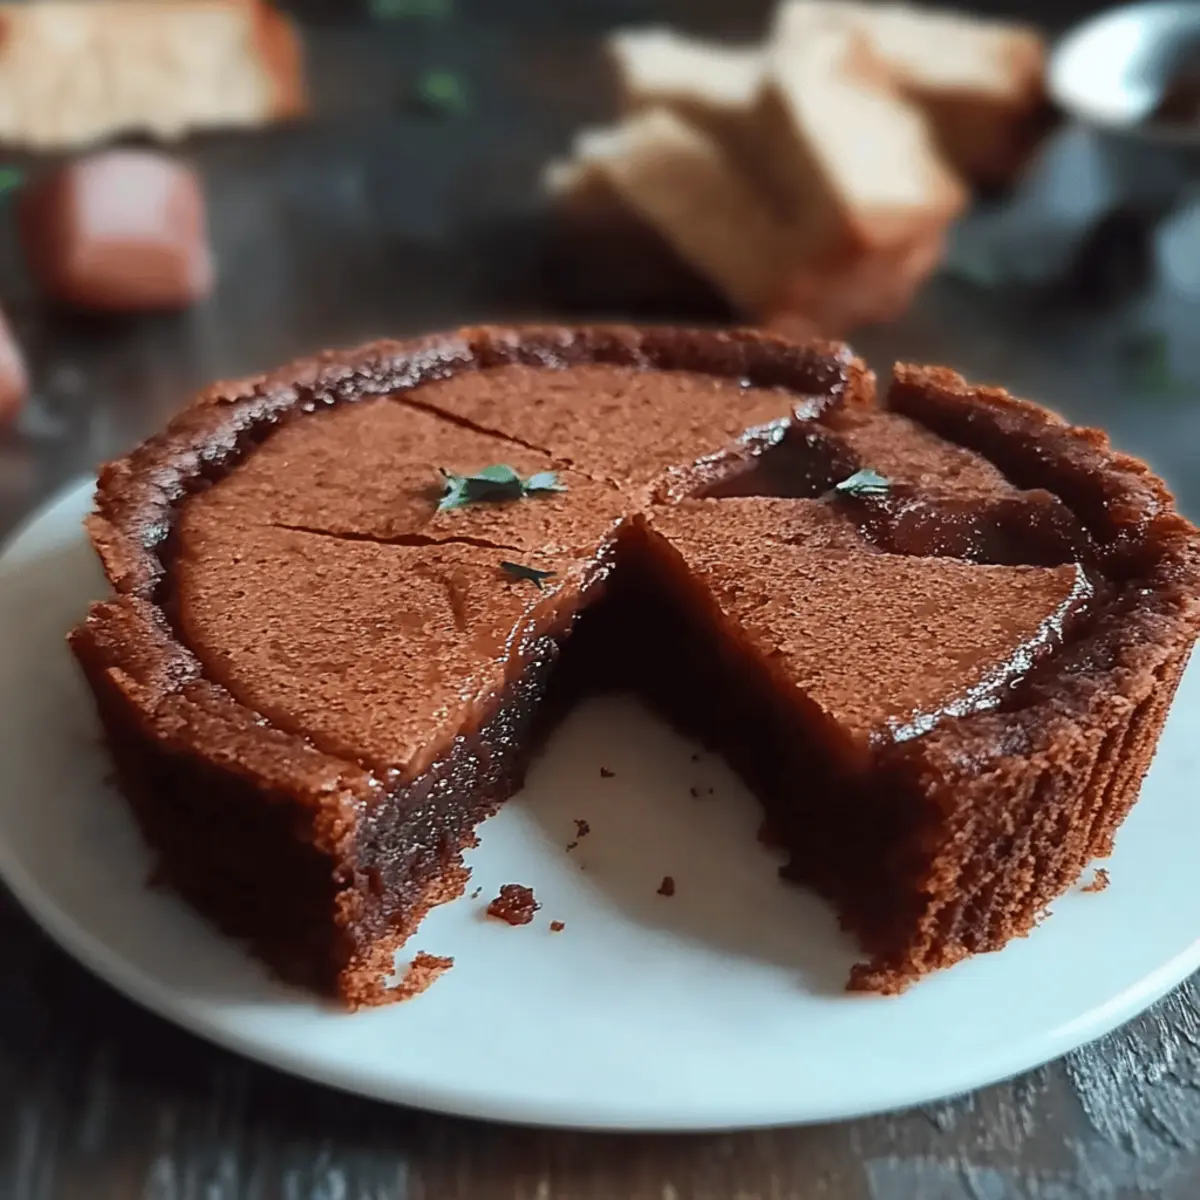
There’s something decidedly special about a chocolate dessert that transports you straight to Italy, and that’s precisely what my Italian Chocolate Tart (Crostata al Cioccolato) offers. The combination of rich dark chocolate nestled in a buttery cocoa crust feels like a warm embrace on a breezy evening. This tart is not just a treat; it’s a celebration of homemade comfort food that’s surprisingly simple to whip up—and it’s always a crowd-pleaser! With only a handful of ingredients and minimal prep time, you can impress your family and friends without breaking a sweat. So, who’s ready to indulge in a slice of this heavenly delight? Let’s dive into making this decadent dessert together!
Why is this tart a must-try?
Decadent chocolate lovers rejoice! This Italian Chocolate Tart is a creamy, dreamy slice of luxury that's astonishingly simple to prepare. Rich layers of dark chocolate filling nestle perfectly in a buttery cocoa crust, creating a divine dessert experience. Crowd-pleaser guaranteed! It's the perfect showstopper for gatherings, from dinner parties to casual family evenings. Plus, with just under two hours in total, you’ll have more time to enjoy with your loved ones. For some extra flair, consider pairing it with a scoop of homemade ice cream for a delightful finish!
Italian Chocolate Tart Ingredients
• The perfect blend for a luscious tart!
For the Crust
- 200 g flour – Opt for all-purpose flour for a tender crust.
- 100 g granulated sugar – This sweetens the dough, balancing the rich filling.
- 40 g cocoa powder – Use high-quality cocoa for an intense chocolate flavor.
- ¼ teaspoon salt – A pinch enhances all the sweet and chocolatey notes.
- 120 g cold butter – Ensure it's cold for a flaky texture.
- 1 egg – Binds the ingredients for a cohesive dough.
- 1 egg yolk – Adds richness to the crust.
For the Filling
- 500 ml milk – Whole milk gives a creamy consistency to the filling.
- 4 egg yolks – These contribute to the custardy, smooth texture.
- 80 g granulated sugar – Sweetens the filling nicely against the dark chocolate.
- 40 g flour – Thickens the filling just right for a luscious bite.
- 120 g dark chocolate – The star of the show; use at least 70% cocoa for a rich taste.
This Italian Chocolate Tart is sure to be a favorite, bringing that authentic touch of Italy into your kitchen!
Step‑by‑Step Instructions for Italian Chocolate Tart
Step 1: Prepare the Dough
In a large bowl, whisk together 200 g of flour, 100 g of granulated sugar, 40 g of cocoa powder, and ¼ teaspoon of salt until well combined. Next, cut in 120 g of cold butter using a pastry cutter or your fingers until the mixture resembles coarse crumbs, about 2-3 minutes. This will create a rich, flaky texture for your Italian Chocolate Tart crust.
Step 2: Form the Dough
Add 1 egg and 1 egg yolk to the mixture, stirring gently until a cohesive dough forms, approximately 1-2 minutes. Once combined, wrap the dough in plastic wrap and refrigerate for at least 30 minutes to firm up, which will make it easier to roll out and shape later. This is a crucial step for achieving the perfect crust for your tart!
Step 3: Roll Out the Dough
After chilling, preheat your oven to 180°C (350°F). On a lightly floured surface, roll out the dough to about ¼ inch thick, ensuring it is large enough to fit a 9-inch tart pan. Once rolled out, gently transfer the dough to the pan, pressing it into the edges carefully to avoid cracking. Trim any excess dough with a sharp knife.
Step 4: Prepare for Baking
To prevent bubbling, prick the bottom of the tart shell with a fork, creating several small holes. Place the tart shell in the preheated oven and bake for approximately 15-20 minutes. Look for a dry, set crust, which should be slightly firm to the touch. While the crust bakes, prepare the filling for your Italian Chocolate Tart.
Step 5: Heat the Milk
In a saucepan, pour 500 ml of milk and heat it over medium heat until it reaches just below boiling, about 5-7 minutes. Stir occasionally to prevent scalding. The milk should be steaming with small bubbles forming around the edges but not boiling. Once ready, remove from heat and set aside while you prepare the egg mixture.
Step 6: Combine Egg Mixture
In a separate bowl, whisk together 4 egg yolks, 80 g of granulated sugar, and 40 g of flour until the mixture is smooth and evenly mixed. This will create a base for the filling. Gradually add the hot milk to the egg mixture while whisking constantly to temper the eggs and avoid scrambling, about 2 minutes.
Step 7: Cook the Filling
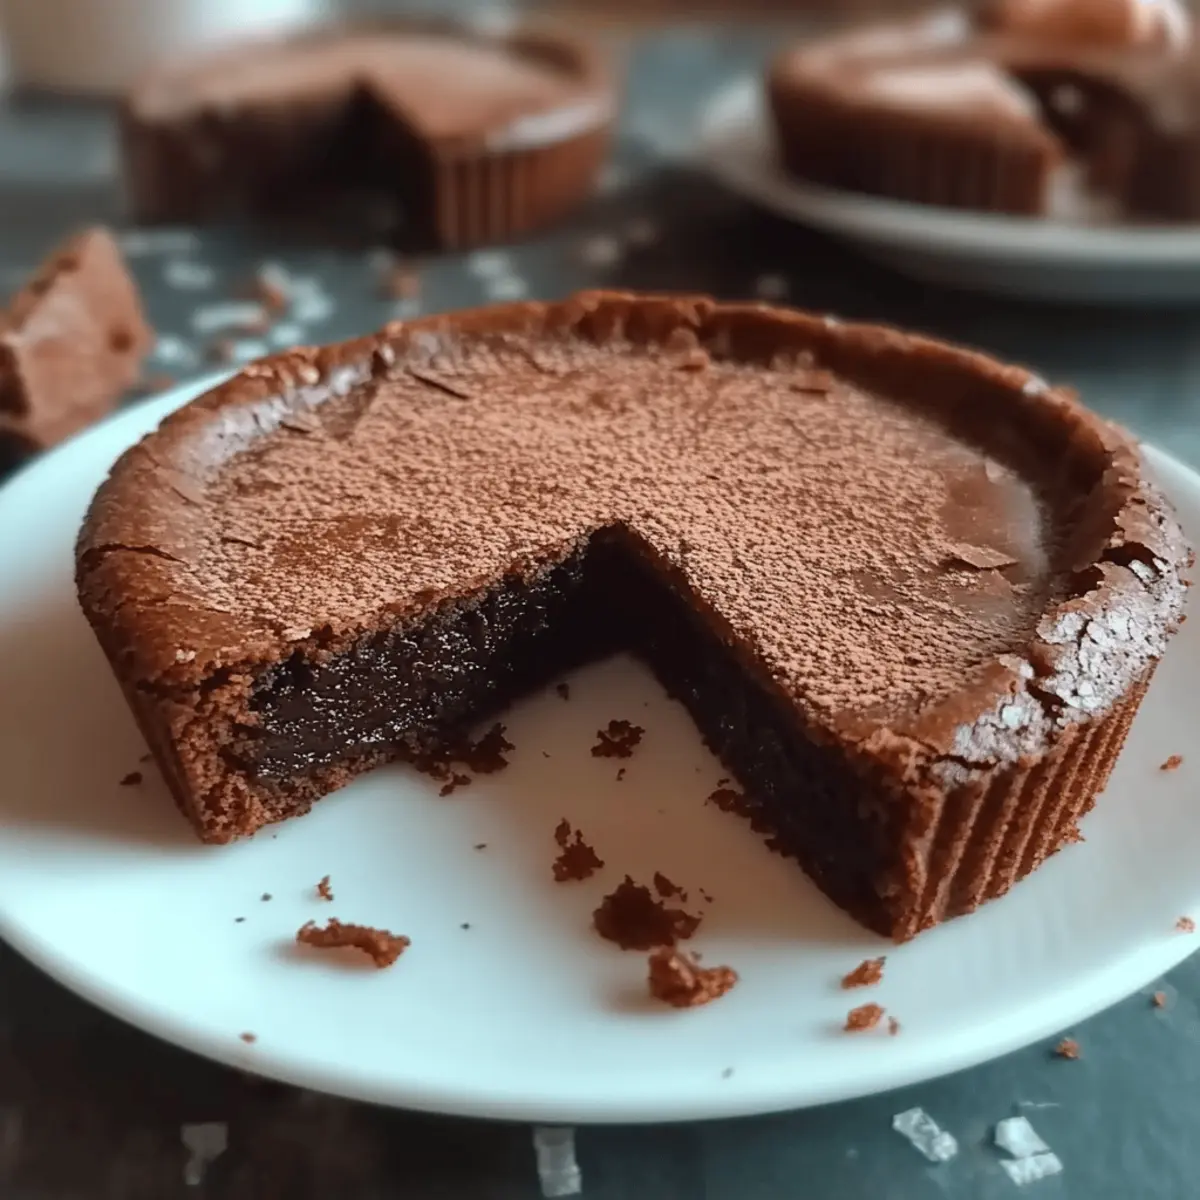
Pour the combined mixture back into the saucepan and cook over medium heat, stirring continuously until it thickens, roughly 5-7 minutes. You’re looking for a custard-like consistency—thick enough to coat the back of a spoon. Once thickened, remove from heat and stir in 120 g of dark chocolate until fully melted and smooth, creating a luscious filling for your tart.
Step 8: Assemble the Tart
Carefully pour the chocolate filling into the cooled tart shell, smoothing the top with a spatula. Make sure the filling spreads evenly across the crust. Once assembled, chill the tart in the refrigerator for at least 30 minutes to allow it to set completely, ensuring each slice holds its shape when served.
Step 9: Serve and Enjoy
When ready to serve your delicious Italian Chocolate Tart, garnish with chocolate shavings or nuts if desired for an elegant touch. Slice into wedges and plate it beautifully for your friends and family. This delightful dessert is sure to impress everyone with its rich flavors and quality homemade charm!
How to Store and Freeze Italian Chocolate Tart
Fridge: Store the tart in an airtight container or covered with plastic wrap in the refrigerator for up to 3 days. This keeps the filling fresh and prevents it from absorbing other odors.
Freezer: If you want to enjoy the tart later, it can be frozen for up to 1 month. Wrap it tightly in plastic wrap and then aluminum foil to prevent freezer burn.
Thawing: To enjoy frozen slices, simply transfer them to the fridge and let them thaw overnight. Avoid thawing at room temperature to maintain texture.
Reheating: If preferred warm, gently heat slices in the microwave for about 15-20 seconds. The chocolate filling will become deliciously gooey, enhancing your Italian Chocolate Tart experience!
What to Serve with Italian Chocolate Tart
Indulging in this rich tart is even sweeter when you pair it with complementary sides and drinks that enhance the experience of this chocolate masterpiece.
-
Fresh Berries: The tartness of raspberries or strawberries balances the richness, adding a refreshing burst of flavor with each bite.
-
Vanilla Ice Cream: A scoop of creamy ice cream brings cooling contrast; its subtle sweetness enhances the intense chocolate notes.
-
Whipped Cream: Light and airy, a dollop of fresh whipped cream softens the tart’s richness, making each slice feel indulgently light.
-
Espresso: Sip on a robust espresso to amplify the chocolate flavor. Its bitterness complements the sweetness of the tart beautifully.
-
Chocolate Sauce: Drizzling warm chocolate sauce on top creates an extra layer of decadent chocolate flavor—perfect for true chocoholics!
-
Fresh Mint Leaves: A few sprigs of mint add a hint of freshness that cuts through the richness, enhancing the overall eating experience.
-
Hazelnut Praline: Crunchy hazelnut praline brings texture and a nutty sweetness that pairs wonderfully with the creamy filling.
-
Chardonnay: A glass of chilled white wine, like Chardonnay, is delightful with this dessert, as its buttery notes complement the tart perfectly.
Italian Chocolate Tart Variations
Feel free to get creative! This versatile tart can adapt to your taste preferences and dietary needs.
-
Gluten-Free: Swap the all-purpose flour for a 1-to-1 gluten-free baking blend for a delicious alternative.
-
Nutty Twist: Add 50 g of ground almonds or hazelnuts to the crust for an extra layer of flavor and texture. The nutty aroma will enhance the rich chocolate filling beautifully.
-
Vegan-Friendly: Use coconut oil instead of butter, and replace eggs with flaxseed meal or a commercial egg replacer to create a plant-based delight.
-
Fruit Infusion: Toss in a handful of fresh raspberries or cherries into the filling before chilling for a delightful burst of juicy flavor. The combination of tart fruit and chocolate creates a decadent mix.
-
Spicy Kick: Sprinkle a pinch of cayenne pepper or espresso powder into the chocolate filling. This adds a surprising layer of heat or depth that enhances the dark chocolate.
-
Mint Chocolate: Stir in a few drops of peppermint extract into the filling for a refreshing minty flavor. Pair it with a sprinkle of crushed peppermint candies for a festive touch.
-
Double Chocolate: Use milk chocolate instead of dark chocolate for a creamier filling or mix both types for a luxurious double chocolate dessert.
-
Caramel Swirl: Drizzle some homemade or store-bought caramel sauce into the filling before chilling. This will create a stunning marbled effect while adding sweetness to each bite.
These variations can transform the classic Italian Chocolate Tart into an even more personalized dessert experience! For a special touch, consider serving it alongside a scoop of homemade ice cream or warm chocolate sauce. Indulge and enjoy!
Expert Tips for Italian Chocolate Tart
-
Chill the Dough: Refrigerate the dough for at least 30 minutes. This prevents shrinkage during baking and creates a flaky crust.
-
Quality Chocolate: Use high-quality dark chocolate (at least 70% cocoa). The depth of flavor is essential for a delicious Italian Chocolate Tart.
-
Avoid Overmixing: When combining the egg mixture and hot milk, whisk gently to prevent scrambling the eggs. A smooth filling is key!
-
Cool Before Filling: Ensure the tart shell is completely cool before adding the filling. This helps maintain the tart’s structure and enhances flavor.
-
Garnish Wisely: For a beautiful presentation, add chocolate shavings or nuts right before serving. They add a lovely touch and texture contrast.
-
Store Properly: If you have leftovers, store them in the refrigerator covered with plastic wrap. Enjoy within 2-3 days for the best flavor.
Make Ahead Options
These Italian Chocolate Tart preparations are perfect for busy weeknights or special occasions when you want to enjoy a slice of indulgence without the last-minute rush! You can make the tart dough and refrigerate it for up to 3 days; just wrap it tightly in plastic wrap to prevent it from drying out. The chocolate filling can also be prepared in advance and kept in an airtight container in the fridge for up to 2 days. When you're ready to assemble, simply roll out the chilled dough, bake it, and fill it with the pre-made chocolate mixture. Chilling the assembled tart for at least 30 minutes will ensure it sets beautifully, giving you a delectable dessert that’s just as delicious as if it was freshly made!
Italian Chocolate Tart Recipe FAQs
What type of dark chocolate should I use for the filling?
Very good question! I recommend using high-quality dark chocolate with at least 70% cocoa content. This ensures a rich, deep flavor that perfectly complements the tart. Brands like Ghirardelli or Callebaut are excellent choices, but feel free to use your favorite for the best results.
How should I store the leftover tart?
Absolutely! Store any leftover Italian Chocolate Tart in an airtight container or covered with plastic wrap in the refrigerator for up to 3 days. This will keep the filling fresh and prevent it from absorbing any other odors from the fridge.
Can I freeze the Italian Chocolate Tart?
Yes, you can! If you want to save some for later, wrap the tart tightly in plastic wrap, then in aluminum foil to prevent freezer burn. It can be frozen for up to 1 month. When you're ready to enjoy it, transfer it to the fridge to thaw overnight.
How can I tell if the tart crust is properly baked?
You’ll know the tart crust is ready when it's slightly firm to the touch and looks dry. If it begins to bubble up, that’s a sign it may need a few pricks with a fork. Aim for an even golden color all around to ensure a perfectly baked shell!
Can I make this tart gluten-free?
Absolutely! To convert the Italian Chocolate Tart into a gluten-free version, simply use a gluten-free flour blend in place of all-purpose flour. Be sure to check your cocoa powder and chocolate for any gluten content as well, for a completely safe treat!
Is this recipe suitable for pets?
No, chocolate is toxic to pets! Please keep the finished tart away from your furry friends. If you're looking to treat them, consider making a special dog-friendly dessert instead, as chocolate should never be shared with them.
Decadent Italian Chocolate Tart to Satisfy Your Cravings
Equipment
- 9-inch tart pan
- Mixing bowl
- Pastry Cutter
- Saucepan
- Whisk
Ingredients
For the Crust
- 200 g all-purpose flour Opt for all-purpose flour for a tender crust.
- 100 g granulated sugar Sweetens the dough.
- 40 g cocoa powder Use high-quality cocoa for an intense flavor.
- 0.25 teaspoon salt Enhances the chocolatey notes.
- 120 g cold butter Ensure it's cold for a flaky texture.
- 1 whole egg Binds the ingredients.
- 1 yolk egg yolk Adds richness to the crust.
For the Filling
- 500 ml whole milk Gives a creamy consistency.
- 4 yolks egg yolks Contributes to a smooth texture.
- 80 g granulated sugar Sweetens the filling.
- 40 g flour Thickens the filling.
- 120 g dark chocolate Use at least 70% cocoa.
Instructions
Preparation
- In a bowl, whisk together flour, sugar, cocoa powder, and salt. Cut in cold butter until resembling coarse crumbs.
- Stir in whole egg and egg yolk until cohesive. Wrap in plastic wrap and refrigerate for 30 minutes.
- Preheat oven to 180°C (350°F). Roll out dough to fit a 9-inch tart pan and press into edges.
- Prick the tart shell with a fork and bake for 15-20 minutes until slightly firm.
- Heat milk over medium until just below boiling. Stir occasionally.
- In another bowl, whisk egg yolks, sugar, and flour until smooth. Gradually add hot milk while whisking.
- Pour mixture back into saucepan and cook until thickened, then stir in dark chocolate until melted.
- Pour chocolate filling into cooled crust and chill in the refrigerator for at least 30 minutes.
- Garnish with chocolate shavings or nuts before serving.