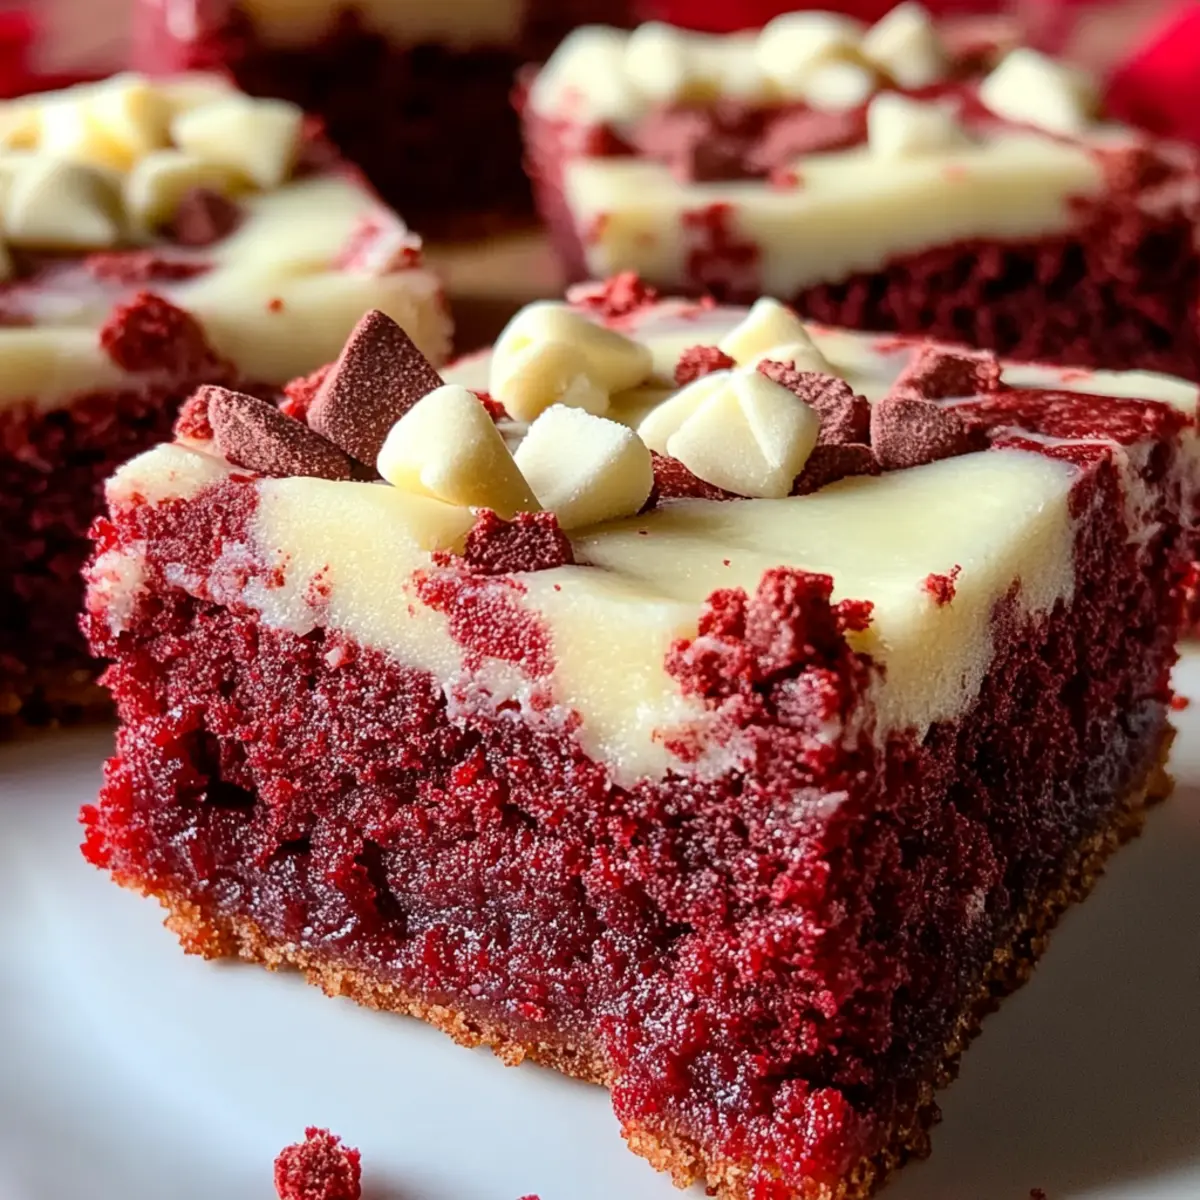
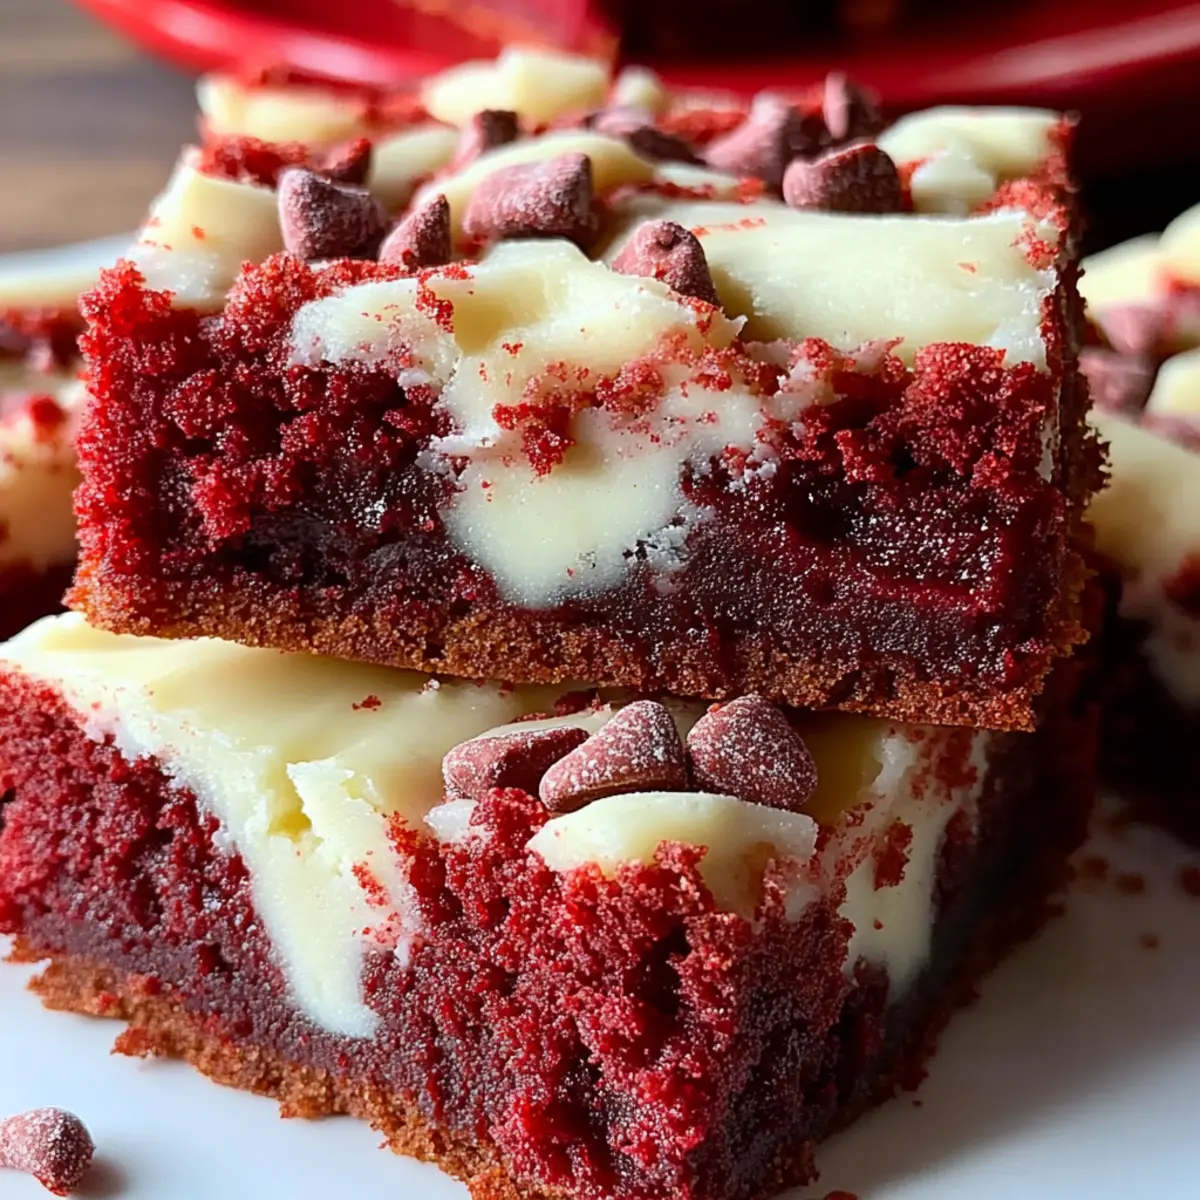
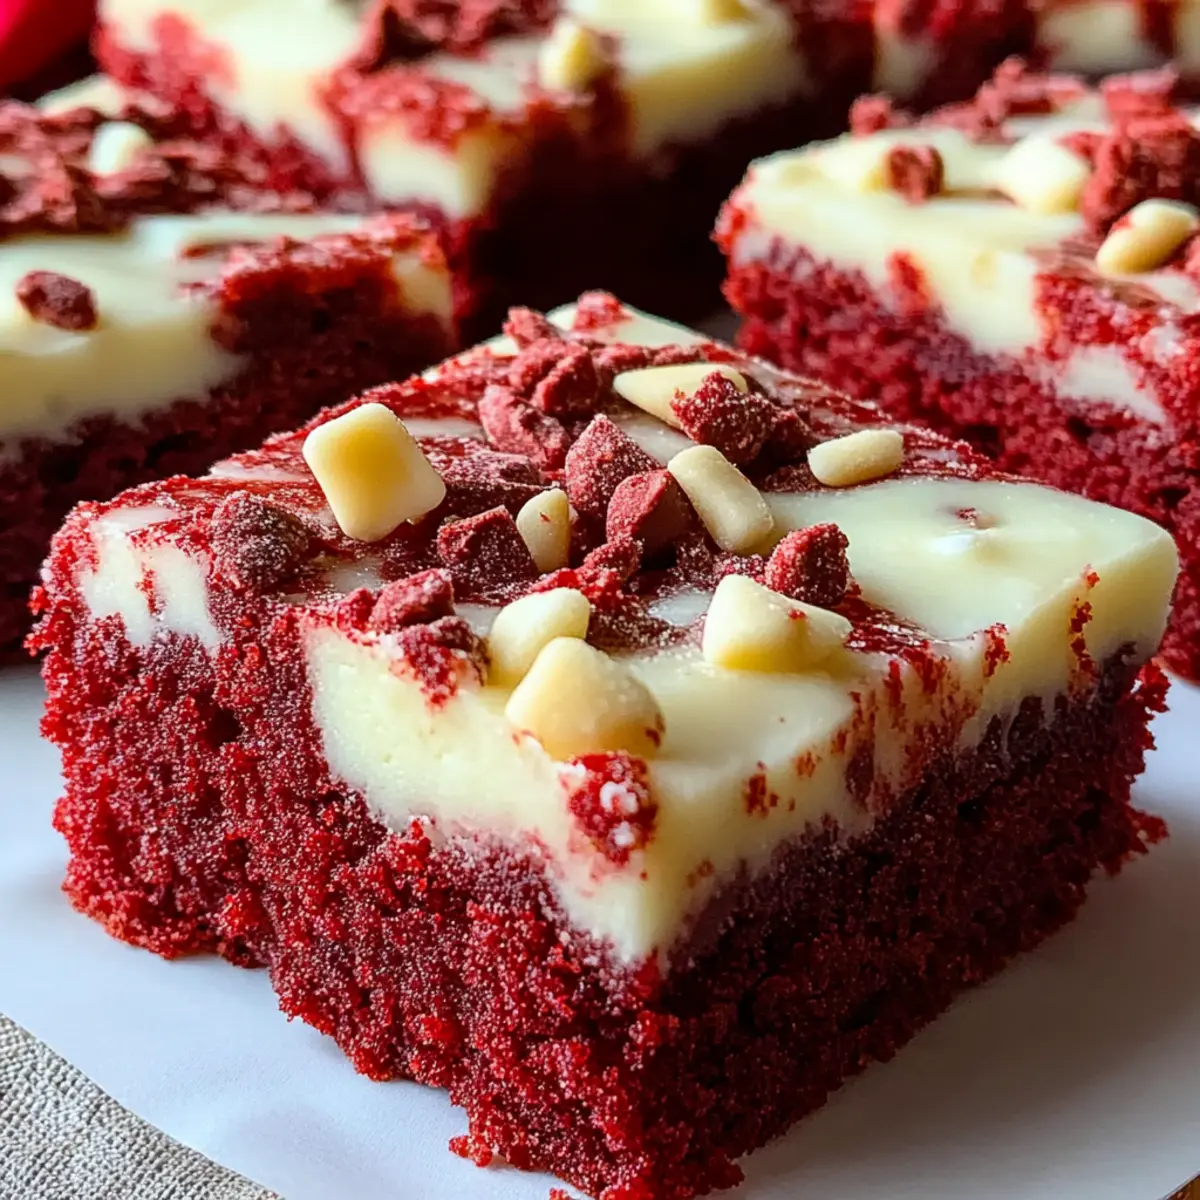
As I pulled the freshly baked tray of Red Velvet Cookie Bars from the oven, the sweet, sweet aroma enveloped my kitchen, instantly lifting my spirits. These vibrant bars are not just a feast for the eyes; they offer a delightful twist on traditional cookies, marrying the rich flavors of red velvet with creamy white chocolate chips. What I love most about this recipe is its simple prep time—perfect for those spontaneous baking sessions when the cravings hit—and the sheer joy it brings to friends and family alike. Topped with luscious cream cheese frosting, these cookie bars are bound to become a favorite in your home. Are you ready to create a little magic in your kitchen?
Why Choose Red Velvet Cookie Bars?
Ultimate showstopper: The vibrant color and creamy frosting make these cookie bars a stunning centerpiece for any gathering.
Effortless preparation: With just 20 minutes of prep, you’ll have a delicious treat ready for baking!
Decadent flavor: The combination of rich red velvet and sweet white chocolate chips will leave your taste buds dancing.
Perfect for sharing: Whether it’s a family dinner or a potluck, these bars are sure to impress everyone around the table.
If you’re in the mood for more delightful desserts, try my Lemon Raspberry Bars or explore the deliciousness of Edible Cookie Dough.
Red Velvet Cookie Bars Ingredients
Here’s everything you need to whip up these delightful treats!
For the Cookie Bars
• All-purpose flour – 2 ½ cups; this forms the base of your cookie bars for that perfect chewy texture.
• Cocoa powder – 2 tablespoons; adds a subtle chocolate flavor that enhances the red velvet experience.
• Baking soda – 1 teaspoon; this is essential for achieving that perfect rise in your cookies.
• Salt – ½ teaspoon; balances the sweetness and enhances the overall flavor.
• Unsalted butter – 1 cup, softened; for a rich and buttery flavor in your cookie bars.
• Granulated sugar – 1 ½ cups; sweetens the bars perfectly, giving them that irresistible taste.
• Brown sugar – ½ cup, packed; contributes moisture and deep flavor to your cookie bars.
• Large eggs – 2; helps bind the ingredients together for the desired texture.
• Vanilla extract – 2 teaspoons; a must for adding that warm, vanilla aroma.
• Red food coloring – 1 tablespoon; gives the bars their signature red velvet color.
• White chocolate chips – 1 cup; adds sweet melty bites that contrast beautifully with the cookie bars.
For the Topping
• Cream cheese frosting – 1 cup; choose store-bought or homemade to spread a luscious layer atop your red velvet cookie bars.
These Red Velvet Cookie Bars promise to tease your taste buds and create unforgettable moments, making them an excellent addition to any dessert spread!
Step‑by‑Step Instructions for Red Velvet Cookie Bars
Step 1: Preheat the Oven
Begin by preheating your oven to 350°F (175°C). Prepare your 9x13 inch baking pan by greasing it with butter or lining it with parchment paper for effortless removal later. This step sets the stage for baking those delightful Red Velvet Cookie Bars!
Step 2: Mix Dry Ingredients
In a medium bowl, whisk together 2 ½ cups of all-purpose flour, 2 tablespoons of cocoa powder, 1 teaspoon of baking soda, and ½ teaspoon of salt. This dry mixture is crucial for achieving the right texture and flavor in your cookie bars, so set it aside as we venture into the wet ingredients.
Step 3: Cream the Butters and Sugars
In a large mixing bowl, cream together 1 cup of softened unsalted butter, 1 ½ cups of granulated sugar, and ½ cup of packed brown sugar. Beat this mixture until it looks light and fluffy, which should take about 3-4 minutes. The fluffiness contributes to the overall softness of your Red Velvet Cookie Bars.
Step 4: Add Eggs, Vanilla, and Food Coloring
Next, add 2 large eggs one at a time, mixing well after each addition. Then, pour in 2 teaspoons of vanilla extract and 1 tablespoon of red food coloring. Mix until everything is well combined and the color is uniform, creating a beautifully vibrant batter.
Step 5: Combine Wet and Dry Ingredients
Gradually introduce the dry ingredient mixture into the wet mixture, stirring gently until just combined. Ensure not to overmix, as this can affect the texture of your Red Velvet Cookie Bars. The batter will be thick but well-blended when incorporated properly.
Step 6: Fold in the White Chocolate Chips
Gently fold in 1 cup of white chocolate chips using a spatula, making sure they are evenly distributed throughout the cookie dough. This adds a sweet contrast that complements the rich red velvet flavor beautifully.
Step 7: Spread the Dough in the Pan
Carefully pour the cookie dough into your prepared baking pan, using a spatula to spread it out evenly across the bottom. This ensures that each square of your Red Velvet Cookie Bars bakes uniformly, creating a delicious treat everyone will love.
Step 8: Bake in the Oven
Place the baking pan in the preheated oven and bake for 25-30 minutes. Keep an eye on them; the bars are done when a toothpick inserted into the center comes out clean. Your kitchen will start to fill with an irresistible aroma!
Step 9: Cool the Cookie Bars
Once baked, remove the pan from the oven and let the bars cool in the pan for about 10-15 minutes. After this initial cooling period, carefully transfer them to a wire rack to cool completely, allowing them to firm up nicely.
Step 10: Frost the Cookie Bars
After the cookie bars have cooled, spread 1 cup of cream cheese frosting evenly on top. You can opt for store-bought or homemade frosting, depending on your preference for an extra touch of indulgence on these Red Velvet Cookie Bars.
Step 11: Cut and Serve
Finally, cut the cookie bars into squares and serve! You can also store any leftovers in an airtight container at room temperature. These delightful treats are perfect for sharing with family or saving for a sweet craving later.
Make Ahead Options
These Red Velvet Cookie Bars are perfect for meal prep, making your busy weeknights a little sweeter! You can prepare the cookie dough up to 24 hours in advance; simply cover it tightly with plastic wrap and refrigerate to prevent drying out. When you're ready to bake, just let it sit at room temperature for 15-20 minutes before spreading it in the pan. Additionally, you can frost the bars up to 3 days ahead—just apply the cream cheese frosting once the bars are completely cooled and store them in an airtight container. With these make-ahead tips, you’ll have delicious, ready-to-serve Red Velvet Cookie Bars at your fingertips, ensuring they’re just as delightful as fresh-baked!
Red Velvet Cookie Bars Variations
Feel free to let your creativity shine through in this recipe; there are endless possibilities to customize your Red Velvet Cookie Bars!
-
Gluten-Free: Substitute all-purpose flour with a gluten-free flour blend to enjoy these bars without the gluten. They’ll still be delightfully chewy!
-
Nutty Twist: Add ½ cup of chopped walnuts or pecans for a satisfying crunch. The nuttiness complements the rich flavors beautifully.
-
Dark Chocolate: Swap white chocolate chips with dark chocolate chips for a more intense chocolate flavor that balances out the sweetness.
-
Spice it Up: Add a pinch of cinnamon or nutmeg to the dry ingredients for a cozy, warm spice that enhances the overall taste.
-
Cream Cheese Swirl: Before baking, dollop some additional cream cheese frosting into the batter and swirl it lightly for added tang and creaminess.
-
Frozen Treats: Freeze the cut bars for a frosty dessert option in warmer months. The cold treat is refreshing and still indulgent!
-
Vegan Version: Use flax eggs, dairy-free butter, and plant-based cream cheese to create a vegan-friendly version of these delicious cookie bars.
-
Fun Sprinkles: Top with colorful sprinkles before baking for a festive touch that’s perfect for parties or celebrations. It adds both flair and fun!
For more delightful desserts, consider trying my Roasted Red Pepper Pesto Pasta or indulge in the fruity goodness of my Lemon Brownie Bars. Happy baking!
What to Serve with Red Velvet Cookie Bars?
Indulge in a heavenly feast alongside these decadent, cream-topped treats that will delight your senses.
-
Vanilla Ice Cream: A scoop of creamy vanilla ice cream creates a delightful contrast to the rich cookie bars, enhancing the overall experience.
-
Fresh Berries: Plump strawberries or raspberries add a fresh burst of flavor, perfectly balancing the sweetness of the frosting. Their tartness cuts through the richness elegantly.
-
Chocolate Milkshake: Thick and creamy, a chocolate milkshake is the ultimate indulgence to pair with these cookie bars, making for a nostalgic dessert experience.
-
Nutty Brownies: Rich, fudgy brownies let you explore even more chocolatey textures, offering a perfect complement for a cookie and brownie platter.
-
Espresso or Coffee: The bold flavor of espresso or freshly brewed coffee effortlessly enhances the sweetness of the cookie bars, making it a perfect after-dinner pairing.
-
Cream Cheese Cupcakes: Little cream cheese cupcakes echo the delightful frosting flavors, creating a cohesive dessert table sure to impress your guests.
These pairings elevate a casual snack to a gourmet spread, perfect for sharing or simply enjoying at home.
Expert Tips for Red Velvet Cookie Bars
-
Accurate Measurements: Ensure you measure flour correctly to avoid dry cookie bars. Spoon and level the flour rather than scooping it straight from the bag.
-
Room Temperature Ingredients: Use room temperature butter and eggs for better emulsification, resulting in a softer texture in your Red Velvet Cookie Bars.
-
Don’t Overmix: When combining wet and dry ingredients, mix until just combined. Overmixing can lead to tough cookie bars—no one wants that!
-
Check for Doneness: Start checking your cookie bars a few minutes before the recommended bake time. Each oven is different, so watch for that clean toothpick test!
-
Chill Before Frosting: Allow the cookie bars to cool completely before icing. This prevents the cream cheese frosting from melting and maintains a lovely layer of sweetness.
-
Customize Your Add-ins: Feel free to add nuts or different chocolate chips for a personalized touch. Make your Red Velvet Cookie Bars uniquely yours!
Storage Tips for Red Velvet Cookie Bars
Room Temperature: Store your Red Velvet Cookie Bars in an airtight container at room temperature for up to 3 days. This keeps them fresh and delicious!
Fridge: For longer freshness, you can refrigerate the cookie bars in an airtight container for up to 7 days. They’ll remain soft and flavorful, ready to enjoy!
Freezer: If you want to save them for later, freeze the cookie bars wrapped tightly in plastic wrap and then in foil for up to 2 months. Just thaw before serving.
Reheating: To enjoy a warm treat, pop the thawed cookie bars in the microwave for about 10-15 seconds. This revives their delightful texture and flavor!

Red Velvet Cookie Bars Recipe FAQs
What type of flour should I use for the cookie bars?
Using all-purpose flour is best for these Red Velvet Cookie Bars. It gives the perfect chewy texture that we all love, while also allowing the cookies to hold their shape during baking. Make sure to spoon and level the flour instead of scooping directly from the bag to avoid excess flour, which can lead to dry cookies.
How should I store my Red Velvet Cookie Bars?
You can store your Red Velvet Cookie Bars in an airtight container at room temperature for up to 3 days. If you want them to last longer, place them in the fridge for up to 7 days. Just remember to let them return to room temperature before serving, as they'll regain their delicious softness!
Can I freeze these cookie bars for later?
Absolutely! To freeze your Red Velvet Cookie Bars, first, let them cool completely. Then, wrap them tightly in plastic wrap and place them in a freezer-safe bag or container. They can be stored in the freezer for up to 2 months. When you're ready to enjoy, simply thaw them in the fridge or on the counter, and warm them slightly in the microwave for that fresh-baked taste!
What should I do if my cookie bars turn out too dry?
If your Red Velvet Cookie Bars end up dry, it could be due to overmixing the batter or too much flour. Next time, ensure that you mix until just combined and measure the flour correctly by spooning and leveling. You can also enjoy them slightly warm with a scoop of ice cream to add extra moisture and flavor.
Are there any allergy considerations with these cookie bars?
Yes! If you're making these Red Velvet Cookie Bars for someone with allergies, be cautious of common allergens. The recipe contains gluten (from flour), dairy (from butter and cream cheese), and eggs. For gluten-free alternatives, consider using a gluten-free baking blend and egg substitutes such as applesauce or flaxseed meal. Always check ingredient labels when buying pre-made items like cream cheese frosting to ensure they're safe for your guests.
Can I substitute the white chocolate chips?
Certainly! You can substitute the white chocolate chips with dark or milk chocolate chips if you prefer a different flavor. Additionally, for a burst of texture, feel free to add in some chopped nuts or dried fruits. That way, you can tailor your Red Velvet Cookie Bars to your family's tastes!
Irresistibly Chewy Red Velvet Cookie Bars with Cream Cheese Frosting
Equipment
- 9x13-inch baking pan
- Mixing bowls
- Whisk
- spatula
- Electric mixer
Ingredients
For the Cookie Bars
- 2.5 cups all-purpose flour for perfect chewy texture
- 2 tablespoons cocoa powder adds subtle chocolate flavor
- 1 teaspoon baking soda essential for perfect rise
- 0.5 teaspoon salt balances sweetness
- 1 cup unsalted butter softened for rich flavor
- 1.5 cups granulated sugar sweetens the bars
- 0.5 cup brown sugar packed to contribute moisture
- 2 large eggs binds ingredients together
- 2 teaspoons vanilla extract adds warm aroma
- 1 tablespoon red food coloring for signature color
- 1 cup white chocolate chips melty bites contrast beautifully
For the Topping
- 1 cup cream cheese frosting store-bought or homemade
Instructions
Step-by-Step Instructions
- Preheat your oven to 350°F (175°C) and prepare your baking pan.
- In a bowl, whisk together flour, cocoa powder, baking soda, and salt.
- In another bowl, cream together butter, granulated sugar, and brown sugar until light and fluffy.
- Add eggs one at a time, then vanilla and food coloring, mixing well.
- Gradually mix in the dry ingredients until just combined.
- Fold in white chocolate chips gently.
- Spread the dough in the prepared baking pan evenly.
- Bake for 25-30 minutes or until a toothpick comes out clean.
- Let the cookie bars cool in the pan for 10-15 minutes before transferring to a wire rack.
- Once cooled, spread the cream cheese frosting on top.
- Cut into squares and serve.