As I stood in my kitchen, the warm aroma of sweet, ripe bananas filled the air, instantly transporting me to my grandmother's cozy home. The recipe for Old-Fashioned Homemade Banana Pudding has been part of my family for generations, and it never fails to evoke cherished memories. This delightful dessert is not only incredibly easy to whip up, requiring just 15 minutes of your time, but it's also a guaranteed crowd-pleaser that's perfect for gatherings or quiet nights at home. With layers of creamy pudding, classic vanilla wafers, and luscious bananas, you’ll find the comforting taste of nostalgia in every bite. Are you ready to bring a slice of tradition to your table? Let’s dive into the sweet world of banana pudding together!
Why is Banana Pudding So Irresistible?
Nostalgic Comfort: There's something magical about the combination of creamy pudding and sweet bananas that brings back fond memories of family gatherings and summer picnics.
Simple Process: This recipe boasts an easy step-by-step method, making it perfect for anyone, whether you're a seasoned chef or a novice in the kitchen.
Versatile Delight: Enjoy it on special occasions or as a cozy treat after dinner; this banana pudding fits any mood!
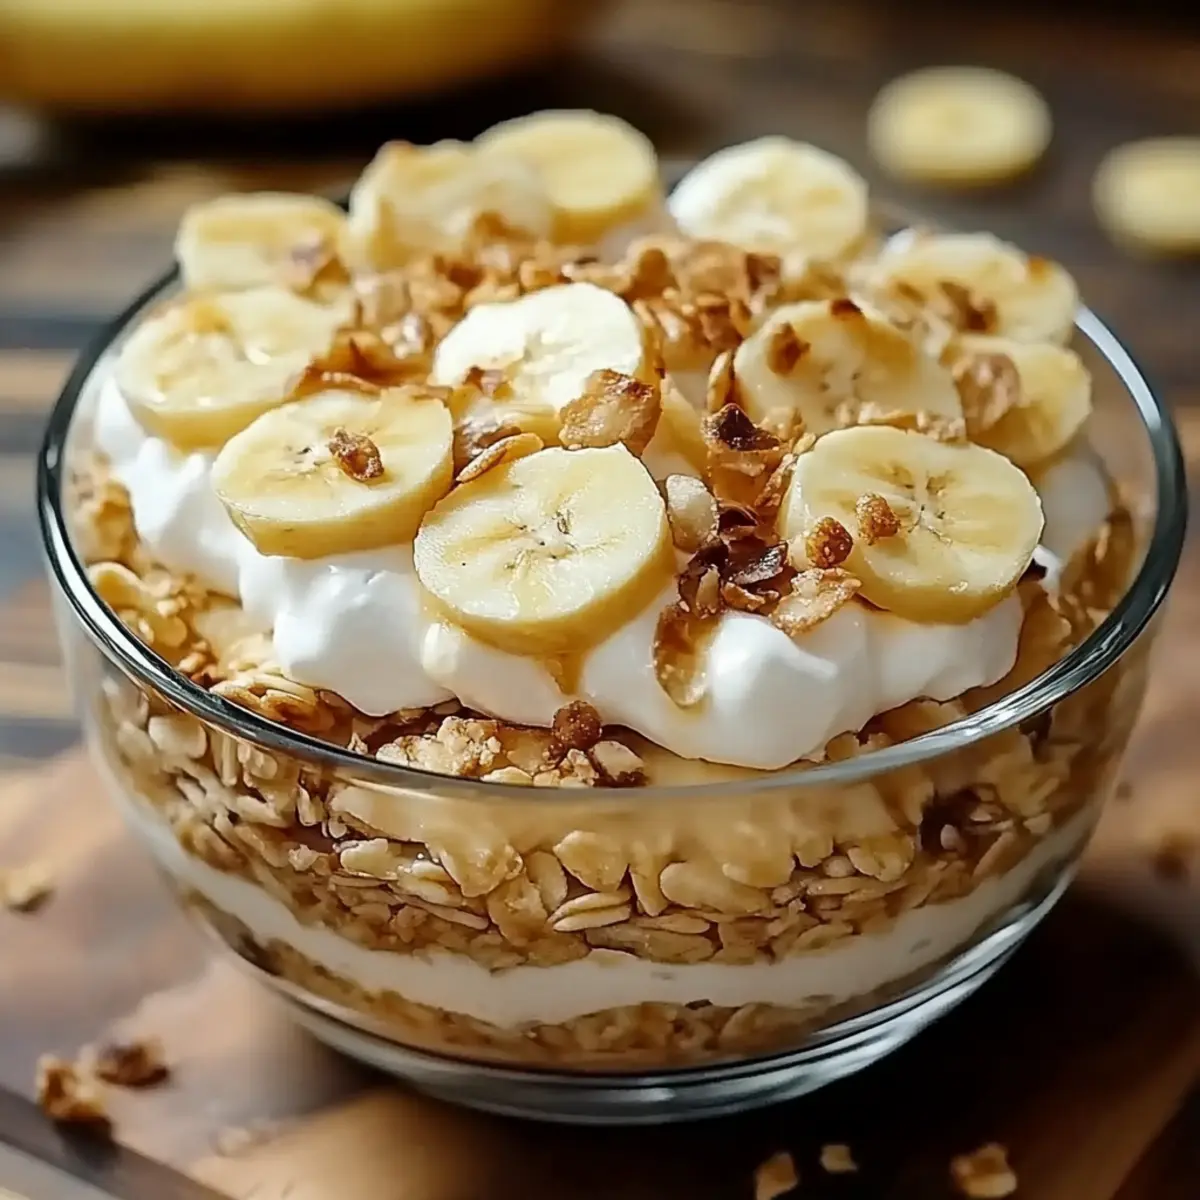
Layered Goodness: The contrast of crunchy vanilla wafers against silky pudding and ripe bananas creates an irresistible texture that leaves you wanting more.
Chill and Serve: With minimal prep time, all you need is a little patience while it chills, giving you more time to relax. Discover more timeless dessert ideas to satisfy your sweet tooth!
Banana Pudding Ingredients
Let’s gather everything you need to create this delightful dessert.
For the Pudding
• Milk – 2 cups of whole milk creates a rich, creamy base for the pudding.
• Granulated Sugar – ½ cup to sweeten the pudding just right!
• All-Purpose Flour – ⅓ cup for thickening, giving the pudding its perfect consistency.
• Salt – ¼ teaspoon enhances the sweetness, balancing flavors beautifully.
• Large Eggs – 3 eggs enrich the pudding and help in achieving that lovely texture.
• Unsalted Butter – 2 tablespoons adds a touch of richness to the final dish.
• Vanilla Extract – 1 tablespoon for an aromatic boost that elevates the flavor.
For Layering
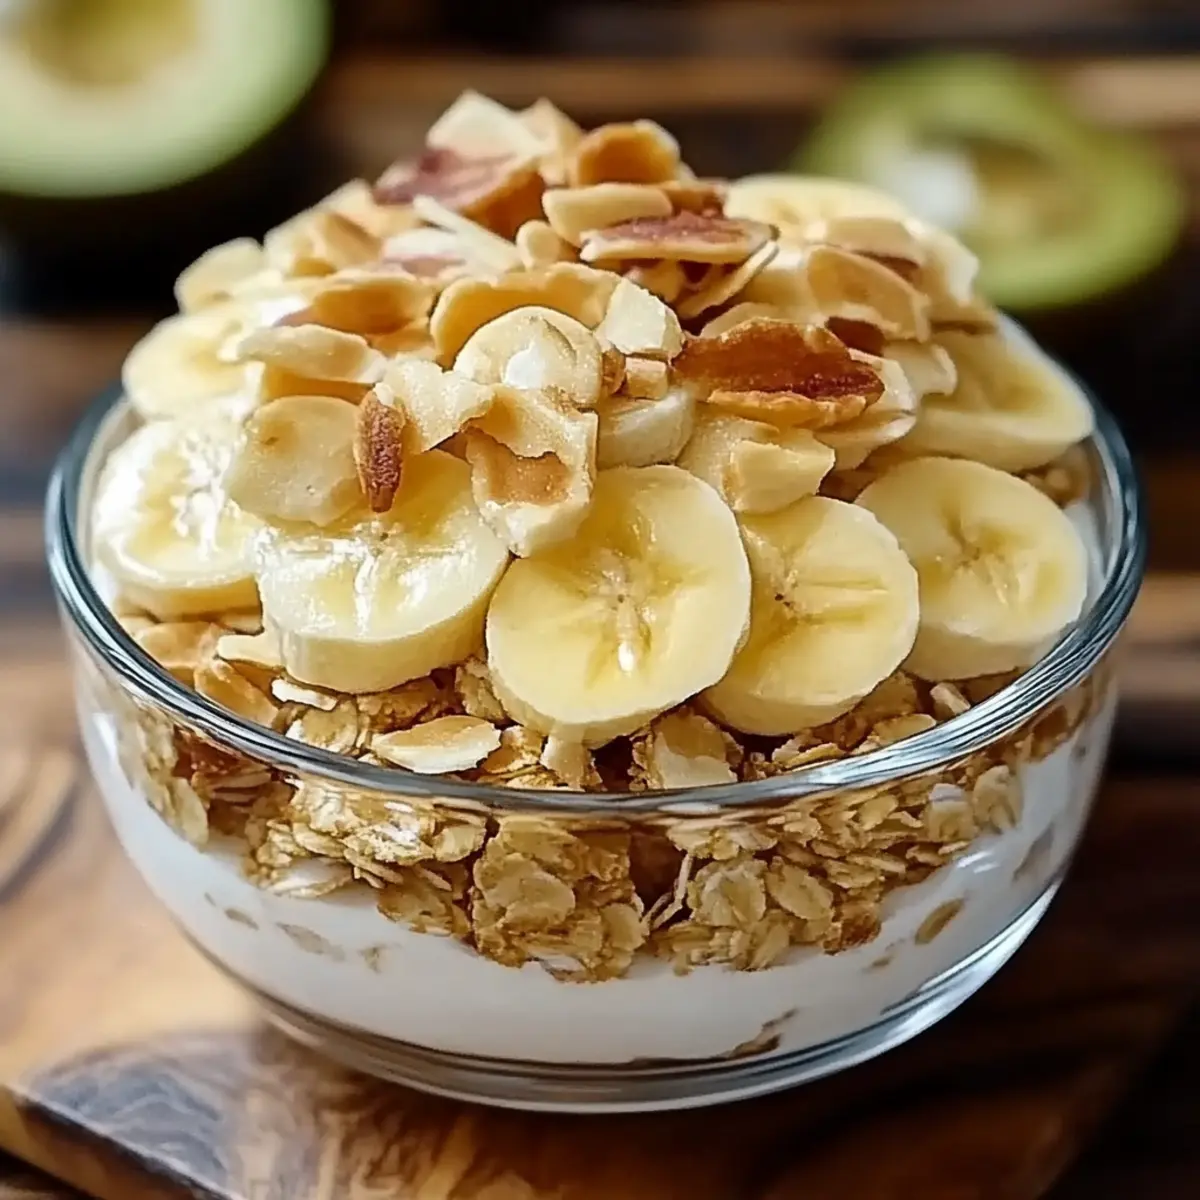
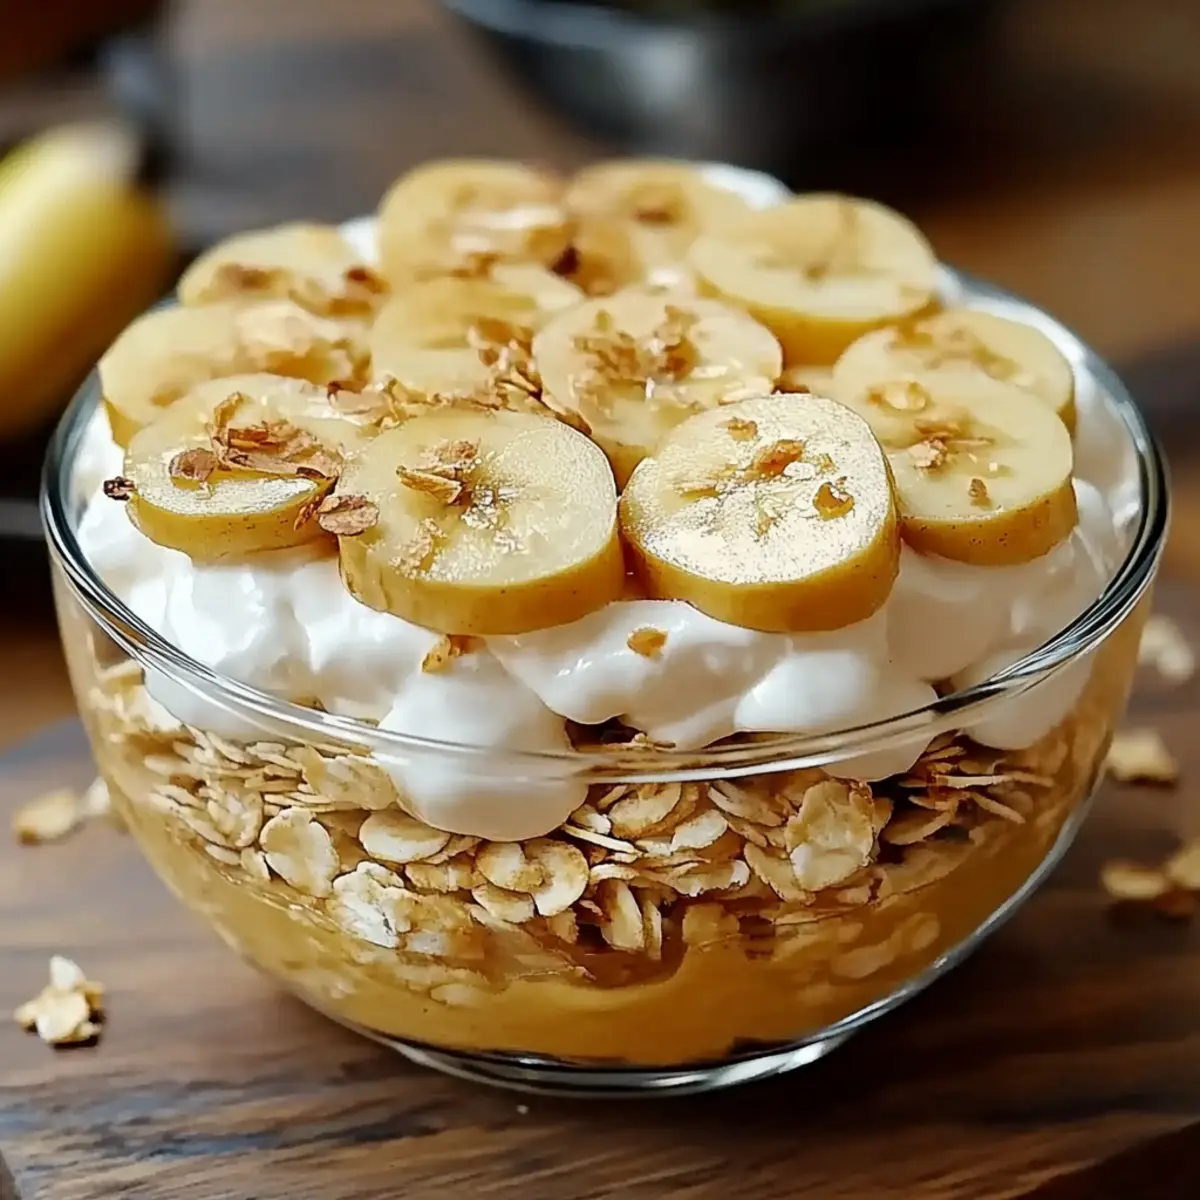
• Ripe Bananas – 3 to 4 bananas, sliced; the sweeter, the better for that classic banana pudding flavor.
• Vanilla Wafers – 12 ounces provide the perfect crunch and classic touch to this nostalgic dessert.
Bring these ingredients together to create a Banana Pudding that's irresistibly creamy and sure to impress everyone at your table!
Step-by-Step Instructions for Banana Pudding
Step 1: Prepare the Pudding Base
In a medium saucepan, combine 2 cups of milk, ½ cup of granulated sugar, ⅓ cup of all-purpose flour, and ¼ teaspoon of salt. Cook over medium heat, stirring constantly for about 10 minutes until the mixture thickens and begins to bubble. You'll know it’s ready when it coats the back of a spoon.
Step 2: Temper the Eggs
While the pudding base heats, crack 3 large eggs into a separate mixing bowl and beat them well. Slowly pour a small amount of the hot milk mixture into the eggs, whisking constantly to temper them. This prevents the eggs from scrambling. Gradually add more of the hot mixture until fully combined, ensuring a smooth texture for your banana pudding.
Step 3: Combine and Cook
Carefully pour the tempered egg mixture back into the saucepan with the rest of the pudding base. Continue to cook over medium heat for an additional 2 minutes, stirring constantly. You'll notice the pudding thickening even more — once it bubbles again and appears glossy, remove the saucepan from the heat.
Step 4: Add Flavor and Transfer
Stir in 2 tablespoons of unsalted butter and 1 tablespoon of vanilla extract into the warm pudding mixture until everything is fully incorporated. The butter will melt and give a lovely richness to the pudding. Once mixed, set the saucepan aside to cool slightly while preparing the layers.
Step 5: Layer the Ingredients
In a large serving dish, start by placing a layer of 12 ounces of vanilla wafers at the bottom. Follow this with a layer of sliced ripe bananas (about 3 to 4 bananas will work beautifully). Spoon a generous layer of the creamy pudding mixture over the bananas, making sure to cover them completely.
Step 6: Repeat the Layers
Continue layering using the remaining vanilla wafers, sliced bananas, and pudding mixture. Aim for at least two to three layers, finishing with a layer of pudding on top. This beautiful construction will make your banana pudding visually enticing and delicious.
Step 7: Chill and Set
Cover the assembled banana pudding with plastic wrap, ensuring it’s sealed well to prevent skin formation. Refrigerate for at least 4 hours, allowing the flavors to meld and the pudding to set perfectly. This is the patience-testing part, but it will be so worth the wait when you're ready to serve!
Step 8: Serve and Enjoy
After chilling, remove the banana pudding from the refrigerator. Gently uncover it and, if desired, garnish with additional banana slices or crushed vanilla wafers for a special touch. Scoop out generous servings and savor the creamy, nostalgic flavors of this irresistible banana pudding!
What to Serve with Old-Fashioned Homemade Banana Pudding
As you prepare to delight your family and friends with this creamy dessert, don’t forget to complement it with a few fantastic sides!
-
Creamy Mashed Potatoes: The buttery richness of mashed potatoes contrasts beautifully with the sweet, fruity flavor of banana pudding, creating a well-rounded meal.
-
Buttery Cornbread: This classic side offers a slightly sweet flavor that pairs wonderfully with the pudding’s creaminess, making your meal even more comforting.
-
Light Garden Salad: A fresh salad with mixed greens and a tangy vinaigrette balances the richness of the pudding while adding a refreshing crunch.
-
Roasted Vegetables: Earthy roasted veggies, like carrots and zucchini, provide a savory counterpoint to the sweetness of banana pudding, enhancing your overall dining experience.
-
Sweet Tea: Sipping on a glass of homemade sweet tea contributes a Southern charm that ties nicely with the nostalgic flavors of banana pudding.
-
Vanilla Ice Cream: For an indulgent twist, serve a scoop alongside your banana pudding for an extra creamy and dreamy dessert experience that everyone will love.
With these delightful pairings, you’ll create a meal that feels just like home!
Make Ahead Options
These delightful Banana Pudding layers make it a breeze to prepare ahead of time, saving you valuable moments during busy weeknights or gatherings. You can make the pudding and layer it with vanilla wafers and bananas up to 24 hours in advance. To do so, prepare the pudding up to the chilling stage, and then layer it in your serving dish, covering it tightly with plastic wrap to prevent skin formation. This ensures when you're ready to serve, the pudding remains just as creamy and delicious. Just remember to add fresh banana slices on top right before serving to keep them fresh and prevent browning. With this make-ahead option, you can enjoy the heartwarming taste of homemade Banana Pudding without the last-minute rush!
Expert Tips for Banana Pudding
Use Ripe Bananas: Ensure your bananas are perfectly ripe for maximum sweetness and flavor. Overripe bananas will enhance the overall taste of your banana pudding.
Temper the Eggs Carefully: When adding hot milk to the eggs, do it slowly while whisking constantly. This prevents scrambling and ensures a smooth pudding.
Avoid Lumpy Pudding: Stir the milk and dry ingredients continuously while cooking. This prevents lumps and gives your banana pudding a silky texture.
Layering Matters: For the best presentation and flavor integration, layer your pudding ingredients evenly, starting and ending with pudding. This allows the bananas to stay moist and prevents them from browning.
Chill for Best Results: Although it’s tempting to dive in right after making, refrigerating for at least 4 hours allows flavors to meld beautifully and the pudding to set.
Banana Pudding Variations & Substitutions
Feel free to make this delightful dessert your own by exploring these tasty twists and swaps!
-
Dairy-Free: Substitute almond milk or coconut milk for a creamy, non-dairy alternative that still tastes delicious.
-
Sugar-Free: Use a sugar substitute like stevia or erythritol to enjoy the same sweet flavor without added sugar.
-
Chocolate Twist: Add ½ cup of cocoa powder to the pudding mixture for a rich chocolate banana pudding. The contrast between chocolate and banana will sweep you off your feet.
-
Nutty Delight: Fold in ½ cup of chopped nuts like walnuts or pecans for added crunch and texture, elevating every creamy bite.
-
Flavor Infusion: Experiment with flavored extracts, such as almond or hazelnut, in place of vanilla for a unique flavor profile. Just a drop goes a long way!
-
Banana Split Style: Layer in maraschino cherries and crushed pineapple along with the bananas for a fun, tropical banana pudding.
-
Spicy Kick: Add a pinch of cinnamon or nutmeg to the pudding for a warm, comforting spice that complements the bananas beautifully.
-
Crunchy Top: Crush additional vanilla wafers or graham crackers and sprinkle them on top for a delightful crunch. Enjoy the satisfying combination of textures!
No matter how you choose to customize your Banana Pudding, these variations invite creativity. For even more inspiration, check out my timeless dessert ideas that are sure to satisfy your sweet cravings!
How to Store and Freeze Banana Pudding
Fridge: Store your banana pudding in an airtight container in the refrigerator for up to 3 days. This helps maintain its creamy texture and fresh flavors.
Freezer: For longer storage, freeze individual servings in freezer-safe containers for up to 2 months. Be aware that the texture may change once thawed.
Reheating: If you prefer to enjoy it warm, thaw in the refrigerator overnight, then gently reheat in the microwave in short intervals until just warmed through.
Wrap Carefully: To prevent the pudding from absorbing odors, cover the dish tightly with plastic wrap before refrigerating or freezing. Enjoy your delicious Banana Pudding at your own pace!
Old-Fashioned Homemade Banana Pudding Recipe FAQs
What kind of bananas should I use?
Absolutely! You want to use bananas that are perfectly ripe—look for ones that are slightly speckled with brown spots. These bananas will provide the maximum sweetness and delicious flavor that makes your banana pudding so irresistible.
How long can I store banana pudding in the fridge?
You can store your banana pudding in an airtight container in the refrigerator for up to 3 days. To keep it fresh and creamy, make sure the container is sealed tightly!
Can I freeze banana pudding?
Yes, you can freeze banana pudding for up to 2 months! To do this, it’s best to freeze individual servings in freezer-safe containers. Just be aware that the texture may change once thawed, so it might not be as creamy as when freshly made.
What should I do if my pudding turns out lumpy?
If your pudding has lumps, don’t worry! You can strain it through a fine mesh sieve after it's cooked to smooth it out. Next time, make sure to stir the mixture continuously while it cooks and gradually add hot milk to your eggs to prevent lumps from forming.
Can I make this banana pudding gluten-free?
Absolutely! To make gluten-free banana pudding, simply substitute the all-purpose flour with a gluten-free flour blend. You might also want to check that your vanilla wafers are gluten-free, or you can make your own using gluten-free ingredients.
Is banana pudding safe for pets?
While it’s tempting to share, it's best not to give banana pudding to pets due to the sugar and dairy content, which can upset their stomachs. Always check with your vet before sharing any human food with your furry friends!

Irresistibly Creamy Banana Pudding That'll Wow You
Equipment
- medium saucepan
- Mixing bowl
- Whisk
- serving dish
- plastic wrap
Ingredients
For the Pudding
- 2 cups whole milk creates a rich, creamy base
- ½ cup granulated sugar to sweeten the pudding just right
- ⅓ cup all-purpose flour for thickening
- ¼ teaspoon salt enhances sweetness
- 3 large eggs enrich the pudding
- 2 tablespoons unsalted butter adds richness
- 1 tablespoon vanilla extract for flavor enhancement
For Layering
- 3-4 pieces ripe bananas sliced; the sweeter, the better
- 12 ounces vanilla wafers provides crunch
Instructions
Step-by-Step Instructions
- In a medium saucepan, combine 2 cups of milk, ½ cup of granulated sugar, ⅓ cup of all-purpose flour, and ¼ teaspoon of salt. Cook over medium heat, stirring constantly for about 10 minutes until the mixture thickens and begins to bubble.
- While the pudding base heats, crack 3 large eggs into a separate mixing bowl and beat them well. Slowly pour a small amount of the hot milk mixture into the eggs, whisking constantly to temper them.
- Carefully pour the tempered egg mixture back into the saucepan with the rest of the pudding base. Continue to cook over medium heat for an additional 2 minutes, stirring constantly.
- Stir in 2 tablespoons of unsalted butter and 1 tablespoon of vanilla extract into the warm pudding mixture.
- In a large serving dish, start by placing a layer of 12 ounces of vanilla wafers at the bottom. Follow with a layer of sliced ripe bananas.
- Continue layering using the remaining vanilla wafers, sliced bananas, and pudding mixture.
- Cover the assembled banana pudding with plastic wrap and refrigerate for at least 4 hours.
- After chilling, remove the banana pudding from the refrigerator, garnish with banana slices or crushed vanilla wafers if desired, and serve.