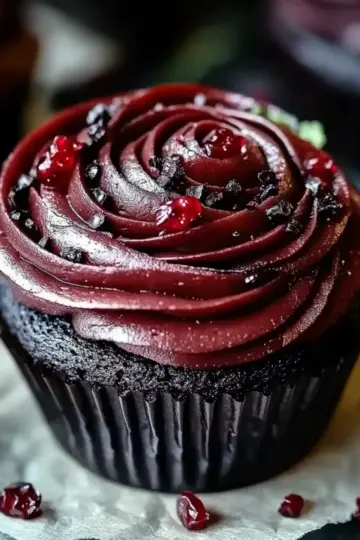
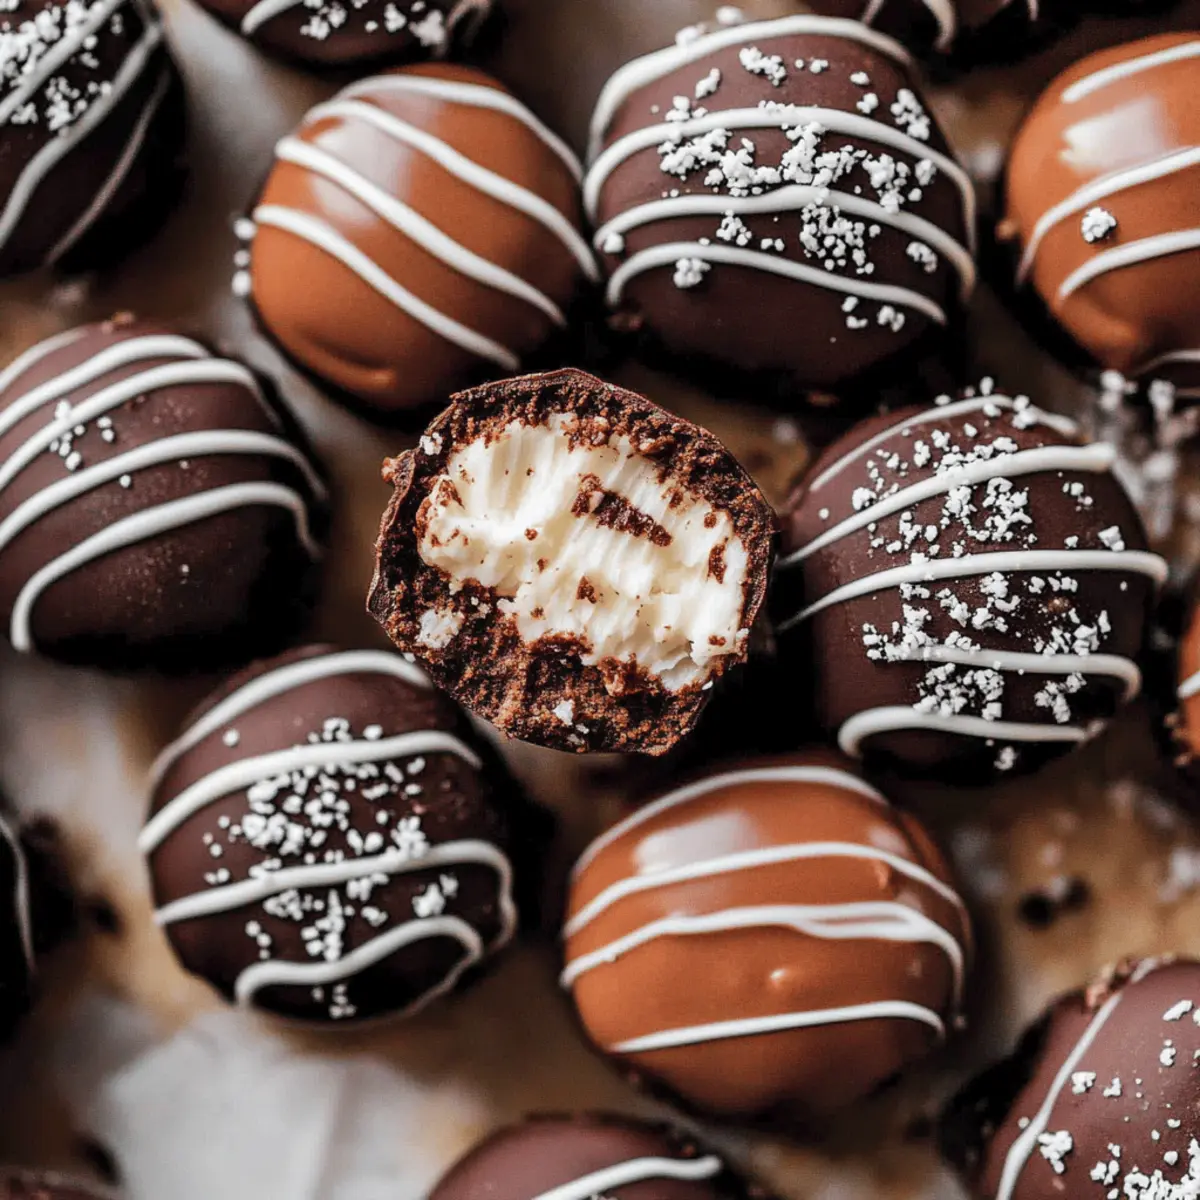
As I sat in my kitchen, the familiar sound of crushed cookies filled the air, whisking me back to my childhood. Today, I’m excited to share my recipe for Oreo Balls—a delightful treat that’s a perfect blend of simplicity and indulgence. Not only are they incredibly easy to prepare, with just a handful of ingredients and only 20 minutes of your time, but they also transform a classic favorite into a fun, bite-sized confection. These little delights are sure to impress family and friends at gatherings, making them a must-try for any chocolate lover. Are you ready to create something sweet that will have everyone asking for seconds?

Why Are Oreo Balls So Irresistible?
Simplicity: With just four ingredients, these treats are easy enough for anyone to whip up, making them perfect for beginner bakers or those short on time.
Sweet, Crunchy Indulgence: Each bite delivers a rich chocolate explosion, perfectly balanced with the delightful crunch of Oreo cookies.
Versatile Toppings: Get creative! Whether you prefer drizzling with white chocolate or dusting with crushed Oreos, there’s no wrong way to top these little gems.
Perfect Party Treat: They’re a surefire hit at any gathering, leaving your guests raving about their new favorite dessert.
Quick to Make: In just 30 minutes, you can have these sweet bites ready to impress, making them ideal for last-minute cravings or surprise guests.
Enjoy making these delightful Oreo Balls for your next get-together or cozy night in!
Oreo Balls Ingredients
Here’s what you need to create these delectable treats!
For the Truffle Base
- Oreo cookies – 8 ounces – Crush these classic cookies to create a sweet and crunchy foundation for the truffles.
- Melted butter – 3 tablespoons – This ingredient helps bind the Oreo mixture and adds richness.
- Milk – 1 teaspoon – A splash of milk provides moisture, making the truffles easier to roll.
For the Chocolate Coating
- Chocolate for coating – 8 ounces – Use high-quality chocolate to ensure a smooth and delicious finish for your Oreo Balls.
Gather these ingredients, and you’ll be all set to create something truly delightful!
Step‑by‑Step Instructions for Oreo Balls
Step 1: Crush the Oreos
Begin by crushing the 8 ounces of Oreo cookies into fine crumbs. You can easily achieve this using a food processor, or if you prefer a hands-on approach, place the cookies in a sealed plastic bag and smash them with a rolling pin. Aim for a crumbly texture, ensuring no large chunks remain, which typically takes about 1-2 minutes.
Step 2: Mix the Ingredients
In a large mixing bowl, combine the crushed Oreo crumbs with 3 tablespoons of melted butter and 1 teaspoon of milk. Use a spatula or your hands to mix the ingredients thoroughly until the mixture is well-blended and holds together. This should take about 2-3 minutes, as you want to achieve a dough-like consistency that's easy to roll.
Step 3: Form the Balls
Once your mixture is ready, scoop small portions and roll them into balls approximately 1 inch in diameter. Place the formed Oreo balls on a parchment-lined tray, ensuring they are evenly spaced apart. Allow them to chill in the refrigerator for about 15 minutes, which will help them firm up before coating.
Step 4: Melt the Chocolate
While the Oreo balls chill, melt the 8 ounces of chocolate for coating. You can do this using a microwave-safe bowl, heating in 30-second intervals and stirring in between until smooth. If desired, add a small amount of oil to thin out the chocolate, making the dipping process easier. This should take about 1-2 minutes in total.
Step 5: Dip the Oreo Balls
Carefully dip each chilled Oreo ball into the melted chocolate, ensuring they are fully coated. Using a fork or a skewer can help manage the dipping process. Allow any excess chocolate to drip back into the bowl, then place the coated balls back on the parchment-lined tray. This step should take about 5-10 minutes to complete.
Step 6: Let the Coating Set
Allow the chocolate-coated Oreo balls to set at room temperature for about 15-20 minutes. For added flair, you can top them with crushed Oreos or drizzle some white chocolate over them before the coating hardens. Once set, these delightful Oreo Balls are ready to be enjoyed or stored for later, making the perfect sweet treat!
Make Ahead Options
These Oreo Balls are perfect for busy home cooks looking to save time without sacrificing flavor! You can easily prepare the truffle base—crushed Oreos mixed with melted butter and milk—up to 24 hours in advance. Simply roll them into balls and refrigerate. When you're ready to serve, melt the chocolate and dip your chilled Oreo Balls; they’ll remain just as delicious and fresh! To maintain quality, store the pre-rolled balls in an airtight container in the refrigerator, ensuring they stay firm until coated. With this make-ahead option, you’ll have a delightful sweet treat ready for last-minute gatherings without any stress.
What to Serve with Oreo Balls?
Create a dessert table that’s bursting with flavors and textures to complement these delightful chocolate-covered treats.
-
Fresh Berries: Juicy strawberries or raspberries add a refreshing contrast to the rich sweetness of Oreo Balls.
-
Vanilla Ice Cream: The creamy, cool texture of vanilla ice cream perfectly balances the chocolatey richness, creating a decadent duo.
-
Coffee or Espresso: A warm cup of coffee enhances the chocolate flavor, providing a comforting end to your sweet experience.
-
Chocolate Dipped Fruit: For a harmonious treat, serve chocolate-dipped strawberries or bananas alongside your Oreo Balls for additional indulgence.
-
Caramel Sauce: Drizzle warm caramel sauce over your plates for a touch of sweetness that pairs beautifully with the cookies' crunch.
-
Cheesecake Bites: Mini cheesecake bites offer a tangy contrast to the sweetness, rounding out your dessert spread with creamy goodness.
-
Milkshake: A rich, chocolate milkshake is a delightful pairing that lets you enjoy both flavors in one blissful sip.
-
Nutty Biscotti: Crunchy biscotti provides a satisfying texture contrast and can be dipped into coffee for a perfect pairing with your Oreo Balls.
How to Store and Freeze Oreo Balls
Fridge: Store your Oreo Balls in an airtight container in the fridge for up to 1 week. This keeps them fresh and cool, perfect for a quick sweet tooth fix.
Freezer: For longer storage, you can freeze the Oreo Balls. Place them in a single layer on a baking sheet until firm, then transfer to a freezer-safe container. They’ll keep well for up to 3 months.
Thawing: When ready to enjoy your frozen Oreo Balls, move them to the fridge for several hours or leave them at room temperature for about 30 minutes to thaw before serving.
Reheating: These treats are best enjoyed cold or at room temperature, so no reheating is required, keeping their delightful texture intact!
Oreo Balls Variations & Substitutions
Feel free to get creative and personalize your Oreo Balls to suit your taste buds!
- Dairy-Free: Use coconut cream instead of milk and dairy-free chocolate for a delightful vegan twist.
- Nutty Crunch: Add ½ cup of finely chopped nuts to the Oreo mixture for an added crunch and depth of flavor. Picture biting into a fudgy treat with nutty surprises in every mouthful!
- Minty Fresh: Mix in ½ teaspoon of peppermint extract to the Oreo mixture for a refreshing mint-flavored version that’s perfect for the holidays!
- Spicy Twist: For adventurous palates, sprinkle in some chili powder or cayenne pepper to the chocolate coating for a surprising kick! Picture the moment when the sweetness gives way to unexpected heat—it’s a game-changer!
- Flavor Boost: Experiment with flavored chocolate, such as white chocolate or dark chocolate with sea salt, for different taste profiles that elevate your Oreo Balls.
- Peanut Butter Lovers: Add ¼ cup of creamy peanut butter to the truffle filling for a rich, nutty flavor that pairs beautifully with chocolate. It’s like a decadent, peanut butter cup disguised as an Oreo Ball!
- Fruit Fusion: Incorporate a handful of mashed raspberries or crushed strawberries into the filling for a fruity burst that perfectly complements the deep chocolate. Imagine the vibrant color and taste each bite brings!
- Rainbow Sprinkles: After dipping in chocolate, roll the Oreo Balls in colorful sprinkles for a festive look that’s guaranteed to brighten any occasion.
Each of these variations provides a unique twist on the classic recipe. As you get creative, consider pairing your delicious Oreo Balls with a delightful cup of coffee or a scoop of ice cream for an irresistible treat experience!
Tips for the Best Oreo Balls
- Crushing Technique: Use a food processor for uniform crumbs. If using a bag, avoid large chunks by ensuring a fine consistency; it’s key for smooth truffles.
- Chill Time: Don’t skip chilling the formed balls before dipping. This makes them easier to coat and helps them hold their shape.
- Chocolate Quality: Choose high-quality chocolate for coating. The better the chocolate, the more delicious your Oreo Balls will be—don’t settle for anything less!
- Coating Consistency: Adding a little oil to melted chocolate helps achieve a smoother finish. Avoid thick coating that can obscure the truffle beneath.
- Topping Variations: Get creative! Finish with crushed Oreos, sprinkles, or a drizzle of white chocolate for visual flair and extra flavor.

Oreo Balls Recipe FAQs
How do I select the best Oreos for the recipe?
Absolutely! When picking Oreos, look for fresh packages with no visible damage. Check for any dark spots or a broken seal, as this may indicate they aren't as fresh. A simple push on the cookie should reveal a nice crispness, which tells you they’ll blend perfectly into those delightful Oreo Balls.
How long can I store leftover Oreo Balls?
Very! You can store your Oreo Balls in an airtight container in the fridge for up to 1 week. This keeps them fresh and ready for whenever a sweet craving strikes. Just make sure the container is sealed well, so they don’t absorb any other smells from your fridge.
Can I freeze Oreo Balls, and how do I do it?
Absolutely! To freeze your Oreo Balls, simply place them in a single layer on a baking sheet and freeze them until solid, which usually takes about 1-2 hours. Once firm, transfer them to a freezer-safe container or zip-top bag, making sure to remove as much air as possible before sealing. They’ll be good for up to 3 months! When you’re ready to indulge, just pop them in the fridge for a few hours or leave them out at room temperature for about 30 minutes to thaw.
What should I do if my Oreo mixture is too crumbly?
If you find your Oreo mixture is a bit too crumbly, don’t worry! Simply add a touch more melted butter—start with an additional 1 teaspoon—and thoroughly mix it in. This extra moisture should help bind the mixture better. If needed, repeat until you reach the ideal dough-like consistency that holds together without falling apart.
Are Oreo Balls safe for pets?
Absolutely not! These sweet treats contain chocolate and Oreos, both of which are harmful to pets, especially dogs. Chocolate can be toxic in even small amounts, so make sure to keep your Oreo Balls safely out of reach of any curious paws!
Can I use white chocolate instead of regular chocolate for coating?
Very! White chocolate is a delightful alternative that not only looks stunning but also adds a deliciously sweet touch to your Oreo Balls. Just follow the same melting instructions as with regular chocolate, and consider adding sprinkles or extra crushed Oreos on top for that extra pizzazz!

Deliciously Easy Oreo Balls for Your Sweet Cravings
Equipment
- food processor
- microwave-safe bowl
- spatula
- Rolling Pin
Ingredients
For the Truffle Base
- 8 ounces Oreo cookies Crush these classic cookies to create a sweet and crunchy foundation for the truffles.
- 3 tablespoons Melted butter This ingredient helps bind the Oreo mixture and adds richness.
- 1 teaspoon Milk A splash of milk provides moisture, making the truffles easier to roll.
For the Chocolate Coating
- 8 ounces Chocolate for coating Use high-quality chocolate to ensure a smooth and delicious finish for your Oreo Balls.
Instructions
Step‑by‑Step Instructions for Oreo Balls
- Begin by crushing the 8 ounces of Oreo cookies into fine crumbs. Use a food processor or smash them in a plastic bag with a rolling pin for 1-2 minutes.
- In a large mixing bowl, combine the crushed Oreo crumbs with 3 tablespoons of melted butter and 1 teaspoon of milk. Mix thoroughly until the mixture holds together, about 2-3 minutes.
- Scoop small portions and roll them into balls approximately 1 inch in diameter. Place on a parchment-lined tray and chill in the refrigerator for about 15 minutes.
- Melt the 8 ounces of chocolate for coating in a microwave-safe bowl, heating in 30-second intervals until smooth, about 1-2 minutes.
- Dip each chilled Oreo ball into the melted chocolate, allowing excess chocolate to drip back into the bowl before placing them on the tray.
- Let the chocolate-coated Oreo balls set at room temperature for 15-20 minutes before enjoying or storing.