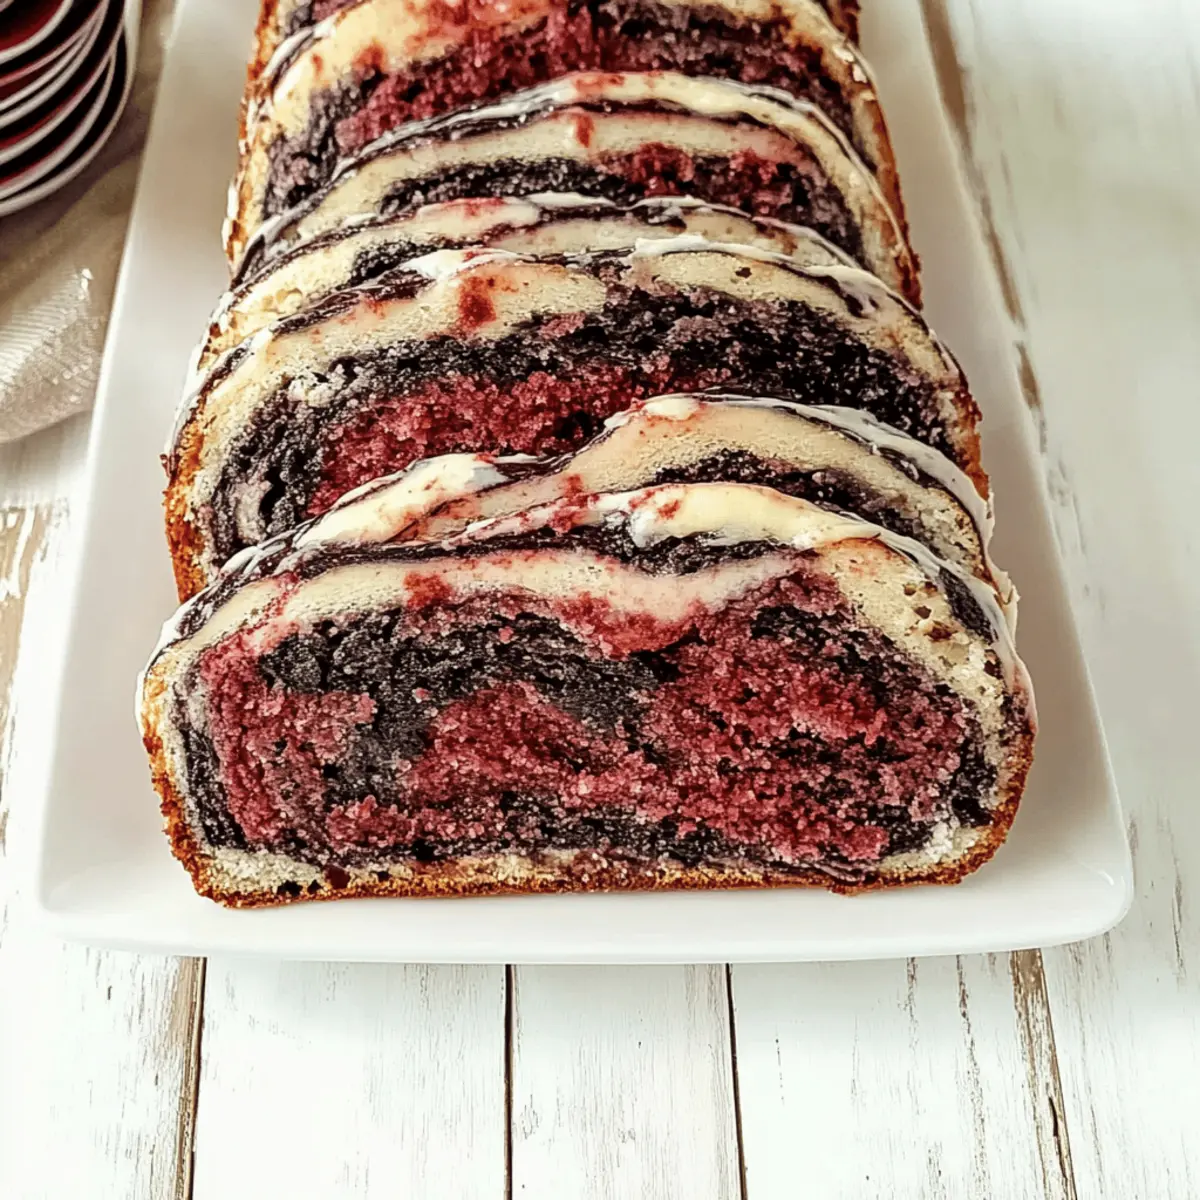
As the sun sets and shadows stretch across my kitchen, a delightful mix of whimsy and warmth fills the room. Today, I’m excited to share my enchanting recipe for Vampire Bread, a fun twist on homemade baking that’ll make your dinner table shine with a touch of Halloween magic. This recipe is perfect for bringing family and friends together, with its striking marbled colors and delightful aroma wafting from the oven. Not only is it a quick prep, taking just 5 minutes to get started, but it also doubles as a crowd-pleaser that’s guaranteed to spark laughter and conversation. Ready to summon some culinary creativity? Let’s dive into the mysterious world of baking with this spooky masterpiece!
Why Is Vampire Bread So Fun to Make?
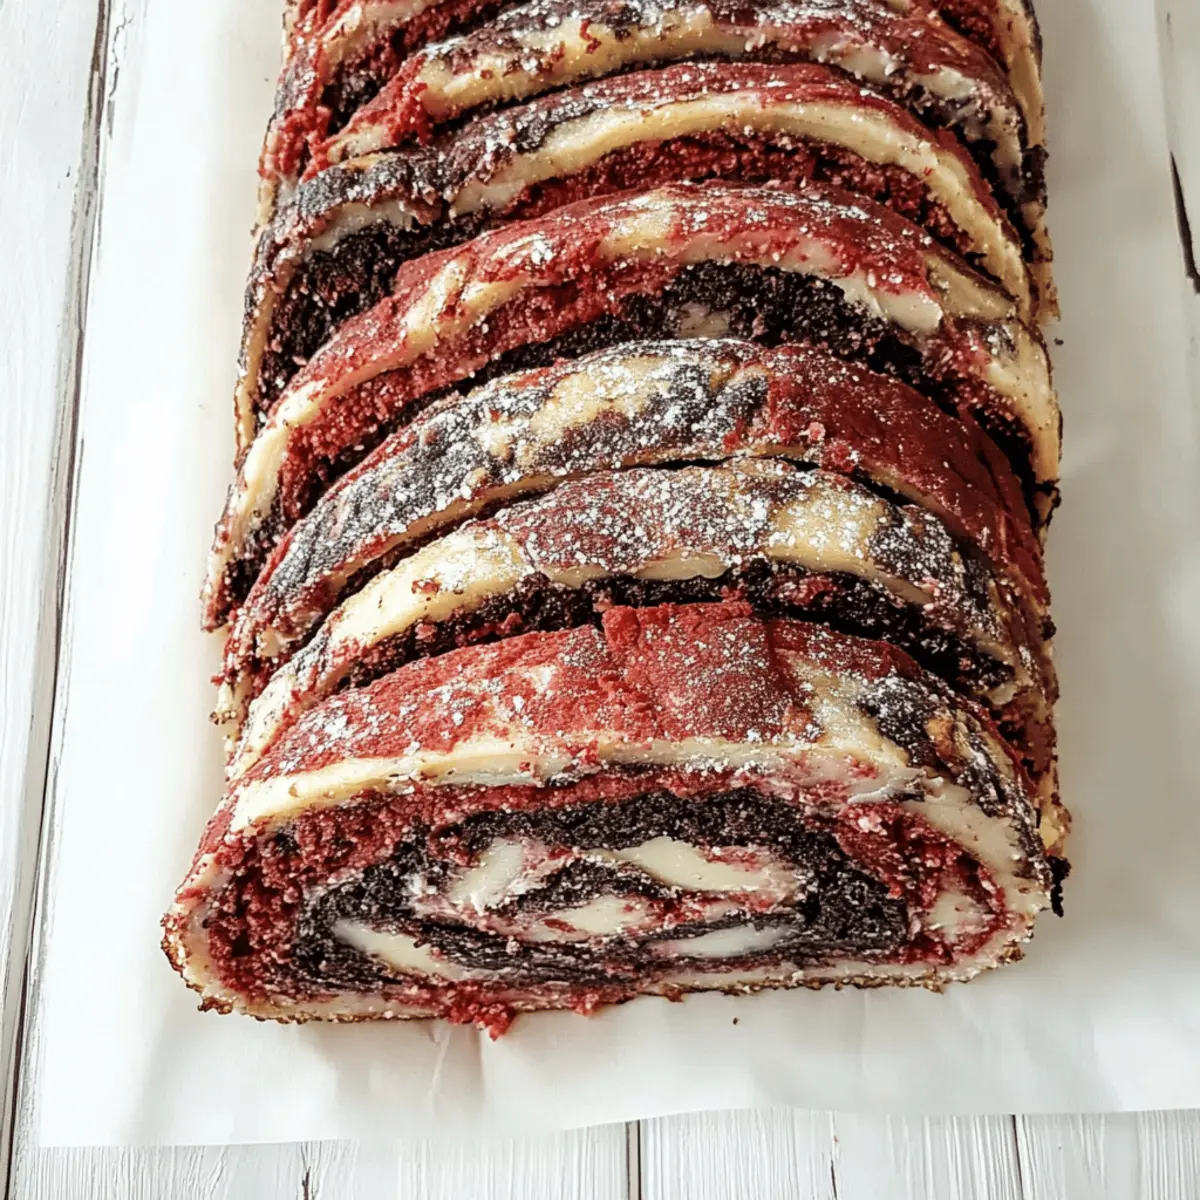
Creativity Unleashed: This recipe encourages you to play with colors, transforming simple dough into a stunning work of art. Quick Prep: With only 5 minutes of hands-on time, you’ll quickly dive into a world of baking fun. Versatile Centerpiece: Perfect for Halloween or any gathering, this bread is sure to be a conversation starter. Looking for more festive ideas? Try pairing it with our Garlic Crack Bread or sweeten the deal with Cranberry Pistachio Shortbread. Family-Friendly Fun: Involve the kids in the coloring process and make lasting memories. Deliciously Unique: Not only does it look incredible, but its delightful flavor will keep everyone coming back for more!
Vampire Bread Ingredients
• To create this spooky loaf, gather these simple ingredients!
For the Dough
- All-purpose flour – Provides the base for a soft, fluffy bread texture.
- Sugar – Adds a touch of sweetness that balances the savory elements.
- Active dry yeast – This is what makes your Vampire Bread rise and become fluffy!
- Warm water – Activates the yeast for the perfect baking magic.
- Vegetable oil – Keeps the bread moist and tender with every slice.
- Salt – Enhances the overall flavor, making each bite satisfying.
For the Color
- Red food coloring – Creates a spooky, vibrant hue that’s iconic for Vampire Bread.
- Black food coloring – Complements the red for a striking and dramatic visual effect.
With these ingredients at your fingertips, you're ready to start your enchanting baking experience!
Step‑by‑Step Instructions for Vampire Bread
Step 1: Activate the Yeast
Begin by mixing the warm water with the active dry yeast in a bowl. Allow this mixture to sit for about 5 minutes, until it becomes foamy, indicating that the yeast is active and ready to work its magic. This step is crucial for the fluffy texture of your Vampire Bread.
Step 2: Combine Dry Ingredients
In a large mixing bowl, combine 2 cups of all-purpose flour, ½ cup of sugar, and 1 teaspoon of salt. Stir these ingredients together until they are well mixed, creating a light and fluffy base for your dough. This combination sets the foundation for the delightful flavors in your Vampire Bread.
Step 3: Mix Wet and Dry Ingredients
Once the yeast mixture is foamy, pour it into the bowl with the dry ingredients, along with ¼ cup of vegetable oil. Mix everything together until a cohesive dough forms. You can use a wooden spoon or your hands for this step, ensuring all ingredients are well combined to create a smooth texture.
Step 4: Divide and Color the Dough
Carefully divide the dough into two equal portions. In one portion, add red food coloring, and in the other, add black food coloring. Knead each portion until the color is evenly incorporated, creating vibrant doughs that will make your Vampire Bread visually striking.
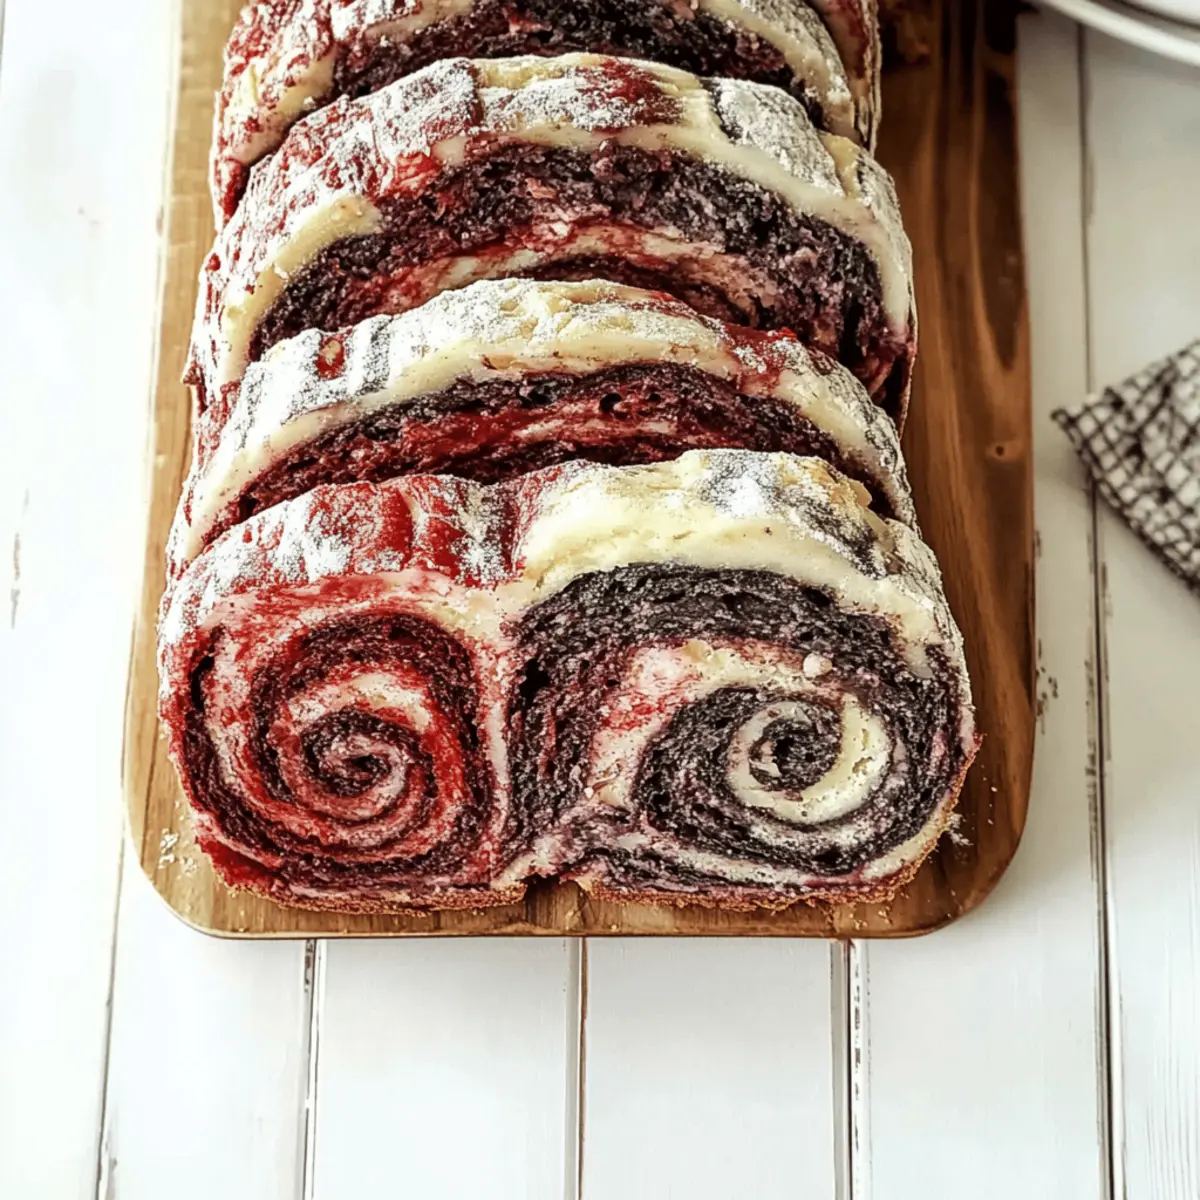
Step 5: Create Marbled Dough
Roll out both colored doughs on a floured surface to about ½-inch thickness. Layer the two pieces together, then twist or fold them to achieve a beautiful marbled effect. This step adds a creative touch, making your Vampire Bread not just delicious but also a visual treat.
Step 6: Shape the Loaf
Once you have the marbled dough, shape it into a loaf. Tuck and pinch the ends to secure the shape, then place it into a greased loaf pan. This shaping ensures that your dough rises evenly, contributing to the delightful texture of your Vampire Bread.
Step 7: Let It Rise
Cover the loaf pan with a clean kitchen towel and place it in a warm area to rise for about 2 hours or until it has doubled in size. This step is essential for the yeast to work, providing the fluffy and airy texture characteristic of your Vampire Bread.
Step 8: Preheat the Oven
As the dough rises, preheat your oven to 350°F (175°C). This ensures that the oven is ready when you're finished with the rising process, allowing your Vampire Bread to bake evenly and develop a lovely golden crust.
Step 9: Bake the Bread
Bake the risen bread in the preheated oven for about 30 minutes. The bread is done when it turns golden brown and a toothpick inserted into the center comes out clean. Keep an eye on it to ensure it doesn’t over-bake.
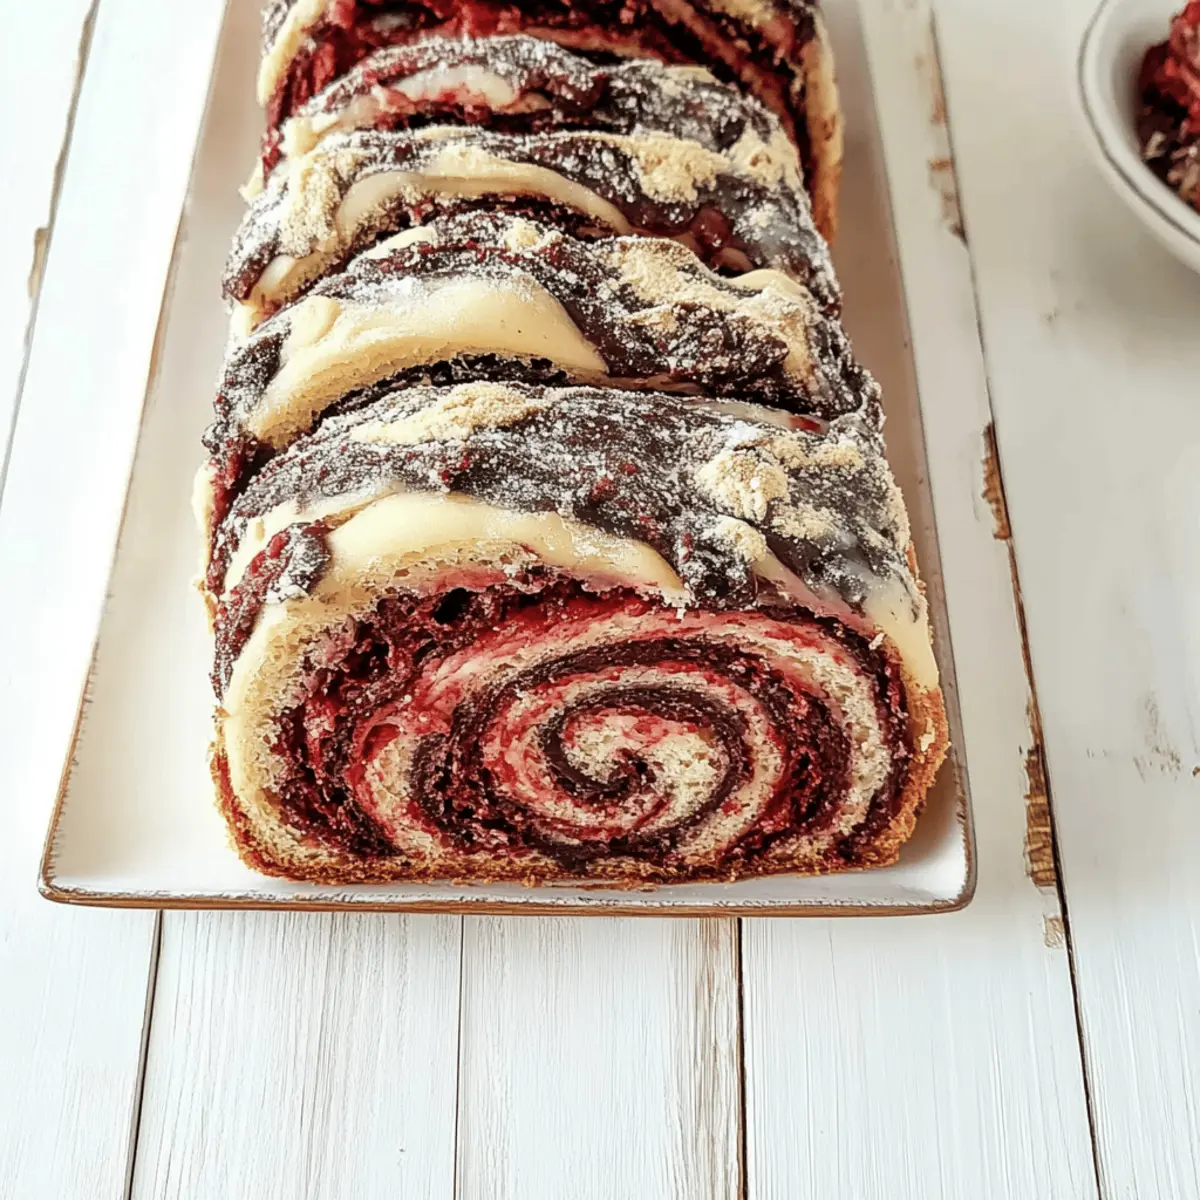
Step 10: Cool and Slice
Once baked, remove the loaf from the oven and allow it to cool in the pan for a few minutes before transferring it to a wire rack. Let it cool completely before slicing. This cooling period helps maintain the bread's soft and tender texture, making your Vampire Bread perfect for serving.
Make Ahead Options
These delightful Vampire Bread are perfect for meal prep enthusiasts! You can prepare the colored dough up to 24 hours in advance; just wrap each portion tightly in plastic wrap to keep it fresh and to prevent drying out. Simply place the prepped dough in the refrigerator until you're ready to twist and shape it. When you're ready to bake, allow the dough to sit at room temperature to rise before shaping it into a loaf and letting it proof for about 2 hours. With these make-ahead options, you'll save precious time on busy days while still serving up a striking and delicious centerpiece!
How to Store and Freeze Vampire Bread
Room Temperature: Store your Vampire Bread in an airtight container or wrap it tightly in plastic wrap. It will stay fresh for up to 3 days.
Fridge: If you want to prolong its freshness, keep the wrapped bread in the refrigerator for up to a week. Just be sure to let it come to room temperature before serving!
Freezer: To freeze, slice the Vampire Bread and wrap each slice individually in plastic wrap, then place them in a freezer bag. It will remain good for up to 3 months.
Reheating: To enjoy your Vampire Bread, simply toast individual slices or warm it in the oven at 350°F (175°C) for about 10 minutes. This will revive its delightful texture and flavor, making it taste freshly baked!
What to Serve with Vampire Bread?
Transform your mealtime into a festive celebration with delightful pairings that complement this striking loaf.
- Garlic Butter Spread: A rich and creamy spread that enhances the flavors of the bread, perfect for dipping or spreading generously.
- Roasted Vegetable Medley: Colorful roasted veggies add a touch of earthiness and beautiful contrasts to the Halloween-themed bread.
- Savory Tomato Soup: The warmth and acidity of tomato soup create a perfect balance with the sweet, marbled bread—a cozy duo!
- Pumpkin Spice Latte: Embrace the autumn vibes with this comforting drink that matches the seasonal aesthetic of the Vampire Bread.
- Cheddar Cheese Platter: Pair with sharp cheddar and crispy crackers for a delightful contrast; the creaminess complements the bread beautifully.
- Cranberry Sauce: A tart and sweet sauce that brightens each bite, providing a burst of flavor against the bread's soft texture.
- Chocolate Mousse: Finish your meal with a rich dessert that echoes the dramatic colors of the bread, providing an indulgent sweet note.
Each of these pairings elevates the experience, making your table not only delicious but visually stunning as well!
Vampire Bread Variations to Explore
Feel free to get creative with this recipe; there are so many delightful ways to customize your Vampire Bread experience!
-
Gluten-Free: Substitute all-purpose flour with a 1:1 gluten-free baking blend for a celiac-friendly option. It’s a great way for everyone to join the fun without missing out!
-
Herb-Infused: Incorporate dried herbs like rosemary or thyme into the dough for a savory twist. The subtle fragrance will elevate your bread experience, making it a new family favorite.
-
Cheesy Delight: Mix in shredded cheese, such as mozzarella or cheddar, into the dough before baking for a gooey, savory surprise. Just imagine pulling apart a slice with melted cheese oozing out—delicious!
-
Sweet Swirl: Add chocolate chips or dried fruits, like cranberries, for a sweet surprise in each bite. This variation turns your Vampire Bread into a special treat, perfect for breakfast or dessert.
-
Spicy Kick: Sprinkle in red pepper flakes or finely chopped jalapeños for some heat. It’s a fantastic way to add an extra layer of flavor, especially for spice lovers!
-
Festive Toppings: Before baking, brush the top of the loaf with an egg wash and sprinkle with sesame or poppy seeds. This not only enhances the flavor but creates a beautiful crust that everyone will adore.
-
Color Play: Try using other food coloring combinations, such as green and purple, for a fantasy theme. Your Vampire Bread can transform into a magical piece suitable for any whimsical occasion!
-
Dip-Friendly: Shape the dough into small rolls instead of a loaf for dipping into soups or spreads. Making bite-sized pieces will turn your baking adventure into a fun gathering, complemented by delightful dips.
Remember, there’s no limit to the creativity you can unleash! Pair your Vampire Bread with a tasty soup and perhaps some delectable Raspberry Lemon Shortbread for a complete meal that’s sure to impress friends and family alike.
Expert Tips for Vampire Bread
• Dough Consistency: Ensure your dough is not too sticky or dry. If it is, adjust with small amounts of flour or water to achieve the perfect texture.
• Coloring Technique: Mix the food coloring gradually to avoid overly dark shades. Aim for vibrant, but balanced hues for a more appealing marbled effect in your Vampire Bread.
• Rising Time: Don’t rush the rising process! Let the dough rise until it doubles in size; this is key to a fluffy and airy loaf.
• Baking Check: Use the toothpick test to check doneness. If it comes out clean, your Vampire Bread is perfectly baked; if it comes out wet, give it a few more minutes in the oven.
• Cooling Patience: Allow the bread to cool completely before slicing to maintain its fluffy texture and prevent squishing. Your patience will be rewarded with perfect slices!
Vampire Bread Recipe FAQs
How should I select the ingredients for Vampire Bread?
Absolutely! For the freshest results, choose high-quality all-purpose flour and check the expiration date on your active dry yeast to ensure it’s still active. The yeast should be fresh to guarantee a good rise, so if it’s been sitting in your pantry for a while, it’s worth checking! Additionally, when selecting your food coloring, opt for gel-based products for the most vibrant colors that won’t water down your dough.
What’s the best way to store Vampire Bread?
Very good question! To keep your Vampire Bread fresh at room temperature, simply store it in an airtight container or wrap it tightly in plastic wrap for up to 3 days. If you want to extend its life, you can refrigerate it; just make sure to wrap it securely. In the fridge, it’ll last up to a week. Remember to let it come to room temperature before serving for the best texture!
Can I freeze Vampire Bread, and if so, how?
Absolutely! To freeze your Vampire Bread, slice it first, as this makes it easier to thaw individual portions. Wrap each slice tightly in plastic wrap, then place them in a freezer-safe bag, ensuring to remove as much air as possible. This way, your lovely bread can last up to 3 months in the freezer. When you’re ready to enjoy it, you can toast the slices directly from the freezer or warm them in the oven at 350°F (175°C) for about 10 minutes.
What should I do if my Vampire Bread doesn’t rise properly?
Ah, the classic baking dilemma! If your dough doesn’t rise, it could be due to inactive yeast. Make sure to proof your yeast in warm water (not hot) first and look for it to become foamy within 5-10 minutes. If it doesn’t foam, it’s best to start over with fresh yeast. Also, ensure the dough is in a warm place to rise; a cold environment can significantly slow down the fermentation process. Lastly, if the dough looks too dry, adding a little warm water can help it along.
Are there any dietary considerations I should be aware of when making Vampire Bread?
Yes, indeed! If you're making this bread for someone with dietary restrictions, be cautious with the ingredients. This recipe contains gluten from the all-purpose flour, which isn't suitable for those with gluten intolerance or celiac disease. You could experiment with a gluten-free flour blend, but the texture and rise may vary. Additionally, if allergies are a concern, check the food coloring for potential allergens, as some brands may contain ingredients that could trigger reactions. Always consult with guests about their dietary needs for a deliciously inclusive feast!
Deliciously Spooky Vampire Bread to Elevate Your Baking Game
Equipment
- Mixing bowl
- Loaf pan
- Wooden spoon
- Kitchen towel
- wire rack
Ingredients
For the Dough
- 2 cups all-purpose flour Provides the base for a soft, fluffy bread texture.
- 0.5 cups sugar Adds a touch of sweetness.
- 1 teaspoon active dry yeast Makes the bread rise and become fluffy.
- 0.75 cups warm water Activates the yeast.
- 0.25 cups vegetable oil Keeps the bread moist.
- 1 teaspoon salt Enhances the overall flavor.
For the Color
- 1 tablespoon red food coloring Creates a spooky hue.
- 1 tablespoon black food coloring Complements the red for a striking effect.
Instructions
Step-by-Step Instructions for Vampire Bread
- Activate the Yeast: Mix warm water with active dry yeast in a bowl and let sit for about 5 minutes until foamy.
- Combine Dry Ingredients: In a large bowl, mix together flour, sugar, and salt until well combined.
- Mix Wet and Dry Ingredients: Add the foamy yeast mixture and vegetable oil to the dry ingredients and stir until forming a cohesive dough.
- Divide and Color the Dough: Divide the dough into two portions, adding red food coloring to one and black to the other, then knead until evenly colored.
- Create Marbled Dough: Roll both doughs into ½-inch thick pieces, layer them, then twist or fold to create a marbled effect.
- Shape the Loaf: Shape the marbled dough into a loaf and place it in a greased loaf pan.
- Let It Rise: Cover with a towel and let it rise in a warm area for about 2 hours or until doubled in size.
- Preheat the Oven: Preheat your oven to 350°F (175°C).
- Bake the Bread: Bake for about 30 minutes until golden brown and a toothpick comes out clean.
- Cool and Slice: Let the bread cool in the pan for a few minutes then transfer to a wire rack to cool completely before slicing.