As I took my first bite of Panna Cotta, I was unexpectedly transported to a cozy Italian café—where the aroma of fresh vanilla danced around me. This delicate dessert, simple yet elegant, is a true testament to the beauty of homemade cooking. With minimal ingredients and quick prep time, it allows you to create a sophisticated dish that impresses without the fuss. Plus, it's a fantastic crowd-pleaser and can be elegantly dressed up with fresh berries and mint leaves for that perfect finishing touch. Trust me, making this creamy delight will elevate your dessert game and bring a touch of Italy into your kitchen. So, are you ready to indulge in the smooth, luscious experience of Panna Cotta? Let’s dive into the recipe!
Why is Panna Cotta a must-try?
Simplicity at its finest: With just a handful of ingredients, this Panna Cotta recipe is incredibly easy to make, even for beginners.
Rich, creamy texture: The perfect blend of heavy cream and whole milk creates that signature velvety smoothness that melts in your mouth.
Customizable delights: Dress it up with fresh berries or drizzled sauces to match any occasion, making it a versatile dessert for every palate.
Perfect for gatherings: Impress your friends and family with this elegant dish that looks as delightful as it tastes, ensuring you’re the star of your next dinner party.
Quick to prep: In just 15 minutes of prep time, you can set this dessert to chill, leaving you free to enjoy the evening without the stress of complicated cooking.
Whether you're seeking a sophisticated treat or a simple yet elegant dessert, this Panna Cotta is your answer!
Panna Cotta Ingredients
• Gather these simple ingredients to create the perfect Panna Cotta!
For the Creamy Base
• 500 ml heavy cream – provides the rich, smooth texture that makes Panna Cotta irresistible.
• 100 ml whole milk – complements the cream for a balanced flavor without being overly rich.
• 80 g granulated sugar – sweetens the dessert to perfection, enhancing its creamy goodness.
• 1 vanilla bean – infuses your Panna Cotta with aromatic warmth (the seeds add a delightful speckled look!).
For the Gelatin
• 7 g powdered gelatin – ensures your Panna Cotta sets beautifully, creating that classic, wobbly dessert.
• 2 tablespoon cold water – helps to bloom the gelatin, ensuring even incorporation into the mixture.
For Garnishing
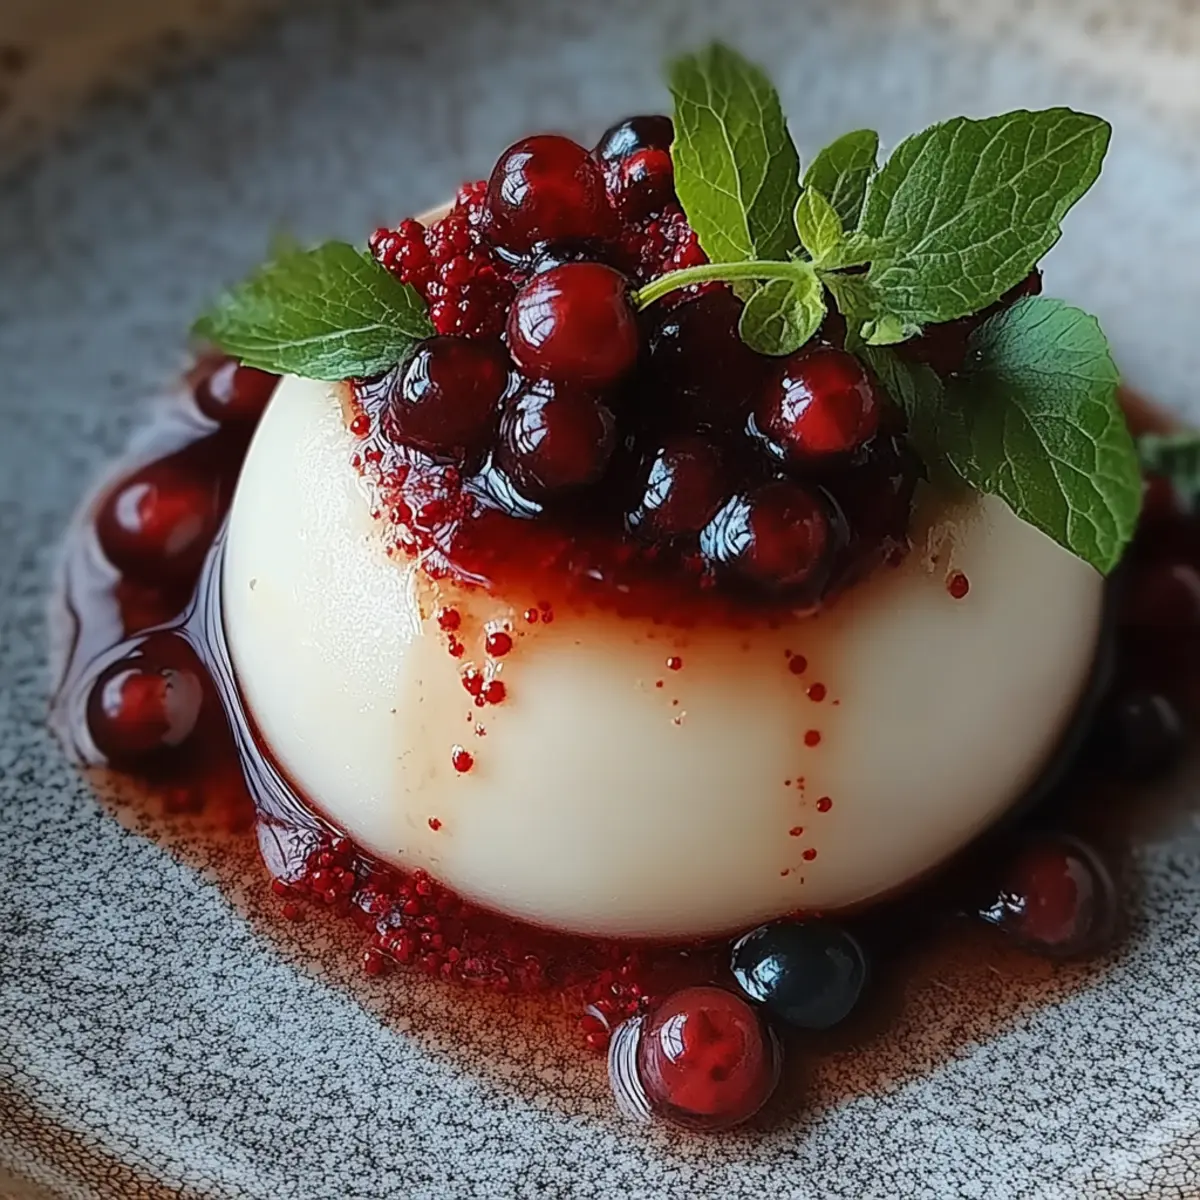
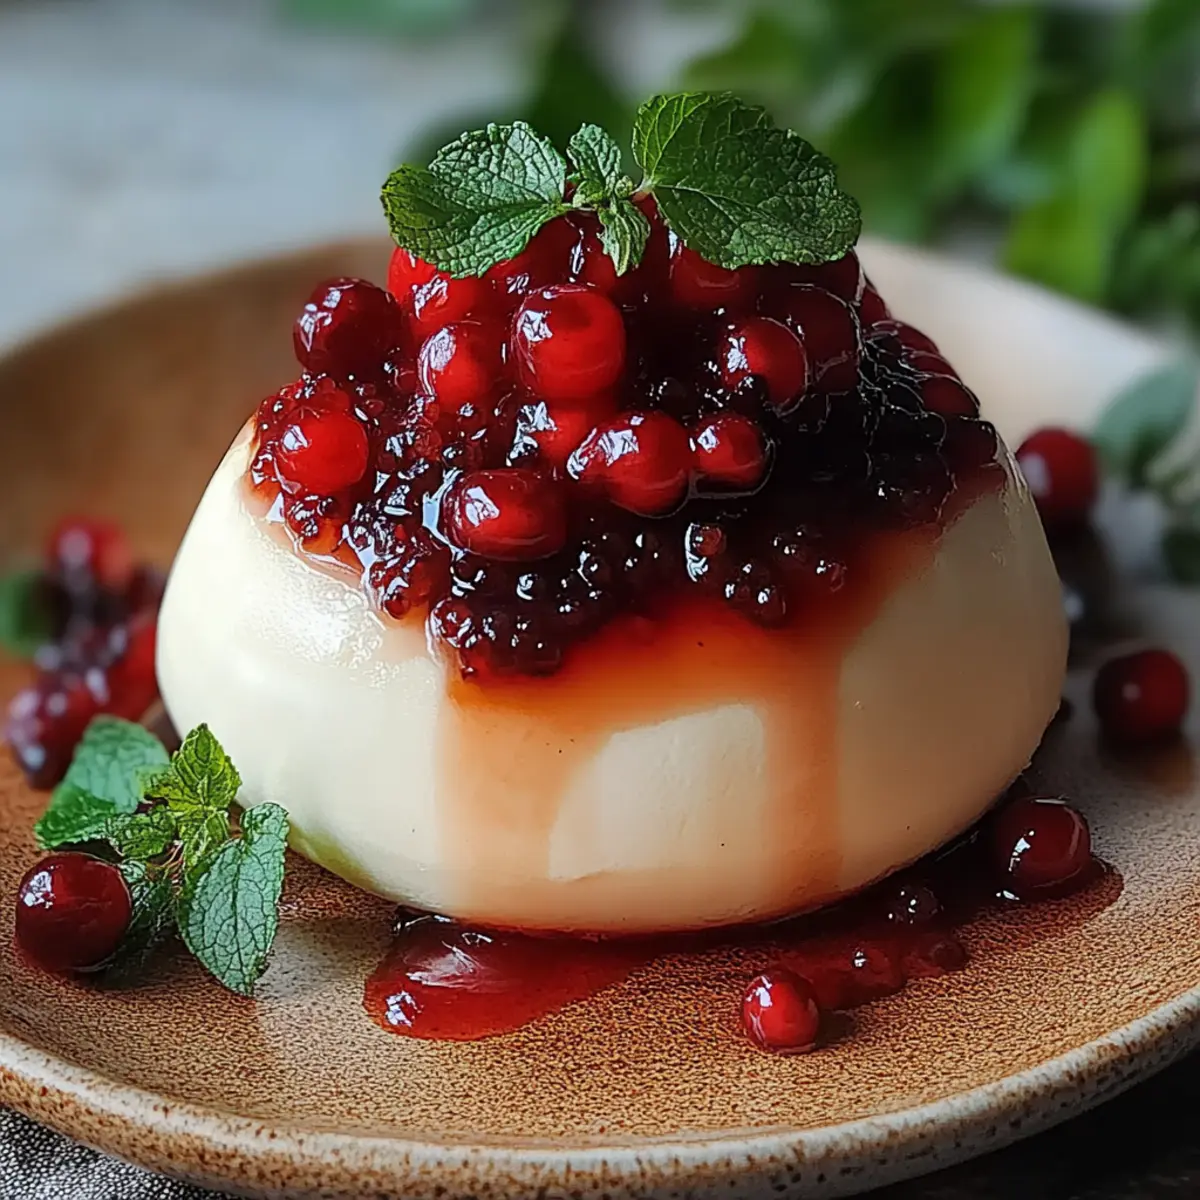
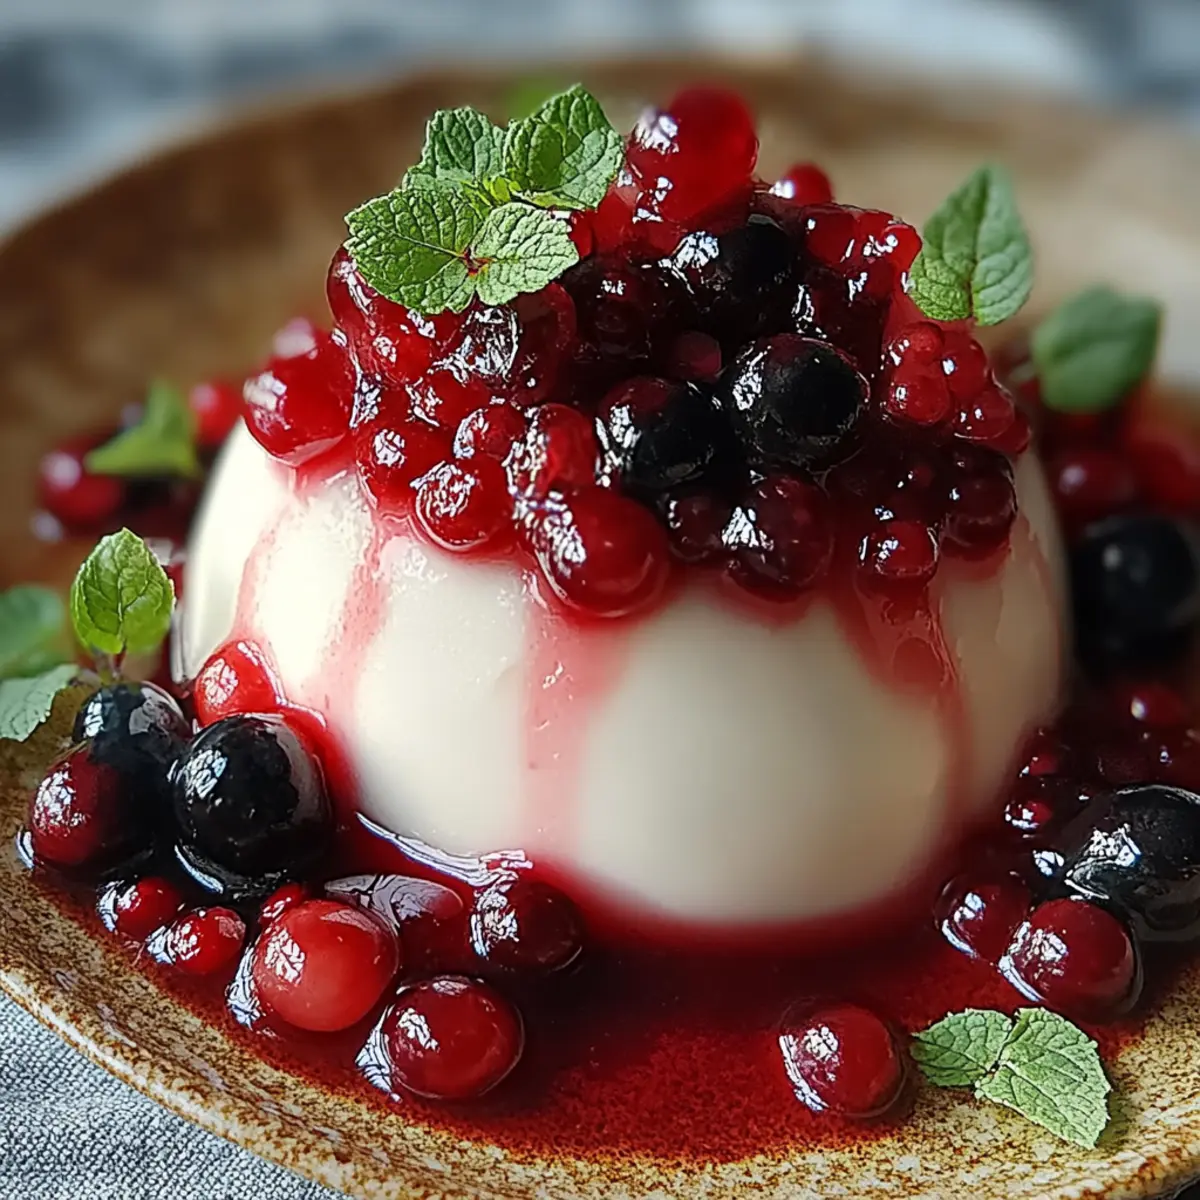
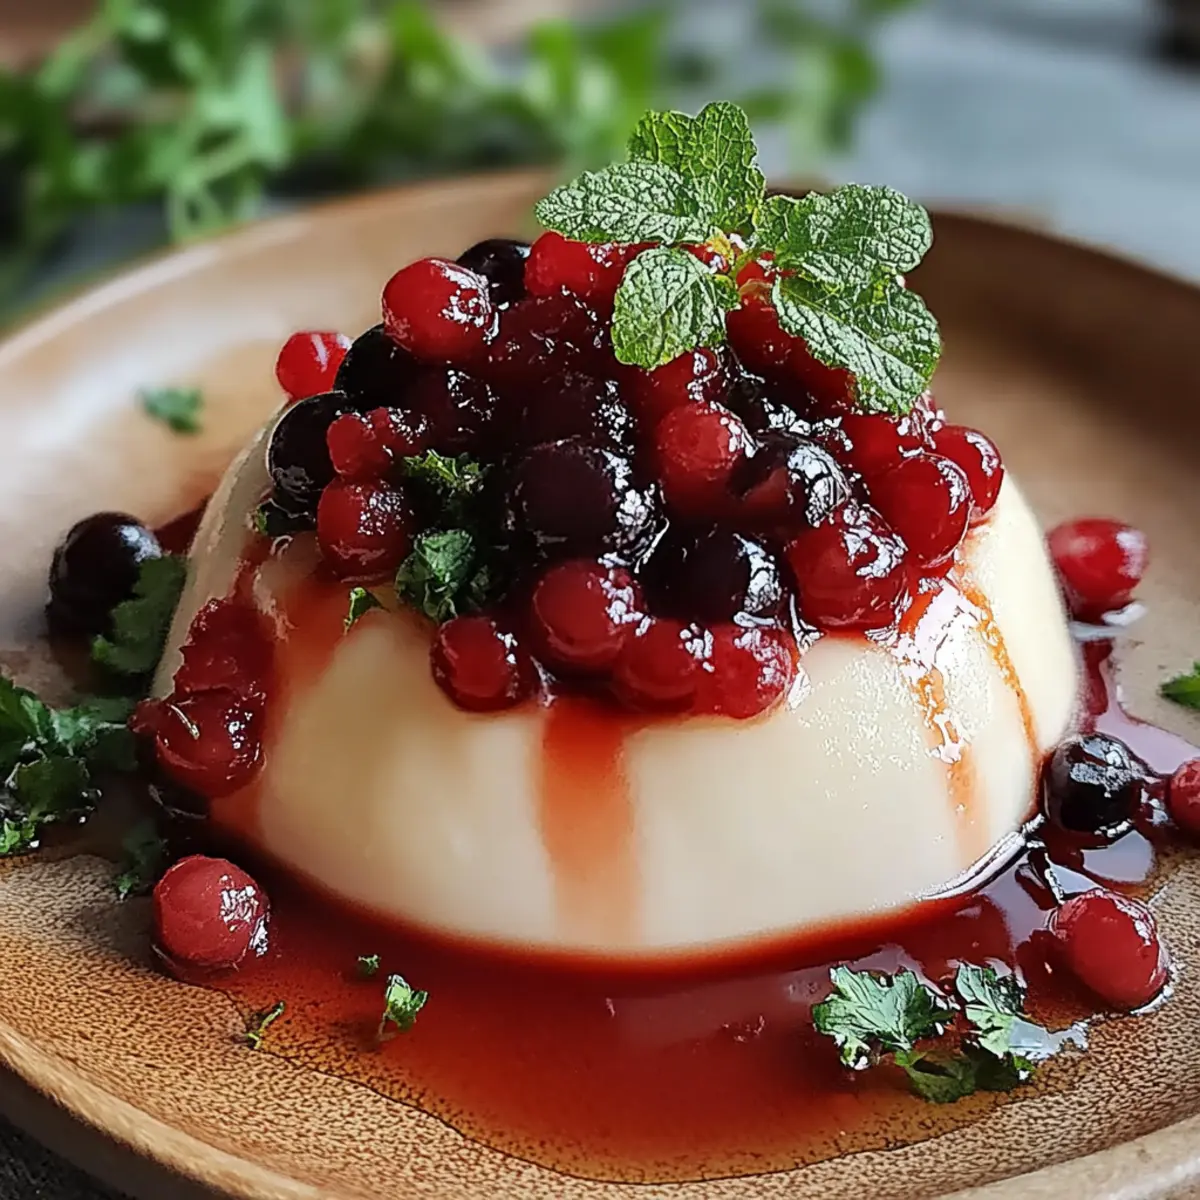
• Fresh berries – add a refreshing burst of flavor and color when serving your Panna Cotta.
• Mint leaves – provide a vibrant touch and a hint of freshness to beautifully finish your dessert.
Step‑by‑Step Instructions for Panna Cotta
Step 1: Bloom the Gelatin
Start by sprinkling the powdered gelatin over the cold water in a small bowl and allow it to bloom for about 5 minutes. You’ll know it’s ready when the gelatin has absorbed the water and is gelatinous in texture. This step is crucial for achieving that perfect, wobbly consistency in your Panna Cotta!
Step 2: Prepare the Vanilla
Next, split the vanilla bean lengthwise using a sharp knife and scrape the fragrant seeds into a bowl. This step truly enhances the flavor of your Panna Cotta, giving it that delightful vanilla aroma. Reserve the empty pod, as it will add more flavor during the cooking process.
Step 3: Combine the Cream and Sugar
In a medium saucepan, combine the heavy cream, whole milk, granulated sugar, the scraped vanilla seeds, and the empty vanilla pod. Place the saucepan over medium heat, stirring often until the sugar fully dissolves and the mixture is just about to simmer, around 5 minutes. Avoid boiling it to maintain that creamy texture we love in Panna Cotta.
Step 4: Incorporate the Gelatin
Once the cream mixture has heated, remove the saucepan from the heat. Discard the vanilla pod and whisk in the bloomed gelatin until it is completely dissolved and the mixture is smooth. This melding of flavors will serve as the luscious base for your Panna Cotta, giving it that elevated taste and texture.
Step 5: Strain the Mixture
To ensure a silky-smooth finish, strain the mixture through a fine mesh sieve into a jug. This step will catch any lumps or bits of undissolved gelatin, making your Panna Cotta beautifully creamy. Watch for the lovely sheen as you pour; this means you are one step closer to dessert perfection!
Step 6: Prepare the Ramekins
Lightly oil your ramekins or molds with a neutral oil to make unmolding easier later on. Carefully pour the strained Panna Cotta mixture into each ramekin, filling them evenly. Let them sit at room temperature for about 20–30 minutes to cool down before refrigerating, allowing flavors to deepen.
Step 7: Chill the Panna Cotta
Cover the ramekins with plastic wrap and refrigerate for at least 4 hours, or until they are completely set. You’ll know they are ready when they have a barely firm, wobbly surface. Patience is key here—this chilling time allows the Panna Cotta to develop its luxurious texture.
Step 8: Unmold and Serve
To serve your Panna Cotta, dip each mold briefly into warm water for about 10 seconds. This will help loosen the dessert. Carefully invert the molds onto plates, allowing the Panna Cotta to slide out smoothly. Garnish with fresh berries and mint leaves for a pop of color and flavor that will dazzle anyone you serve!
Panna Cotta Variations & Substitutions
Feel free to explore creative twists that will make your Panna Cotta even more delightful and personalized!
-
Dairy-Free: Substitute heavy cream and whole milk with coconut cream and almond milk for a tropical, yet creamy version.
Swapping in coconut cream adds a rich flavor and brings a hint of paradise right to your kitchen. -
Flavored Variations: Infuse your cream with orange zest or espresso for a citrusy or coffee kick.
Simply add the zest or brewed coffee to the cream mixture while heating, letting those flavors shine through. -
Sugar-Free: Use a sugar substitute like erythritol or stevia to shun the sweetness if you're watching your sugar intake.
These alternatives can still provide that sweet creaminess without the extra calories, keeping it guilt-free! -
Chocolate Delight: Melt dark chocolate and stir it into the warm cream mixture for an indulgent chocolate Panna Cotta.
Just remember to adjust the sugar to balance out the bitterness of the chocolate for a perfectly sweet treat. -
Nutty Flavor: Add a tablespoon of almond or hazelnut extract to the cream mixture for a delightful nutty twist.
This not only enhances the flavor profile but also adds a nostalgic touch reminiscent of homemade desserts from childhood. -
Spicy Kick: Incorporate a hint of cinnamon or a few slices of fresh ginger in the cream while heating for a gentle spicy warmth.
These spices evoke comforting memories and add an innovative note to your classic dessert. -
Fruit-Infused: Blend in puréed fruits like strawberries or mangoes for a fruity layer that complements the Panna Cotta beautifully.
You can swirl it into the mixture before pouring it into the ramekins for a stunning, layered effect. -
Herbal Infusion: Experiment with fresh herbs like basil or rosemary for an aromatic surprise that enhances flavor.
A touch of rosemary, especially, can add depth and complexity, transforming your Panna Cotta into a sophisticated dessert masterpiece.
Each variation speaks to the beauty of homemade cooking, letting you express your culinary style while enjoying the comforting embrace of this classic Italian treat. For more delightful tips, check out my post on Expert Tips for Perfect Panna Cotta or embrace a bold flavor profile with my Chocolate Panna Cotta Recipe. Enjoy the journey of creating your own signature Panna Cotta!
How to Store and Freeze Panna Cotta
Room Temperature: Panna Cotta is best served chilled and should not be left at room temperature for more than 2 hours to avoid spoiling.
Fridge: Store leftover Panna Cotta in an airtight container in the refrigerator for up to 3 days. This keeps it fresh and ready for a sweet craving!
Freezer: While it's possible to freeze Panna Cotta, it's recommended to consume it fresh. If needed, freeze it in an airtight container for up to 1 month, but expect a change in texture when thawed.
Reheating: If the Panna Cotta has been frozen, thaw it in the refrigerator overnight and serve chilled. Consider garnishing with fresh berries to elevate the dessert's appeal again!
What to Serve with Panna Cotta
As you explore the creamy elegance of this Italian delight, let’s pair it with mouthwatering accompaniments to enhance your dining experience.
-
Zesty Lemon Sorbet: A refreshing contrast that cleanses the palate between bites of creamy Panna Cotta, brightening up the dessert experience.
-
Chocolate Drizzle: A rich chocolate sauce adds a luxurious touch, satisfying any sweet tooth. Drizzle it artfully over the Panna Cotta for a beautiful presentation!
-
Grilled Peaches: The sweet smokiness of grilled peaches combines beautifully with the creamy texture of Panna Cotta, offering warmth and fruitiness.
-
Mixed Green Salad: A light, peppery mixed green salad tossed with a citrus vinaigrette balances the indulgence of the dessert, offering a refreshing bite.
-
Espresso: A shot of robust espresso serves as a perfect coffee companion, providing a bold counterpoint to the velvety sweetness of this dessert.
-
Mint Tea: Steeped mint tea adds an aromatic touch that harmonizes with the vanilla in the Panna Cotta, enhancing its freshness and flavor profile.
Indulging in these pairings will elevate your Panna Cotta experience, ensuring a delightful conclusion to any meal!
Make Ahead Options
These Panna Cotta are perfect for busy home cooks looking to save time! You can prepare the creamy base (steps 1-6) up to 24 hours in advance, letting the flavors meld beautifully while keeping the luscious texture intact. After straining the mixture into your ramekins, cover them tightly with plastic wrap and refrigerate. When you're ready to serve, simply chill for at least 4 hours before unmolding (steps 7-8). If you're feeling extra efficient, feel free to garnish with fresh berries and mint leaves just before serving for a stunning presentation that remains just as delicious and fresh as the day you made them!
Expert Tips for Perfect Panna Cotta
Gently Heat: Keep the cream and milk mixture over medium heat and never let it boil to maintain that silky, creamy texture in your Panna Cotta.
Bloom Properly: Ensure the gelatin is well-bloomed by letting it sit in cold water for the full 5 minutes. This step is vital for achieving the right consistency.
Strain Thoroughly: Strain your mixture through a fine-mesh sieve to eliminate any lumps or undissolved gelatin, ensuring a perfectly smooth and creamy dessert.
Don’t Rush Chilling: Allow at least 4 hours of chilling time for the best results. Patience is key, as it helps the flavors meld beautifully in your Panna Cotta.
Oil the Molds: Lightly oil your ramekins to prevent sticking, making the unmolding process seamless and keeping your Panna Cotta intact and gorgeous.
Panna Cotta Italian Recipe FAQs
What kind of gelatin should I use for Panna Cotta?
I recommend using powdered gelatin for Panna Cotta, as it easily dissolves and sets well, creating that perfect creamy texture. If you're looking for a vegetarian alternative, you could try agar-agar, but be aware that the texture may differ slightly.
How do I know if my Panna Cotta has set properly?
You’ll know your Panna Cotta is set when it has a firm yet slightly wobbly surface, which usually takes at least 4 hours in the fridge. If it's still too soft after that time, it might need a bit more chilling, so give it a little longer!
Can I make Panna Cotta in advance?
Absolutely! Panna Cotta can be made up to 2 days in advance. Just cover it tightly in the refrigerator once set, and you’ll have a delightful dessert ready to impress at your next gathering.
How long can I store Panna Cotta?
Stored properly in an airtight container, Panna Cotta will last in the fridge for up to 3 days. If you want to keep it longer, you can freeze it for up to a month, but remember that the texture may change once thawed. Just thaw it overnight in the fridge before serving.
What should I do if my Panna Cotta didn’t set?
If your Panna Cotta hasn’t set, it may be due to insufficient gelatin or not letting it bloom long enough. To fix it, dissolve an additional 1-2 teaspoons of gelatin in a little warm water and gently whisk it into your mixture. Pour it back into the molds and chill again for several hours until set.
Can I use alternative milks for Panna Cotta?
Certainly! If you prefer dairy-free options, try using coconut milk or almond milk for a different flavor profile. Keep in mind that the richness may change, so you may need to adjust the sugar for sweetness accordingly. Enjoy the journey of making Panna Cotta your own!
Creamy Panna Cotta with Fresh Berries to Delight Your Senses
Equipment
- medium saucepan
- small bowl
- fine mesh sieve
- ramekins or molds
Ingredients
For the Creamy Base
- 500 ml heavy cream provides the rich, smooth texture
- 100 ml whole milk complements the cream
- 80 g granulated sugar sweetens the dessert
- 1 whole vanilla bean infuses with aromatic warmth
For the Gelatin
- 7 g powdered gelatin ensures your Panna Cotta sets beautifully
- 2 tablespoon cold water helps to bloom the gelatin
For Garnishing
- Fresh berries adds burst of flavor and color
- Mint leaves provides a vibrant touch
Instructions
Step-by-Step Instructions for Panna Cotta
- Sprinkle the powdered gelatin over the cold water in a small bowl and let it bloom for about 5 minutes.
- Split the vanilla bean lengthwise and scrape the seeds into a bowl. Reserve the empty pod.
- In a medium saucepan, combine heavy cream, whole milk, granulated sugar, scraped vanilla seeds, and the empty pod. Heat over medium until just about to simmer.
- Remove from heat, discard the vanilla pod, and whisk in the bloomed gelatin until completely dissolved.
- Strain the mixture through a fine mesh sieve into a jug.
- Lightly oil ramekins and pour in the strained mixture, then let sit at room temperature for 20-30 minutes.
- Cover with plastic wrap and refrigerate for at least 4 hours until set.
- Dip molds briefly in warm water to loosen, invert onto plates, and garnish with fresh berries and mint leaves.