As I stood in my kitchen, the intoxicating aroma of sizzling chicken filled the air, transporting me to the bustling streets of Japan. That's when I decided to conquer the delicious world of Japanese Katsu Bowls, a dish that beautifully marries crispy, breaded meat with fluffy, seasoned rice. Not only is this recipe a fun twist on weeknight dinners, but it's also a crowd-pleaser that’s ready in just about 60 minutes! With its delightful layers of flavor and wholesome ingredients, this Katsu Bowl promises to awaken your taste buds and bring a taste of Japan straight to your home. Curious to dive into the crispy goodness and tangible comfort of this dish? Let’s get cooking!

Why are Japanese Katsu Bowls so beloved?
Crispy Perfection: The delightful crunch of perfectly breaded chicken or pork makes each bite irresistible and satisfying.
Bold Flavor: A divine balance of savory tonkatsu sauce and the refreshing crunch of cabbage elevates these bowls to new heights.
Quick & Easy: With a total preparation time of just 60 minutes, this recipe fits perfectly into your busy weeknight routine.
Crowd-Pleasing Comfort: Japanese Katsu Bowls are sure to impress your family and friends, making them a staple for gatherings or cozy dinners at home.
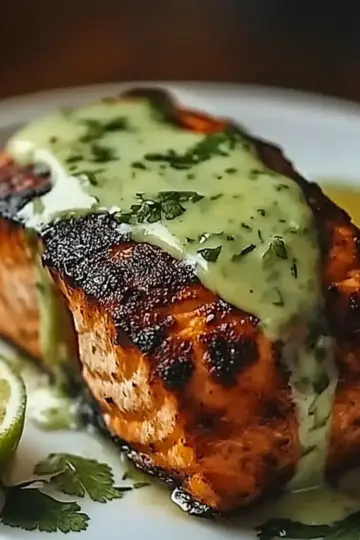
Versatile Ingredients: Swap chicken for pork or even tofu to cater to your personal taste and dietary needs. Give this comforting dish a try, and don't forget to check out some of my other quick weeknight meals!
Japanese Katsu Bowls Ingredients
Unleash the crispy goodness with these must-have ingredients!
For the Katsu
- Boneless chicken breasts – perfect for a crispy outer layer and juicy interior; feel free to substitute with pork loin for a different twist.
- Salt and pepper – essential for enhancing the natural flavors of your protein.
- All-purpose flour – acts as a binding agent, ensuring the panko adheres perfectly to the meat.
- Large eggs – provides moisture for the panko to cling; use a flaxseed mixture for a vegan alternative.
- Panko breadcrumbs – these Japanese-style breadcrumbs give the katsu its signature crunch; you can substitute with regular breadcrumbs in a pinch.
- Vegetable oil – choose a neutral oil for frying that won’t overpower the dish's flavors.
For the Rice
- Japanese short-grain rice – sticky and fluffy, it complements the katsu beautifully; jasmine rice can be a good substitute if needed.
- Water – this is key in achieving perfectly cooked rice.
- Rice vinegar – adds a subtle tang to the rice, enhancing its flavor profile.
- Sugar – balances the acidity of the vinegar; honey or agave syrup can work well as alternatives.
- Salt – enhances the overall taste of the rice, helping it to shine alongside the katsu.
For the Sauce
- Tonkatsu sauce – this sweet and tangy sauce is a katsu bowl staple; store-bought is convenient, but homemade is a game-changer!
- Soy sauce – adds depth and umami to the sauce blend.
- Worcestershire sauce – a dash gives complexity to the sauce's flavor; tamari is a great gluten-free option.
- Ketchup – a hint of sweetness to balance the savory notes.
For Toppings
- Shredded cabbage – adds a fresh crunch to the dish, elevating the overall texture experience.
- Green onions – their mild onion flavor and vibrant color bring brightness to the bowl.
- Sesame seeds – not just for garnish, these little seeds pack a nutty flavor that complements the dish beautifully.
- Pickled ginger (optional) – a refreshing palate cleanser that adds a pop of color and flavor.
With these ingredients in hand, you're just a few steps away from creating mouthwatering Japanese Katsu Bowls that are sure to impress! Enjoy the process and the delightful flavors that await you.
Step‑by‑Step Instructions for Japanese Katsu Bowls
Step 1: Rinse the Rice
Start by rinsing 2 cups of Japanese short-grain rice in a fine-mesh strainer under cold water until the water runs clear, which helps remove excess starch for perfect texture. Next, transfer the rinsed rice to a medium saucepan, add 2 ½ cups of water, and let it soak for 30 minutes to enhance its fluffiness.
Step 2: Cook the Rice
After soaking, cover the saucepan with a lid and bring it to a boil over medium-high heat. Once boiling, reduce the heat to low and let it simmer for 15 minutes without lifting the lid to ensure even cooking. You'll know it's done when the water is absorbed, and the rice is tender and fluffy.
Step 3: Season the Rice
Once the rice has finished cooking, turn off the heat and let it sit, covered, for another 10 minutes to further steam. In a small bowl, mix together 1 tablespoon of rice vinegar, 1 tablespoon of sugar, and ½ teaspoon of salt until dissolved. Gently fold this mixture into the rice until it is well combined, setting it aside to cool slightly.
Step 4: Prepare the Chicken
While the rice is cooling, take 2 boneless chicken breasts and place them between two sheets of plastic wrap. Gently pound the chicken to an even thickness of about ½ inch using a meat mallet or rolling pin, which ensures uniform cooking. Next, season both sides of the chicken with salt and pepper for enhanced flavor.
Step 5: Bread the Chicken
Set up a breading station with three separate dishes: one filled with 1 cup of all-purpose flour, another with beaten eggs, and the last with 1 cup of panko breadcrumbs. Dredge each chicken breast in flour, shaking off the excess, then dip it in the eggs, and finally coat it with panko, pressing gently to ensure it adheres well for that delightful crunch.
Step 6: Fry the Katsu
In a large skillet, heat about ½ inch of vegetable oil over medium heat until it shimmers, indicating it's hot enough for frying. Carefully place the breaded chicken into the oil and fry for 4-5 minutes on each side until golden brown and crispy. The internal temperature should reach 165°F (75°C) for safe consumption; use a meat thermometer for accuracy.
Step 7: Drain and Slice the Katsu
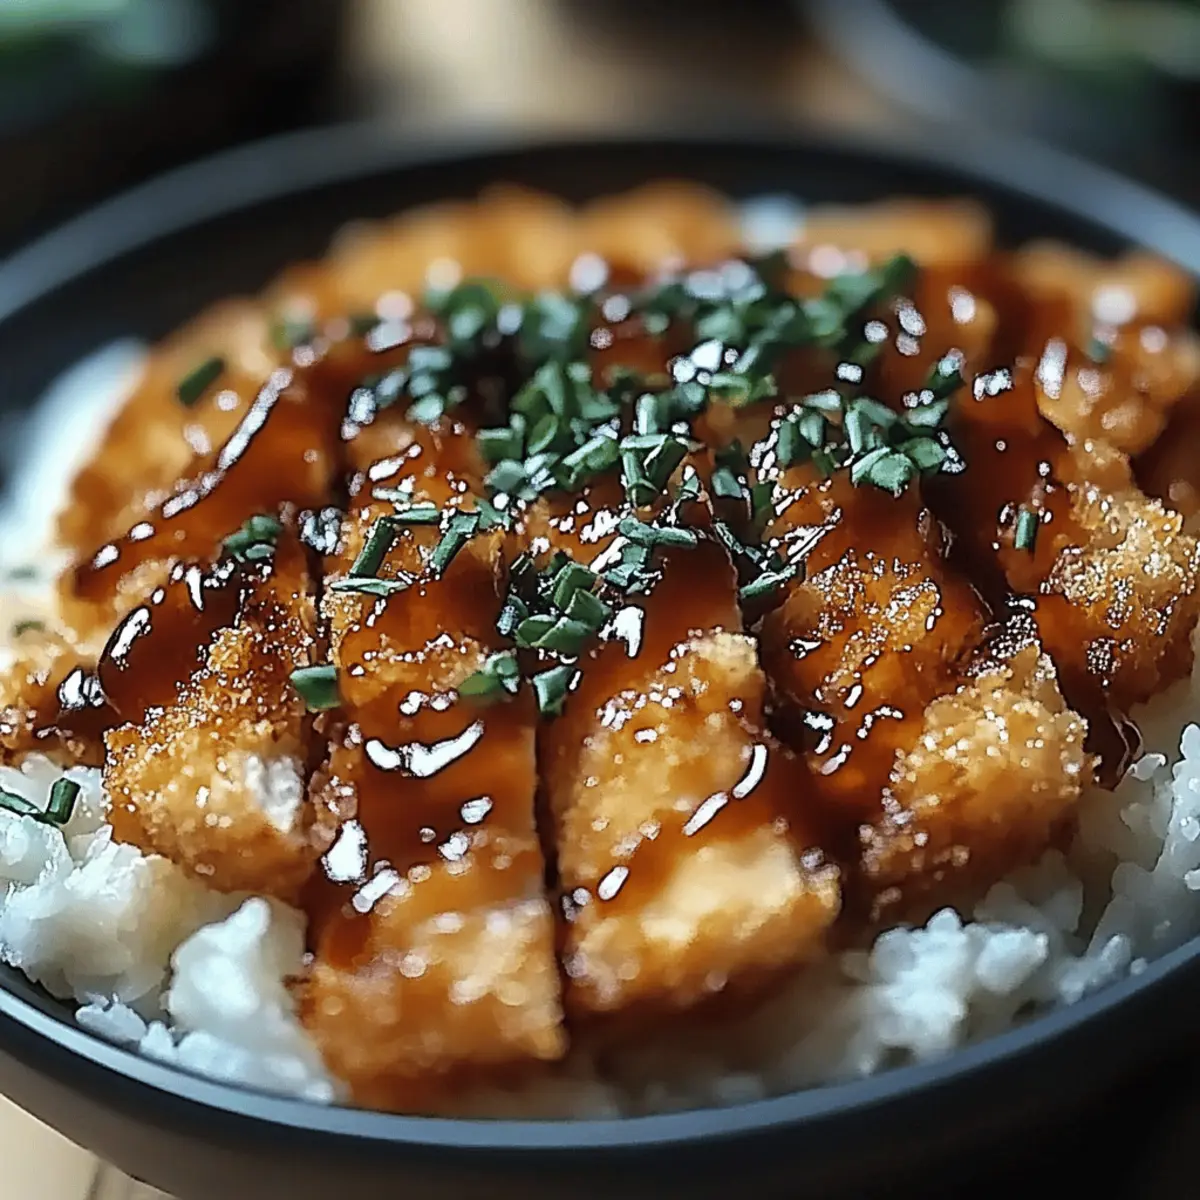
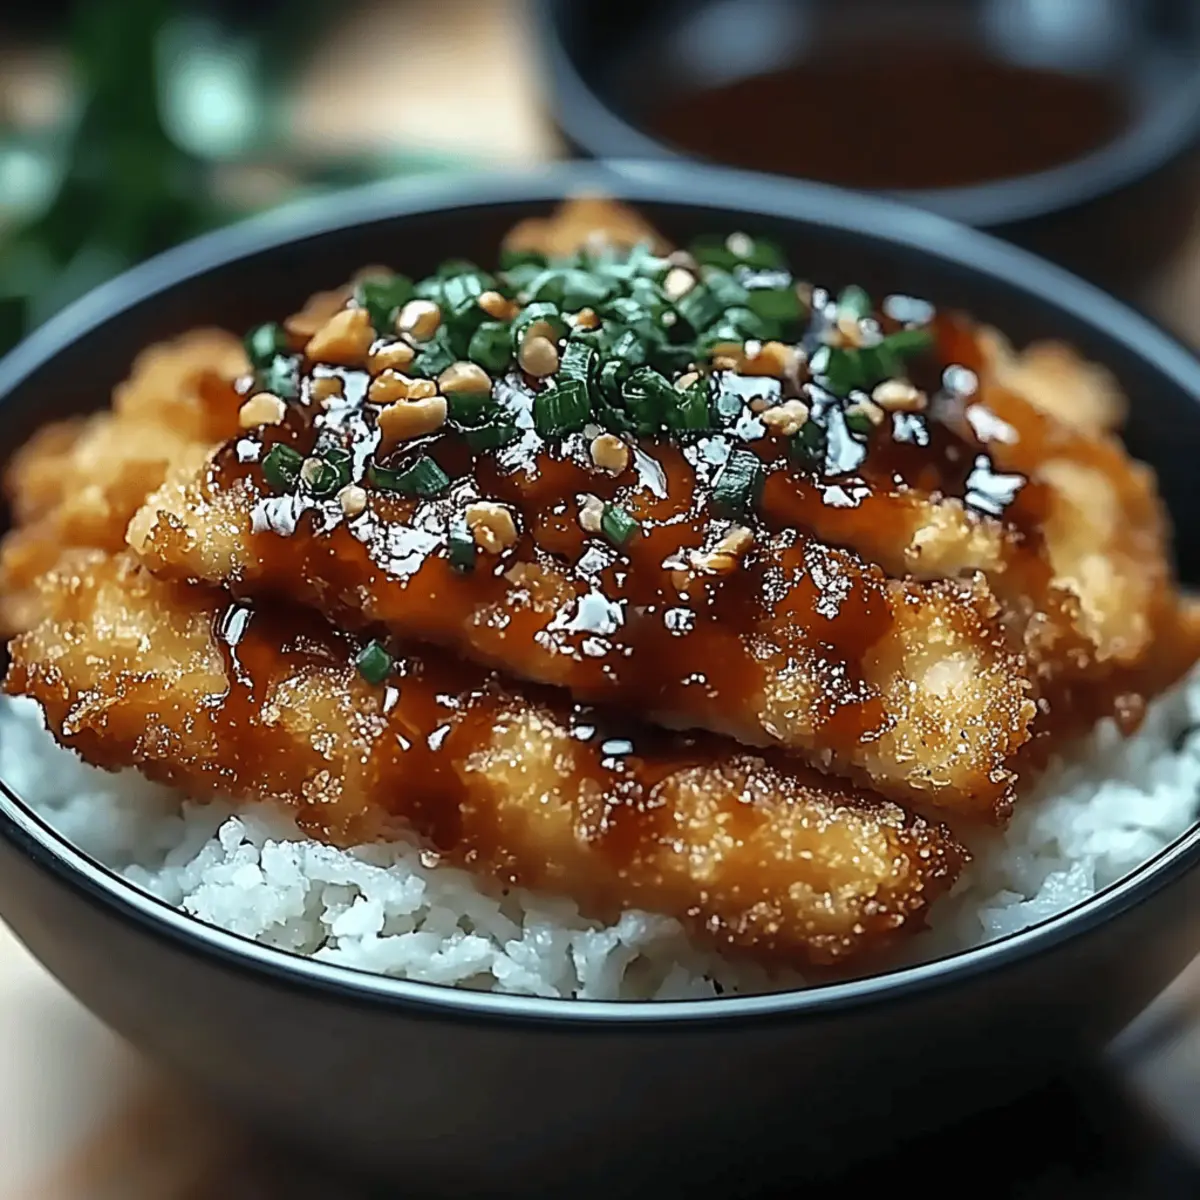
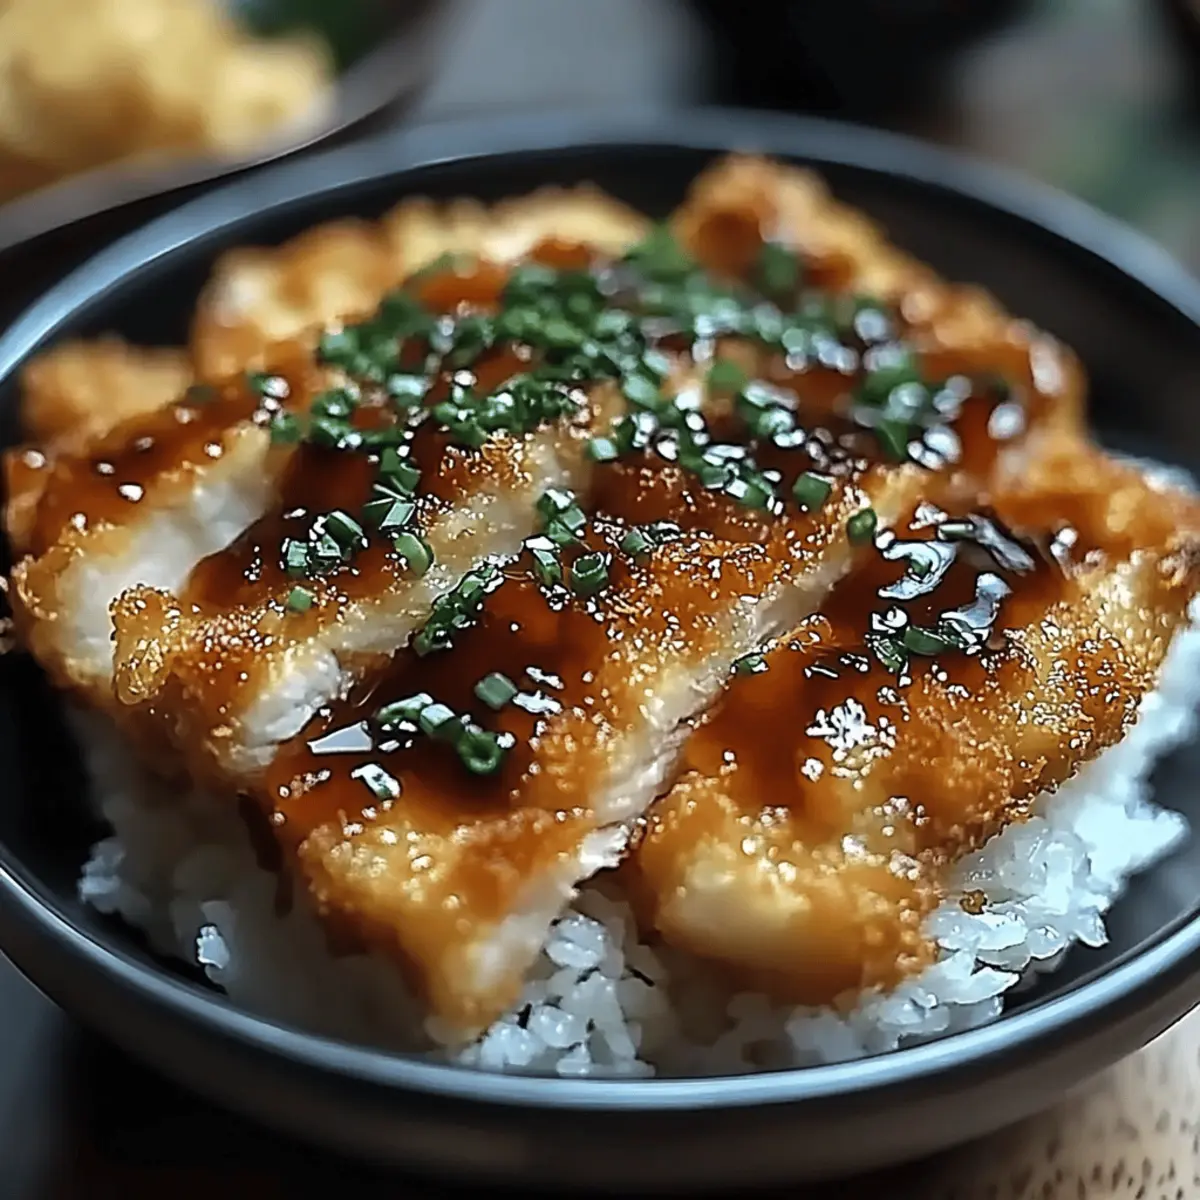
Once the chicken is cooked, transfer it to a paper towel-lined plate to drain any excess oil and let it rest for a few minutes. After resting, slice the katsu into strips, ready to top off your Japanese Katsu Bowls with crispy, flavorful goodness.
Step 8: Make the Sauce
In a small bowl, combine ⅓ cup of tonkatsu sauce, 1 tablespoon of soy sauce, 1 teaspoon of Worcestershire sauce, and 1 teaspoon of ketchup. Stir until well blended, creating a rich and savory sauce that perfectly complements the crispy katsu and adds depth to the overall flavor profile of your Japanese Katsu Bowls.
Step 9: Assemble the Katsu Bowls
To serve, start by placing a generous bed of seasoned rice into each bowl. Top with the sliced katsu, drizzling the prepared sauce over the chicken. Finally, garnish with a mound of shredded cabbage, a sprinkle of sliced green onions, sesame seeds, and add pickled ginger on the side, if desired, to bring vibrant flavors and textures to your delightful Japanese Katsu Bowls.
How to Store and Freeze Japanese Katsu Bowls
Fridge: Store leftover Japanese Katsu Bowls in an airtight container in the fridge for up to 3 days. Be sure to separate the katsu and rice to maintain texture.
Freezer: For longer storage, wrap the katsu in plastic wrap and foil, then place in a freezer-safe bag or container. They can be frozen for up to 3 months.
Reheating: To reheat, thaw the katsu in the fridge overnight, then bake in a preheated oven at 375°F (190°C) for about 10-15 minutes until crispy. Reheat rice separately, adding a splash of water to keep it from drying out.
Sauce Storage: Keep the tonkatsu sauce in a sealed container in the fridge for up to 1 week, or freeze it for a quick flavor boost next time!
Make Ahead Options
These Japanese Katsu Bowls are perfect for meal prep enthusiasts looking to simplify busy weeknights! You can pre-cook the rice and store it in an airtight container in the refrigerator for up to 3 days; just reheat in the microwave before serving. Additionally, you can bread the chicken and keep it in the fridge for up to 24 hours; this allows the flavors to meld while maintaining the katsu's crispiness upon frying. On the day you plan to serve, simply fry the breaded chicken and assemble the bowls. This way, you'll enjoy the same delicious taste with minimal effort, making mealtime effortless!
What to Serve With Japanese Katsu Bowls?
Creating a cozy meal around your delicious Japanese Katsu Bowls can enhance the dining experience, bringing a delightful balance of flavors and textures.
-
Crispy Tempura Vegetables: Lightly battered and fried, tempura veggies add a satisfying crunch that pairs beautifully with the katsu while boosting the freshness of your meal.
-
Miso Soup: This warm, savory soup with silky tofu and seaweed offers a comforting contrast to the crispy katsu and brings traditional Japanese flavors to the table.
-
Japanese Pickles (Tsukemono): A selection of pickled vegetables delivers tangy brightness that cuts through the richness of the katsu, enhancing the overall balance of the meal.
-
Steamed Edamame: These tender, salty soybeans provide a pleasant bite and texture that complement the crunchy katsu while being a protein-rich addition.
-
Sesame Slaw: A fresh slaw made with cabbage, carrots, and a sesame dressing introduces a refreshing crunch that harmonizes with the katsu's flavors, creating a colorful spread.
-
Green Tea: This light and refreshing beverage not only cleanses the palate but also enhances the umami flavors of your meal, bringing a soothing touch to the dining experience.
-
Fruit Sorbet: For dessert, a light fruit sorbet offers a refreshing finish that's sweet yet not heavy, cleansing the palate after the savory katsu.
These pairing ideas will elevate your dining table and create a vibrant culinary experience alongside your Japanese Katsu Bowls!
Expert Tips for Japanese Katsu Bowls
-
Choose the Right Cut: Opt for boneless chicken breasts or pork loin; they both fry beautifully and provide that juicy interior everyone loves.
-
Perfect Breading: Ensure each piece of meat is evenly coated with flour, egg, and panko; this step is crucial for achieving that crispy texture synonymous with Japanese Katsu Bowls.
-
Fry at the Right Temperature: Hot oil is key! Use a thermometer to check the oil's temperature—around 350°F (175°C) ensures a perfect golden-brown crust without excess grease.
-
Drain Properly: Let the cooked katsu rest on a paper towel-lined plate after frying to absorb any remaining oil, preserving its crunch and flavor.
-
Customize Your Sauce: Feel free to experiment with the tonkatsu sauce mix; adjusting the Worcestershire and ketchup can create a blend that suits your taste perfectly.
-
Add Freshness: Don’t skip the shredded cabbage and green onions—they not only enhance flavor but also add a refreshing crunch that balances the dish beautifully.
Japanese Katsu Bowls Variations & Substitutions
Feel free to get creative and make this dish your own with these fun swaps and additions!
- Pork Swap: Substitute chicken with pork loin for a different flavor profile, offering a richer taste experience.
- Vegetarian Option: Use tofu or tempeh instead of meat for a delightful plant-based katsu, perfect for veggie lovers!
- Spicy Kick: Add a touch of sriracha to the sauce for an extra layer of heat that will awaken your taste buds!
- Whole Grain Rice: Swap white rice for brown rice for a nuttier taste and added nutrition, giving you a wholesome twist.
- Crunchy Veggies: Incorporate grated carrots or sliced radishes for added crunch and a refreshing contrast to the crispy katsu.
- Zesty Sauce: Experiment by adding a splash of lime or lemon juice to the sauce for a bright, zesty note that cuts through richness.
- Herbs Galore: Toss in fresh herbs like cilantro or basil as a garnish to elevate the flavor and add a colorful touch.
- Cheesy Delight: For a fusion twist, add a sprinkle of your favorite cheese over the top before serving, creating a creamy layer of indulgence.
Make the dish your own, and take a journey through flavors that suits your palate. If you’re looking for more delicious twists, be sure to check out my hearty comfort food or if you’re in the mood for quick bites, explore my collection of easy appetizers!
Japanese Katsu Bowls Recipe FAQs
What do I need to look for when selecting chicken or pork for my katsu?
Absolutely! When choosing your protein, look for boneless cuts that are fresh and firm. The chicken breasts should have smooth skin, while pork loin should be pale pink with a little marbling for flavor. Avoid any with dark spots or a strong odor.
How can I store leftover Japanese Katsu Bowls?
To store your delicious Japanese Katsu Bowls, separate the katsu from the rice in an airtight container. This helps maintain the crispy texture of the katsu. They will keep well in the fridge for up to 3 days; just make sure to reheat properly!
Can I freeze breaded katsu, and how should I do it?
Yes, you can! To freeze your katsu, first wrap each piece tightly in plastic wrap and then in foil to prevent freezer burn. Place them in a freezer-safe bag. They can be frozen for up to 3 months. When you're ready to enjoy, thaw in the fridge overnight and reheat in the oven for that crispy texture.
What should I do if my katsu isn't crispy?
Very! If your katsu doesn't come out crispy, there are a few things you can do. First, ensure your oil is hot enough—around 350°F (175°C) is ideal. If the temperature is too low, the breadcrumbs may soak up oil instead of frying up nicely. Also, double-check your breading technique; coat your meat evenly and press the crumbs firmly for adherence.
Are there any dietary considerations for these Japanese Katsu Bowls?
Absolutely! For gluten-free options, use gluten-free panko and flour, or try rice flour as a substitute. Additionally, if you're cooking for someone with a chicken or pork allergy, tofu is a fantastic alternative that can still provide that satisfying crunch. Just be sure to press out the moisture before breading it!
How long can I keep tonkatsu sauce after making it?
You can store homemade tonkatsu sauce in a sealed container in the fridge for up to 1 week. For longer storage, consider freezing it in small portions—perfect for a quick flavor addition for future meals!
Delicious Japanese Katsu Bowls for a Cozy Homemade Meal
Equipment
- medium saucepan
- large skillet
- Fine mesh strainer
- meat mallet
- Rolling Pin
- three separate dishes for breading
Ingredients
For the Katsu
- 2 pieces boneless chicken breasts can substitute with pork loin
- to taste salt
- to taste pepper
- 1 cup all-purpose flour
- 2 large eggs or vegan flaxseed mixture
- 1 cup panko breadcrumbs Japanese-style
- ½ cup vegetable oil for frying
For the Rice
- 2 cups Japanese short-grain rice can substitute with jasmine rice
- 2½ cups water
- 1 tablespoon rice vinegar
- 1 tablespoon sugar honey or agave syrup can substitute
- ½ teaspoon salt
For the Sauce
- ⅓ cup tonkatsu sauce sweet and tangy
- 1 tablespoon soy sauce
- 1 teaspoon Worcestershire sauce or tamari for gluten-free
- 1 teaspoon ketchup
For Toppings
- 1 cup shredded cabbage
- 2 tablespoons green onions sliced
- 1 tablespoon sesame seeds
- pickled ginger optional
Instructions
Step-by-Step Instructions
- Rinse the rice in a fine-mesh strainer under cold water until the water runs clear. Transfer to a medium saucepan, add water, and let soak for 30 minutes.
- Cover the saucepan, bring to a boil over medium-high heat, then reduce to low and simmer for 15 minutes.
- After cooking, turn off heat and let sit for 10 minutes. Mix together rice vinegar, sugar, and salt, then fold into rice.
- Pound the chicken breasts between plastic wrap to an even thickness, seasoning both sides with salt and pepper.
- Set up three dishes: flour, beaten eggs, panko. Dredge chicken in flour, dip in eggs, and coat in panko.
- Heat oil in a skillet. Fry breaded chicken for 4-5 minutes per side until golden brown and internal temperature reaches 165°F.
- Transfer cooked chicken to a paper towel-lined plate to drain. Slice into strips.
- Combine tonkatsu sauce, soy sauce, Worcestershire sauce, and ketchup in a bowl.
- To serve, place a bed of seasoned rice in each bowl. Top with sliced katsu, drizzle sauce, and garnish with cabbage, green onions, and sesame seeds.